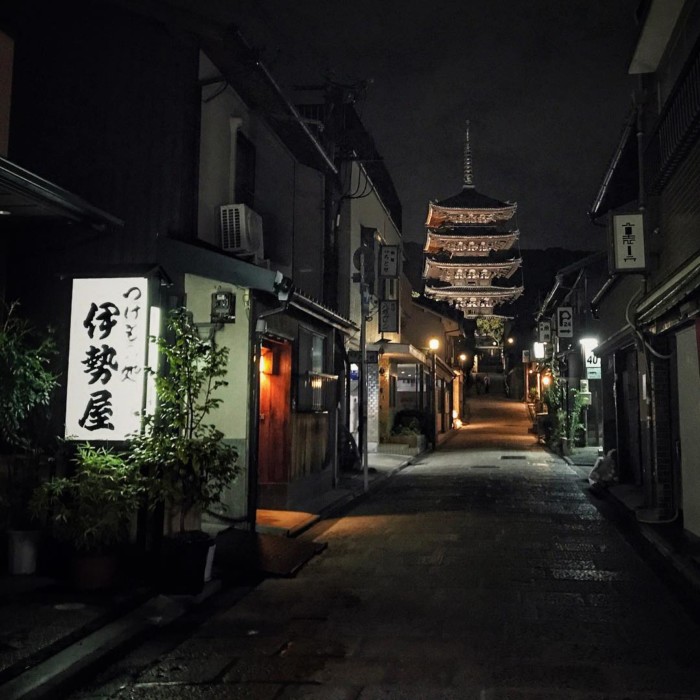
Do you ever wonder why some mobile photography portraits look professional? I’ll let you in on a little secret — it’s the lighting. Learn mobile photography lighting to create professional-looking high-quality mobile photography portraits.
A portrait taken with a smartphone camera using open shade lighting.
Lighting is a very important aspect of photography and is often overlooked. It is what makes a photo come alive and feel three dimensional. It can make or break a photo, and will often be the difference between a good photo and a bad one.
LIGHTING FOR MOBILE PHOTOGRAPHY PORTRAITS
Lighting is especially important in mobile photography because the quality of the photo will be dramatically affected by poor light. Personally, I do not like to use the flash on my iPhone as I don’t like the quality it produces. Often, the flash on the smartphone camera will produce portraits with “red-eye” as the flash on the iPhone is directional. Simply, that means that it can’t be bounced off a ceiling or wall to help make the light softer and look less harsh and flattering.
While the low light cameras on smartphones these days are getting better – like the iPhone 11 Pro, my favourite type of light for mobile photography portraits is natural light. It’s what I prefer to rely on as it is all around us, and smartphone lighting accessories are not needed.
In this article, I will discuss two types of light for mobile photographers and how it can improve the quality and look of your mobile photography portraits.
TWO TYPES OF NATURAL LIGHT FOR MOBILE PHOTOGRAPHERS
OPEN SHADE LIGHTING FOR MOBILE PHOTOGRAPHERS
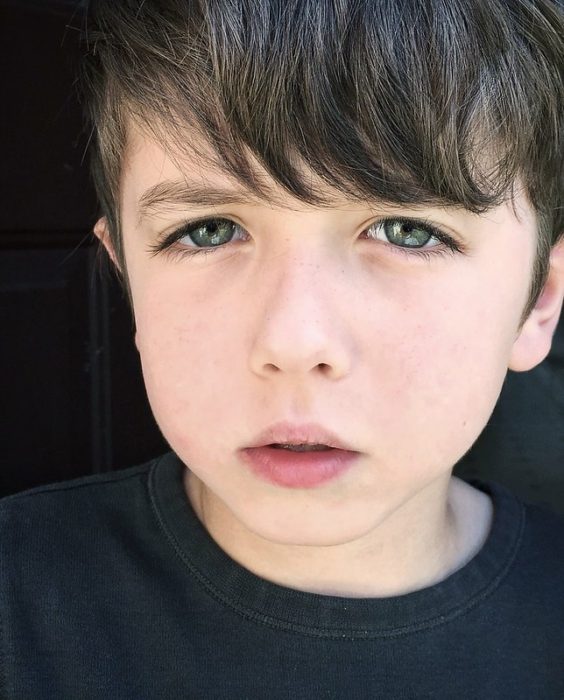
A mobile photography portrait using the light from the sky in front of the subject. This photo of my son was taken on a porch using open shade and an iPhone.
Open shade is light that is not direct and it is soft. It is easily found in the shadow of a large building, under leafy trees, on a porch, in a garage or on a cloudy day – anywhere where you are not directly in sunlight. Simply, it shields your subjects from direct sun. One way to find it is to stand on a veranda and ask your subject to turn slowly (a full 360 degrees). As you look into their eyes, watch the light change. No, this is not some scene from a romance movie, you’re looking for that little sparkle in their eyes. That sparkle is called a catchlight and is produced by the light source such as the sky or a window if you are indoors. Catchlights are the reflection of the light in the eyes and can range in size. It is the sparkle that you didn’t know you were searching for. You will notice the best light comes when your subject is facing the light source (open sky).
One note of caution, if you are under trees, the lighting can change quickly and you need to beware of dappled light. While you may be in open shade and generally protected by directional light under a tree, some dappled light could come through and affect the outcome, making the portrait less desirable.
Sometimes, the light may fall short (not reaching the subject fully) so you can position the subject to be closer to the edge of a porch, the trees etc. If your subject is wearing a hat, you may want to try and get them to look up a bit. If you’re photographing a candid photo, then you will want to wait until they look up (depending on the age of your subject). Notice the catchlights in the eyes on the portraits displayed in this article.
Open Shade from the open sky behind me, my son is on the side of a building
WINDOW LIGHT FOR MOBILE PHOTOGRAPHERS
A smartphone portrait taken with an iPhone using the natural window light.
Window light is my favourite indoor light. You can use the window the same way you’d use the open sky when outdoors. The window light should be in front of the subject and at the back of the photographer.
Another way to use window light, and for a more dramatic effect, is to have the window on one side of your subject. The side of the subject that is away from the window will be darker and thus a more dramatic and moody feel. It’s a great type of light for portraiture.
Have your subject turn slowly so you can see how the light appears in their eyes, find the catchlights. The window light will change significantly as your subject moves. You don’t need to worry about the exact angle, just look at how it falls when your subject moves and what you prefer.
If the light source is at a 90-degree angle to the subject you will find a very dramatic look, at a 45-degree angle you will find a softer feel.
MOBILE PHOTOGRAPHY LIGHTING TIPS
Pay attention to how the light falls in your home over a day or two. Natural light is constantly changing so look at it at different times of the day. That way, when the opportunity comes to catch that perfect moment, you will know how to deal with it.
As a photographer, I see the light very differently and operate intentionally. If I see the light is particularly beautiful in one area of the home or outdoors, I will wait patiently for the right moment when my subject(s) enter that area.
Hopefully, this gives you a bit more insight into two types of natural light for mobile photographers. I hope these tips will help you create fantastic portraits with your smartphone.
Caution, after reading this article and practicing with these two types of light, you may find yourself seeing catchlights everywhere.
If you’re in Toronto or visiting the area and are into nature, birding and wildlife photography, I offer a birding/nature walk + photography lesson through Airbnb experiences Toronto.
I hope these tips will help you create cherished photos of your safari. If you have any questions, please do not hesitate to contact me.
SUBSCRIBE to wanderingiPhone.com for staying in the loop – exclusive opportunities, photo tours, workshops, webinars, and subscriber discounts on mobile photography workshops, consulting and more.
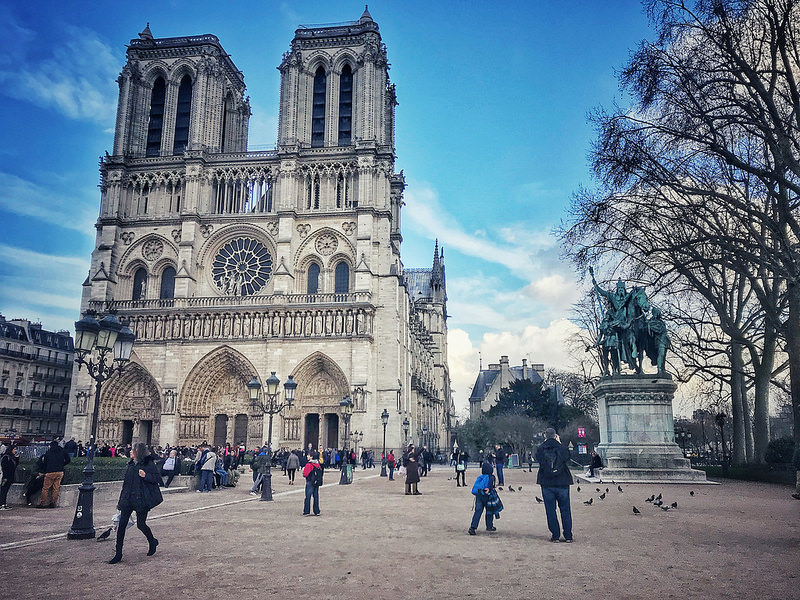
March is a great time for a family trip to Paris and Paris with kids is always a good idea. Paris in Spring means it’s off-season, more affordable than a summer visit and the attractions are significantly less busy. I’ve been to Paris 5 times with three of those visits in March and three of those visits with at least one child (one of my sons, both sons or my niece).
In 2012, I had 6 nights in Paris and fantastic weather. Days were bright and blue and temperatures were in the mid-teens, one day hit 20 degrees Celsius. In March 2018, we didn’t luck out with the weather, but that didn’t stop our wandering. We had 5 nights and everything from sun to rain to snow, yes, snow (it melted quickly).
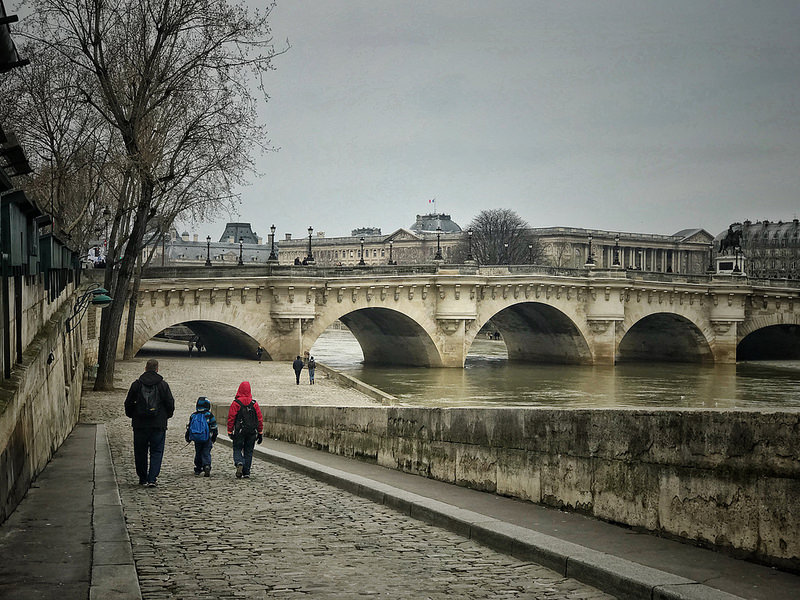
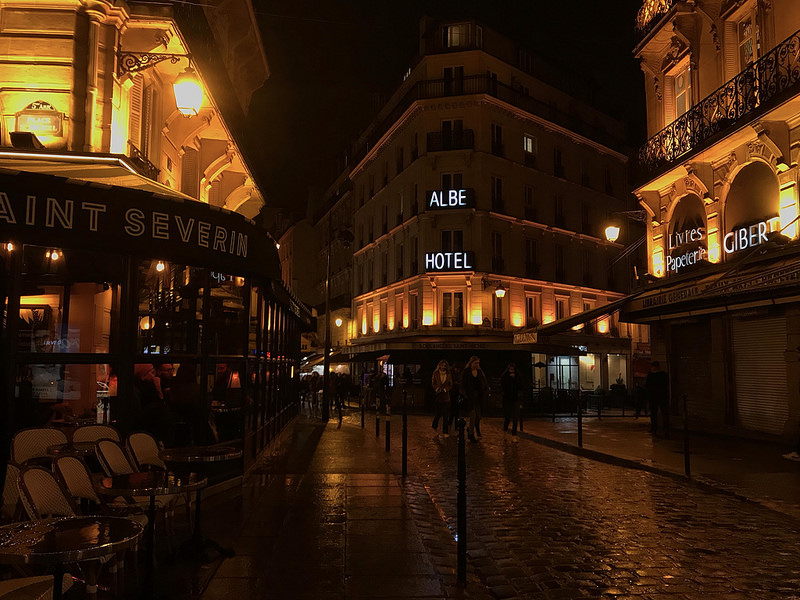
I have found that 3 to a 5-day family trip to Paris is the perfect amount of time. On our family of four trip to Paris, we stayed in an Airbnb in the Latin Quarter, my favourite arrondissement, near Place Saint Michel and Quai Saint-Michel. It is walking distance to the Notre Dame, the infamous Shakespeare, and Co. book shop, the cobblestone streets of Rue de la Huchette and the Seine.
We took advantage of a fantastic flight deal from Toronto ($321 CAD on British Airways) and visited Paris during my son’s March Break (also known as Spring break).
The best days were without a plan exploring on the hop on hop off tour of Paris or on foot and feeling the vibe of the city. It’s that vibe, the cafes, the lights, the architecture, the cobblestone streets, and the je ne sais quoi that keeps bringing me back to the City of Lights.
Some highlights of our trip:
Hop On Hop off Bus
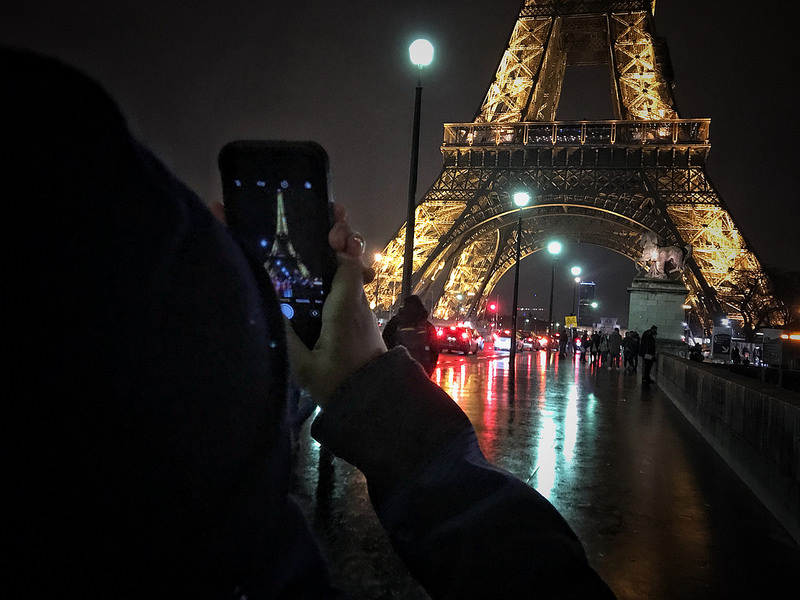
Eiffel Tower at Night
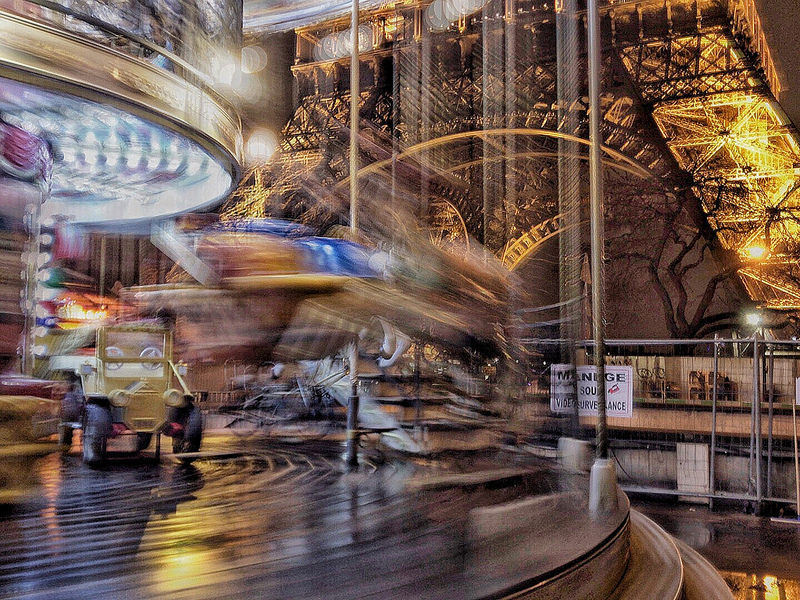
The Carousel near the Eiffel Tower
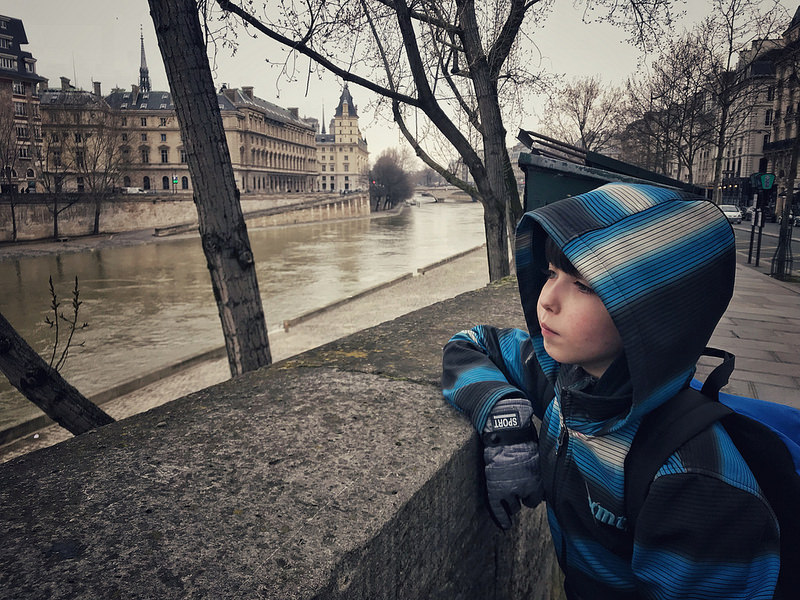
Walking along the Seine
The Lego Store near the Latin Quarter
Midnight run for gelato
Street Food
All photos shot on iPhone 7 plus.
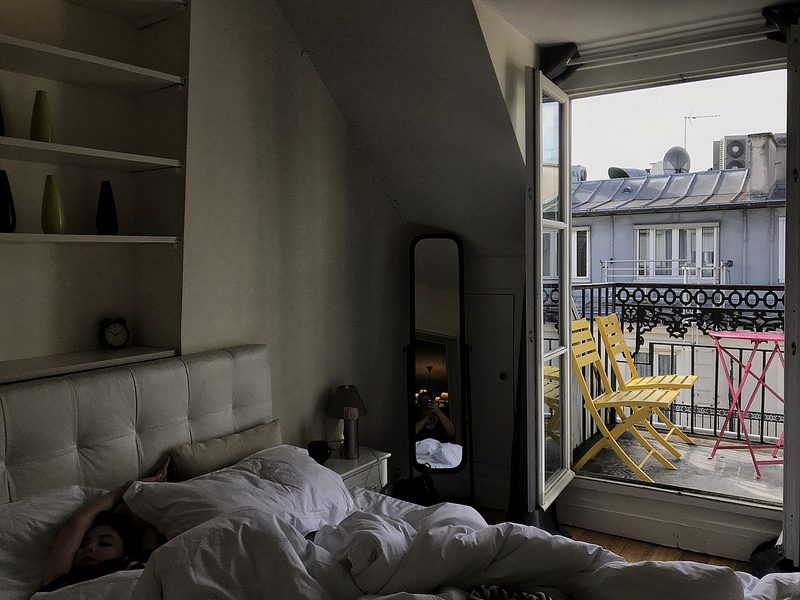
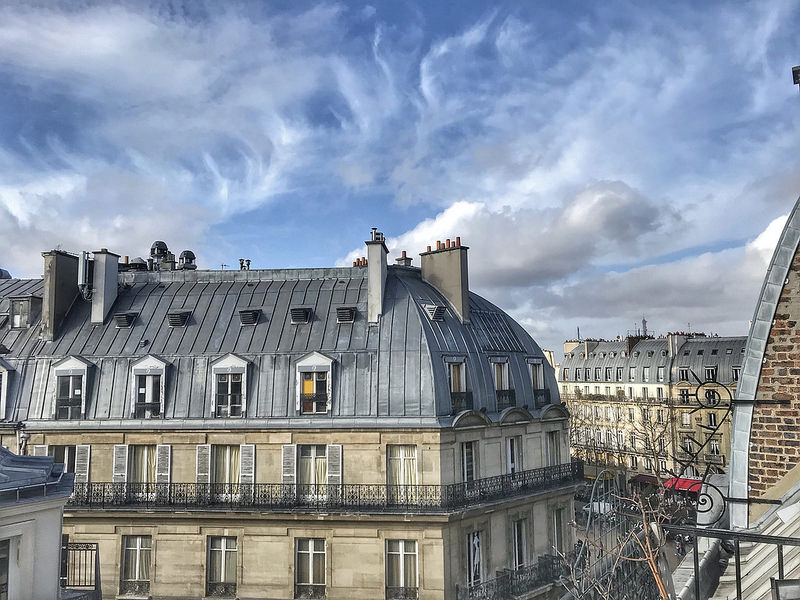
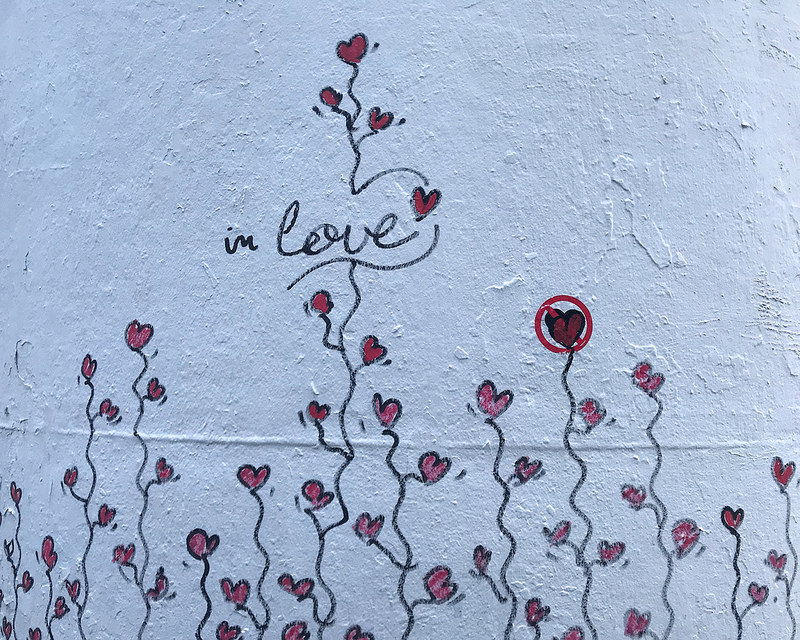
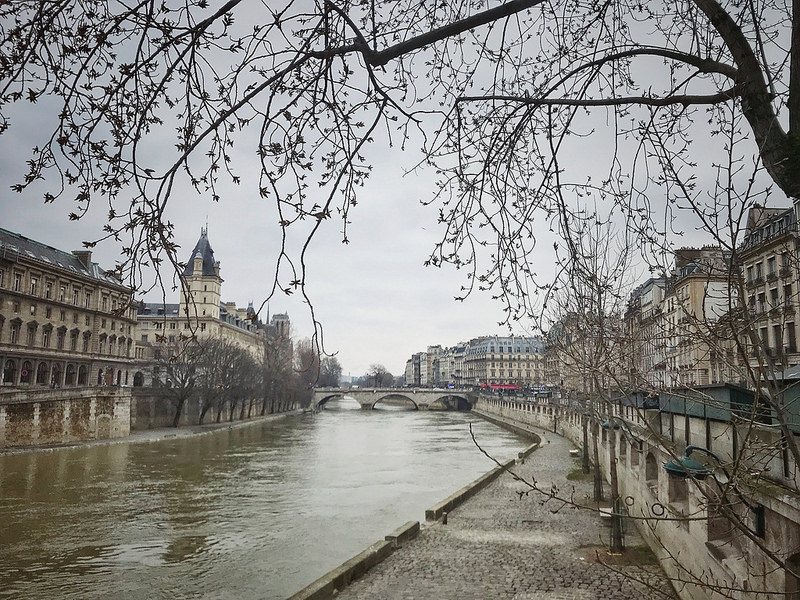
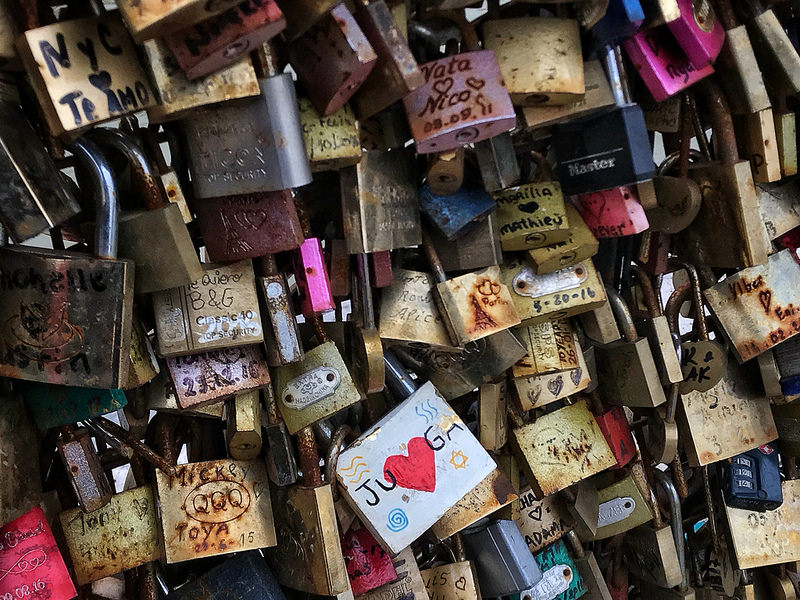
A view from a bedroom in our Paris Airbnb.The view from our Airbnb balcony in ParisMy family at the Notre Dame in ParisSome street art near Le Centre Pompidou in ParisOur neighbourhood on a late Saturday night and the cobblestone streets of Rue de la HuchetteWalking back to our Airbnb after late-night gelato.The SeineMy youngest son pauses to take in the view over the Seine.My family walking near Pont Neuf and the Seine.Love locks on the Pont Neuf in Paris
Waiting for a view of my family to walk through this garden, instead, this group appeared. After some research, I learned that this was a group of Knights Templar. I also learned that at the tip of this island, Île de la Cité, some Knights Templar were burned at the stake on March 18, 2014. This photo was taken on March 18, 2018.
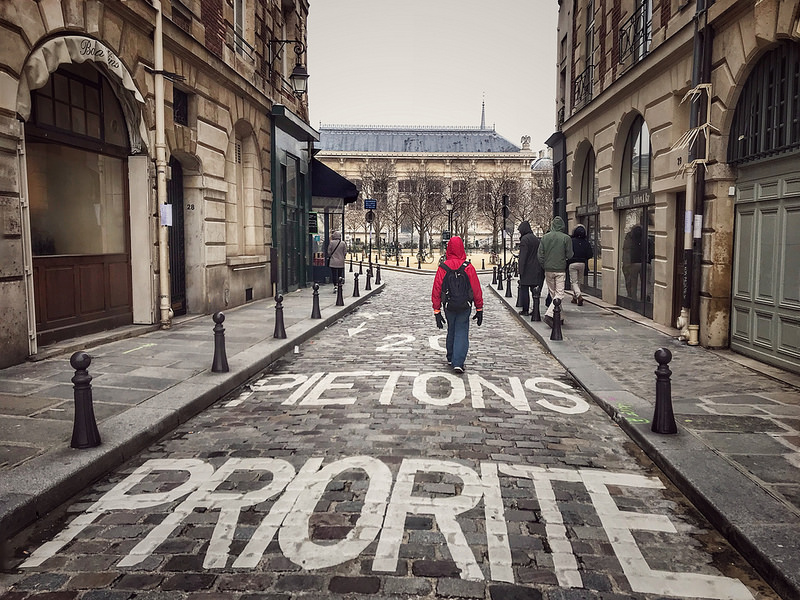
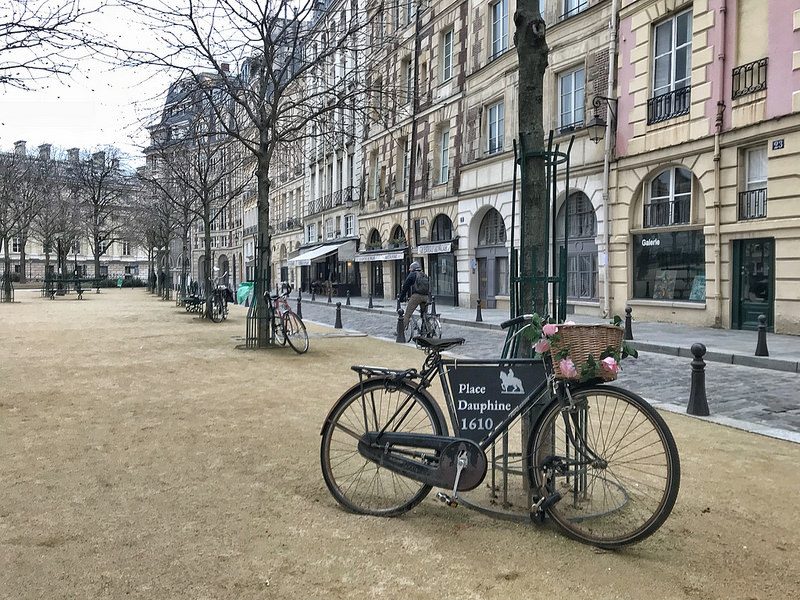
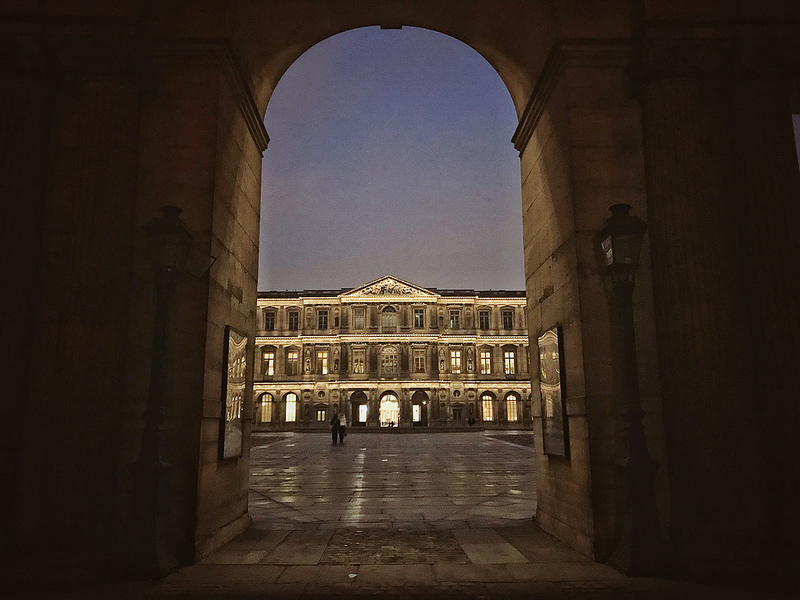
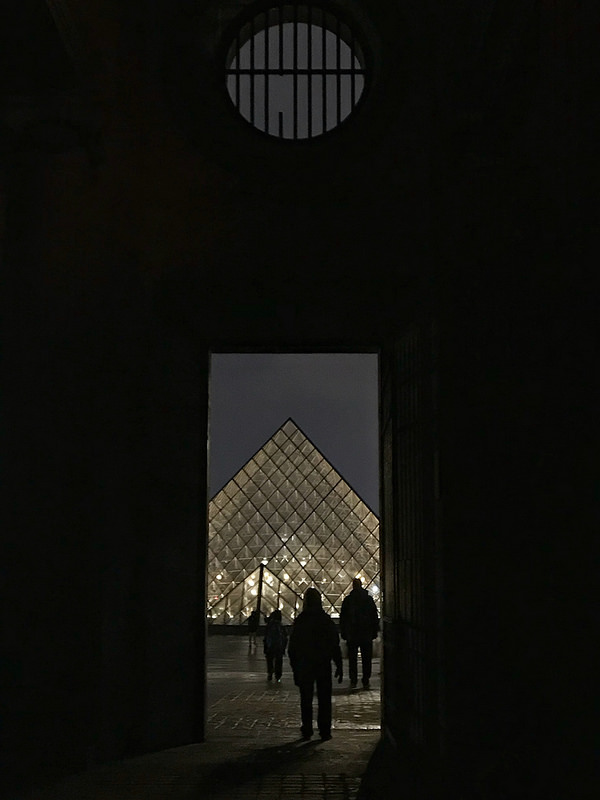
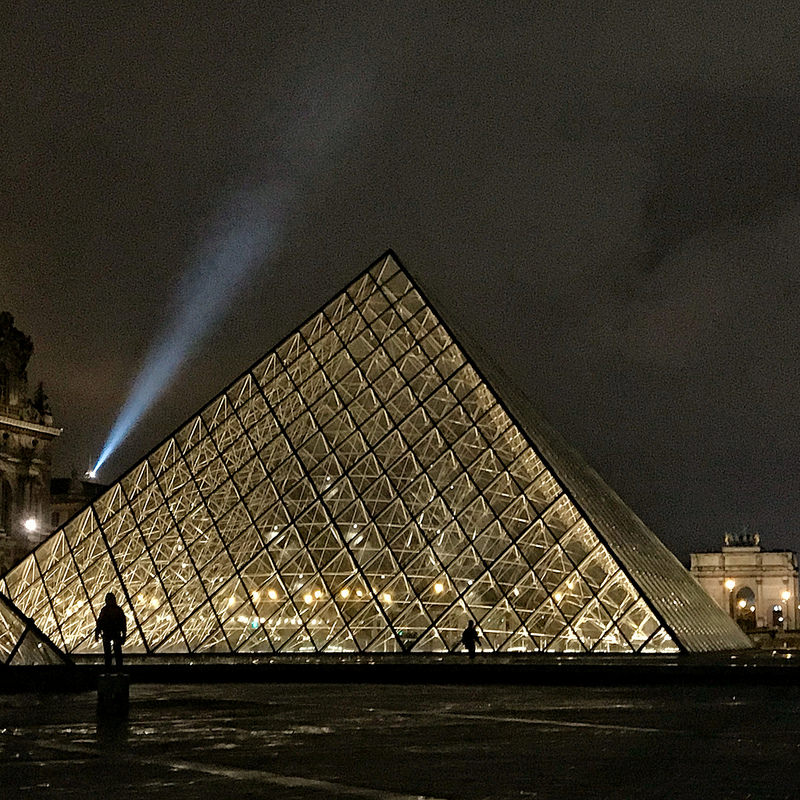
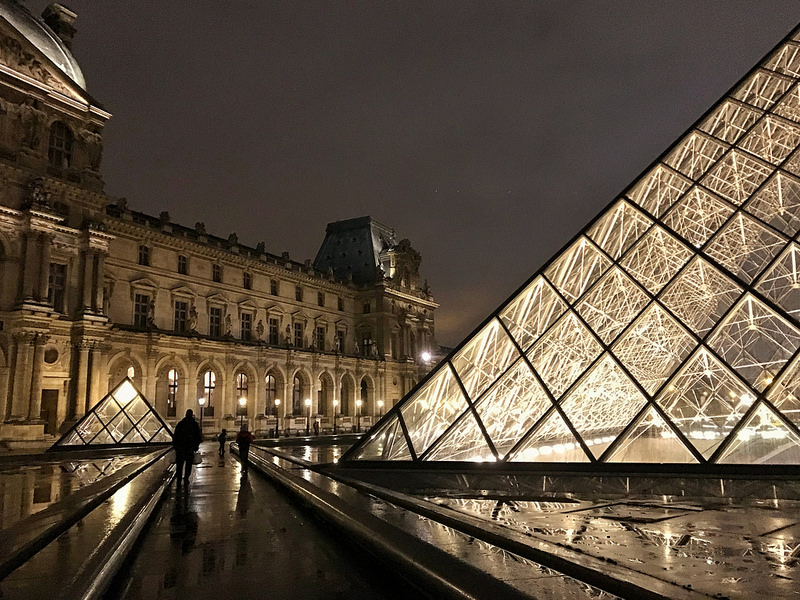
Street food on Pont Neuf in ParisWalking towards Place Dauphine in ParisPlace Dauphine is surrounded by buildings and cafes and there is room for kids to run. It’s a quaint oasis in Paris. Don’t miss this hidden spot.Palais du LouvreThe first sight of the Louvre Pyramid in Paris.Louvre Pyramid at Night, my sons in silhouette.My family walking by the Louvre Pyramid in ParisThe Carousel near the Eiffel Tower. My sons enjoyed a ride, even my 12-year old 🙂My youngest son taking a photo of the Eiffel Tower with his iPhone 5s.
Disclaimer: The moment links below contain affiliate links. If you find value in something I have shared, I’d be grateful if you used my link to make your purchase as it helps with the costs to run this blog. And as always, if you have any questions, please do not hesitate to connect with me. Thank you – Andrea.
Moment add-on lenses for iPhone
Over the years I’ve invested in Moment lenses for my iPhone to capture wider views and macro details. In the last year or so I added a telephoto lens and an anamorphic lens to my iPhone photography gear.
Click on the text below for more info on Moment iPhone lenses and cases.
If you have any questions, please do not hesitate to contact me.
SUBSCRIBE to wanderingiPhone.com for staying in the loop – exclusive opportunities, photo tours, workshops, webinars, and subscriber discounts on mobile photography workshops, consulting and more.
What if the only camera you own is an iPhone, Samsung of Google Pixel smartphone and you want to take safari photos? You might not see a smartphone on the best camera for wildlife photography lists, but does that mean you can’t capture great wildlife photography? Does it mean you should not go on a photo safari? Absolutely not.
With these smartphone photography tips, I’ll show you how it’s possible to photograph a safari with a smartphone. You’ll come home from your African safari trip with images you love, are proud to share and want to print.
You might be thinking that great safari photography can only be achieved with bulky and heavy dedicated cameras, long lenses, f-stop this and aperture that.
I’m here to say that the best camera for your safari is the one that is with you. Please don’t miss out on one of the most incredible experiences because you don’t have what some might consider a safari camera or wildlife photography camera or worse, don’t know how to use it.
Photographing my first South African safari
On safari with Naledi Game Lodge in South Africa. Shot on iPhone 4s.
The first time I went on a safari in 2012, I photographed the wildlife, nature, and landscapes of the Greater Kruger National Park in South Africa with an iPhone 4s. True story.
As a professional portrait photographer that worked mostly in the studio back then, I didn’t have a telephoto lens for my Nikon cameras, and I didn’t want to invest thousands of dollars for a once-in-a-lifetime experience as I wasn’t a professional wildlife photographer. The photos were only for my memories. Some of those photos are featured in this article.
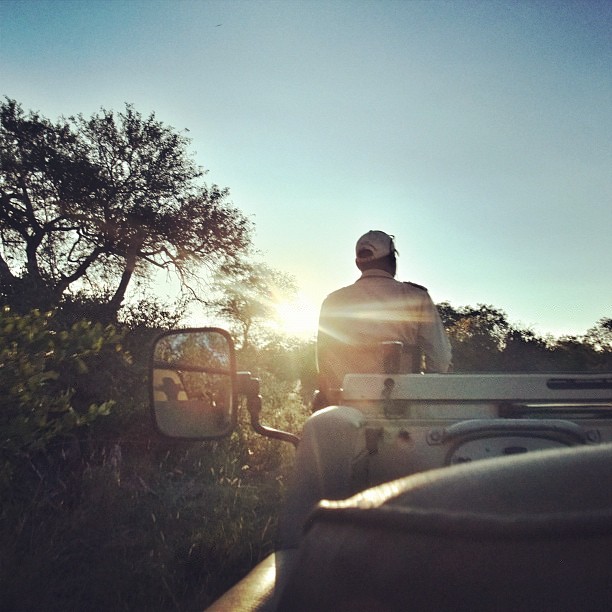
Although I travel with an Olympus OM-D e-m1 mark III mirrorless camera and 40-150 mm M.Zuiko 2.8 pro lens with a teleconverter on safari these days, I always, always take photos with my iPhone too. Some of my most cherished wildlife photos have been taken with my smartphone.
Tips to photograph the wildlife, landscapes, and nature with the phone in your pocket, your smartphone.
On safari with Tours de Mornay in Kruger National Park. Shot on iPhone 11 Pro Max.
ON THIS PAGE I DISCUSS: (click on the link below to jump to the topic)
First, let’s start with some things to think about before you take the shot.
Make sure the lens on the smartphone is clean. Consider carrying a small lens cleaning cloth.
Tap your finger on the screen where you want to focus to activate the yellow square for focus and exposure (iPhone). The yellow sun icon will appear, drag up and down to adjust. For Android, tap the yellow sun icon and use the slider to change. ProTip: Purchase the ProCamera app as it will allow you to separate the focus and exposure. Tap the blue square for focus and the yellow circle for exposure.
The shutter trips after you lift your finger off (white circle button on the iPhone).
Keep steady. For sharper photos, slightly tuck in your elbows or lean against something.
Keep level and watch your horizon.
Photograph horizontally for a wider scene, photograph vertically for tall buildings, trees and close portraits (headshots). These rules can be broken.
If possible, use your feet to get closer. Zoom if you have a dual-lens (2x or 3x on iPhone) smartphone or an add-on telephoto lens for your iPhone or Android phone (see below).
ProTip: Use the + (up) volume button on your iPhone (some Android phones) to trigger the shutter.
WHAT TO PHOTOGRAPHY ON SAFARI WITH A SMARTPHONE?
Go beyond the animal mug shot: Capture the Details
Remember to capture your unique, safari story. The safari lodge you choose for your South Africa safari holiday might be one of the most luxurious accommodations you’ve ever stayed at. It certainly has been the case for me.
Photograph your room and the view, the environment and all the luxurious details – the bed, the decor, the grounds, and the surrounding area.
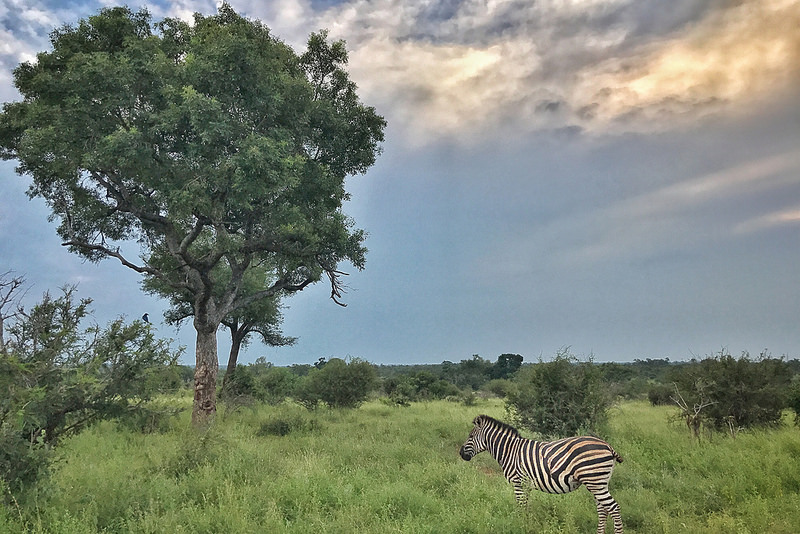
Photograph beyond the animal mug shot, show wildlife in their habitat and surroundings. This is something that should you do whether you use an iPhone, Samsung, Google Pixel, Sony, Nikon, Canon, Fuji or Olympus camera for your wildlife photography. Focus on telling the animal’s story.
Capture the sunrises and sunsets, the landscapes, trees, flowers, insects, and silhouettes.
The natural beauty of South Africa is some of the best I’ve experienced anywhere. The Kruger National Park has one of the most diverse wildlife, landscapes, and fauna. It truly is a special park and is one of my favourite places in the entire world. For many, a safari is a once-in-a-lifetime experience, and every detail deserves to be captured.
SAFARI PHOTOGRAPHY TIPS AND THE BEST COMPOSITIONS
FRAMING
Use literal, structural, architectural or environmental elements to bring focus to your subject.
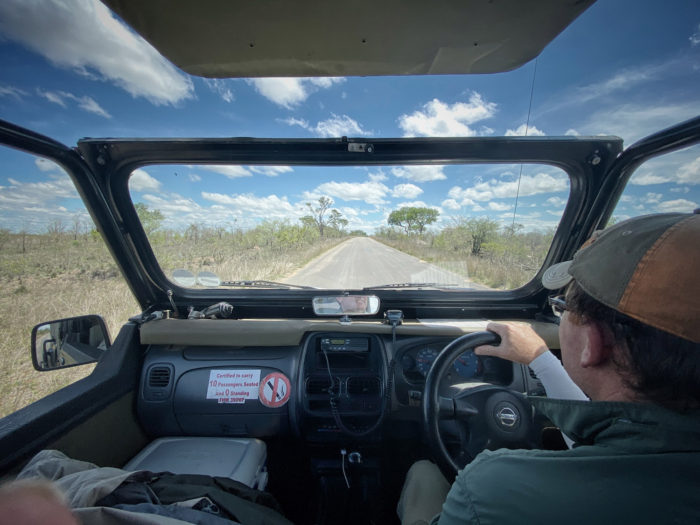
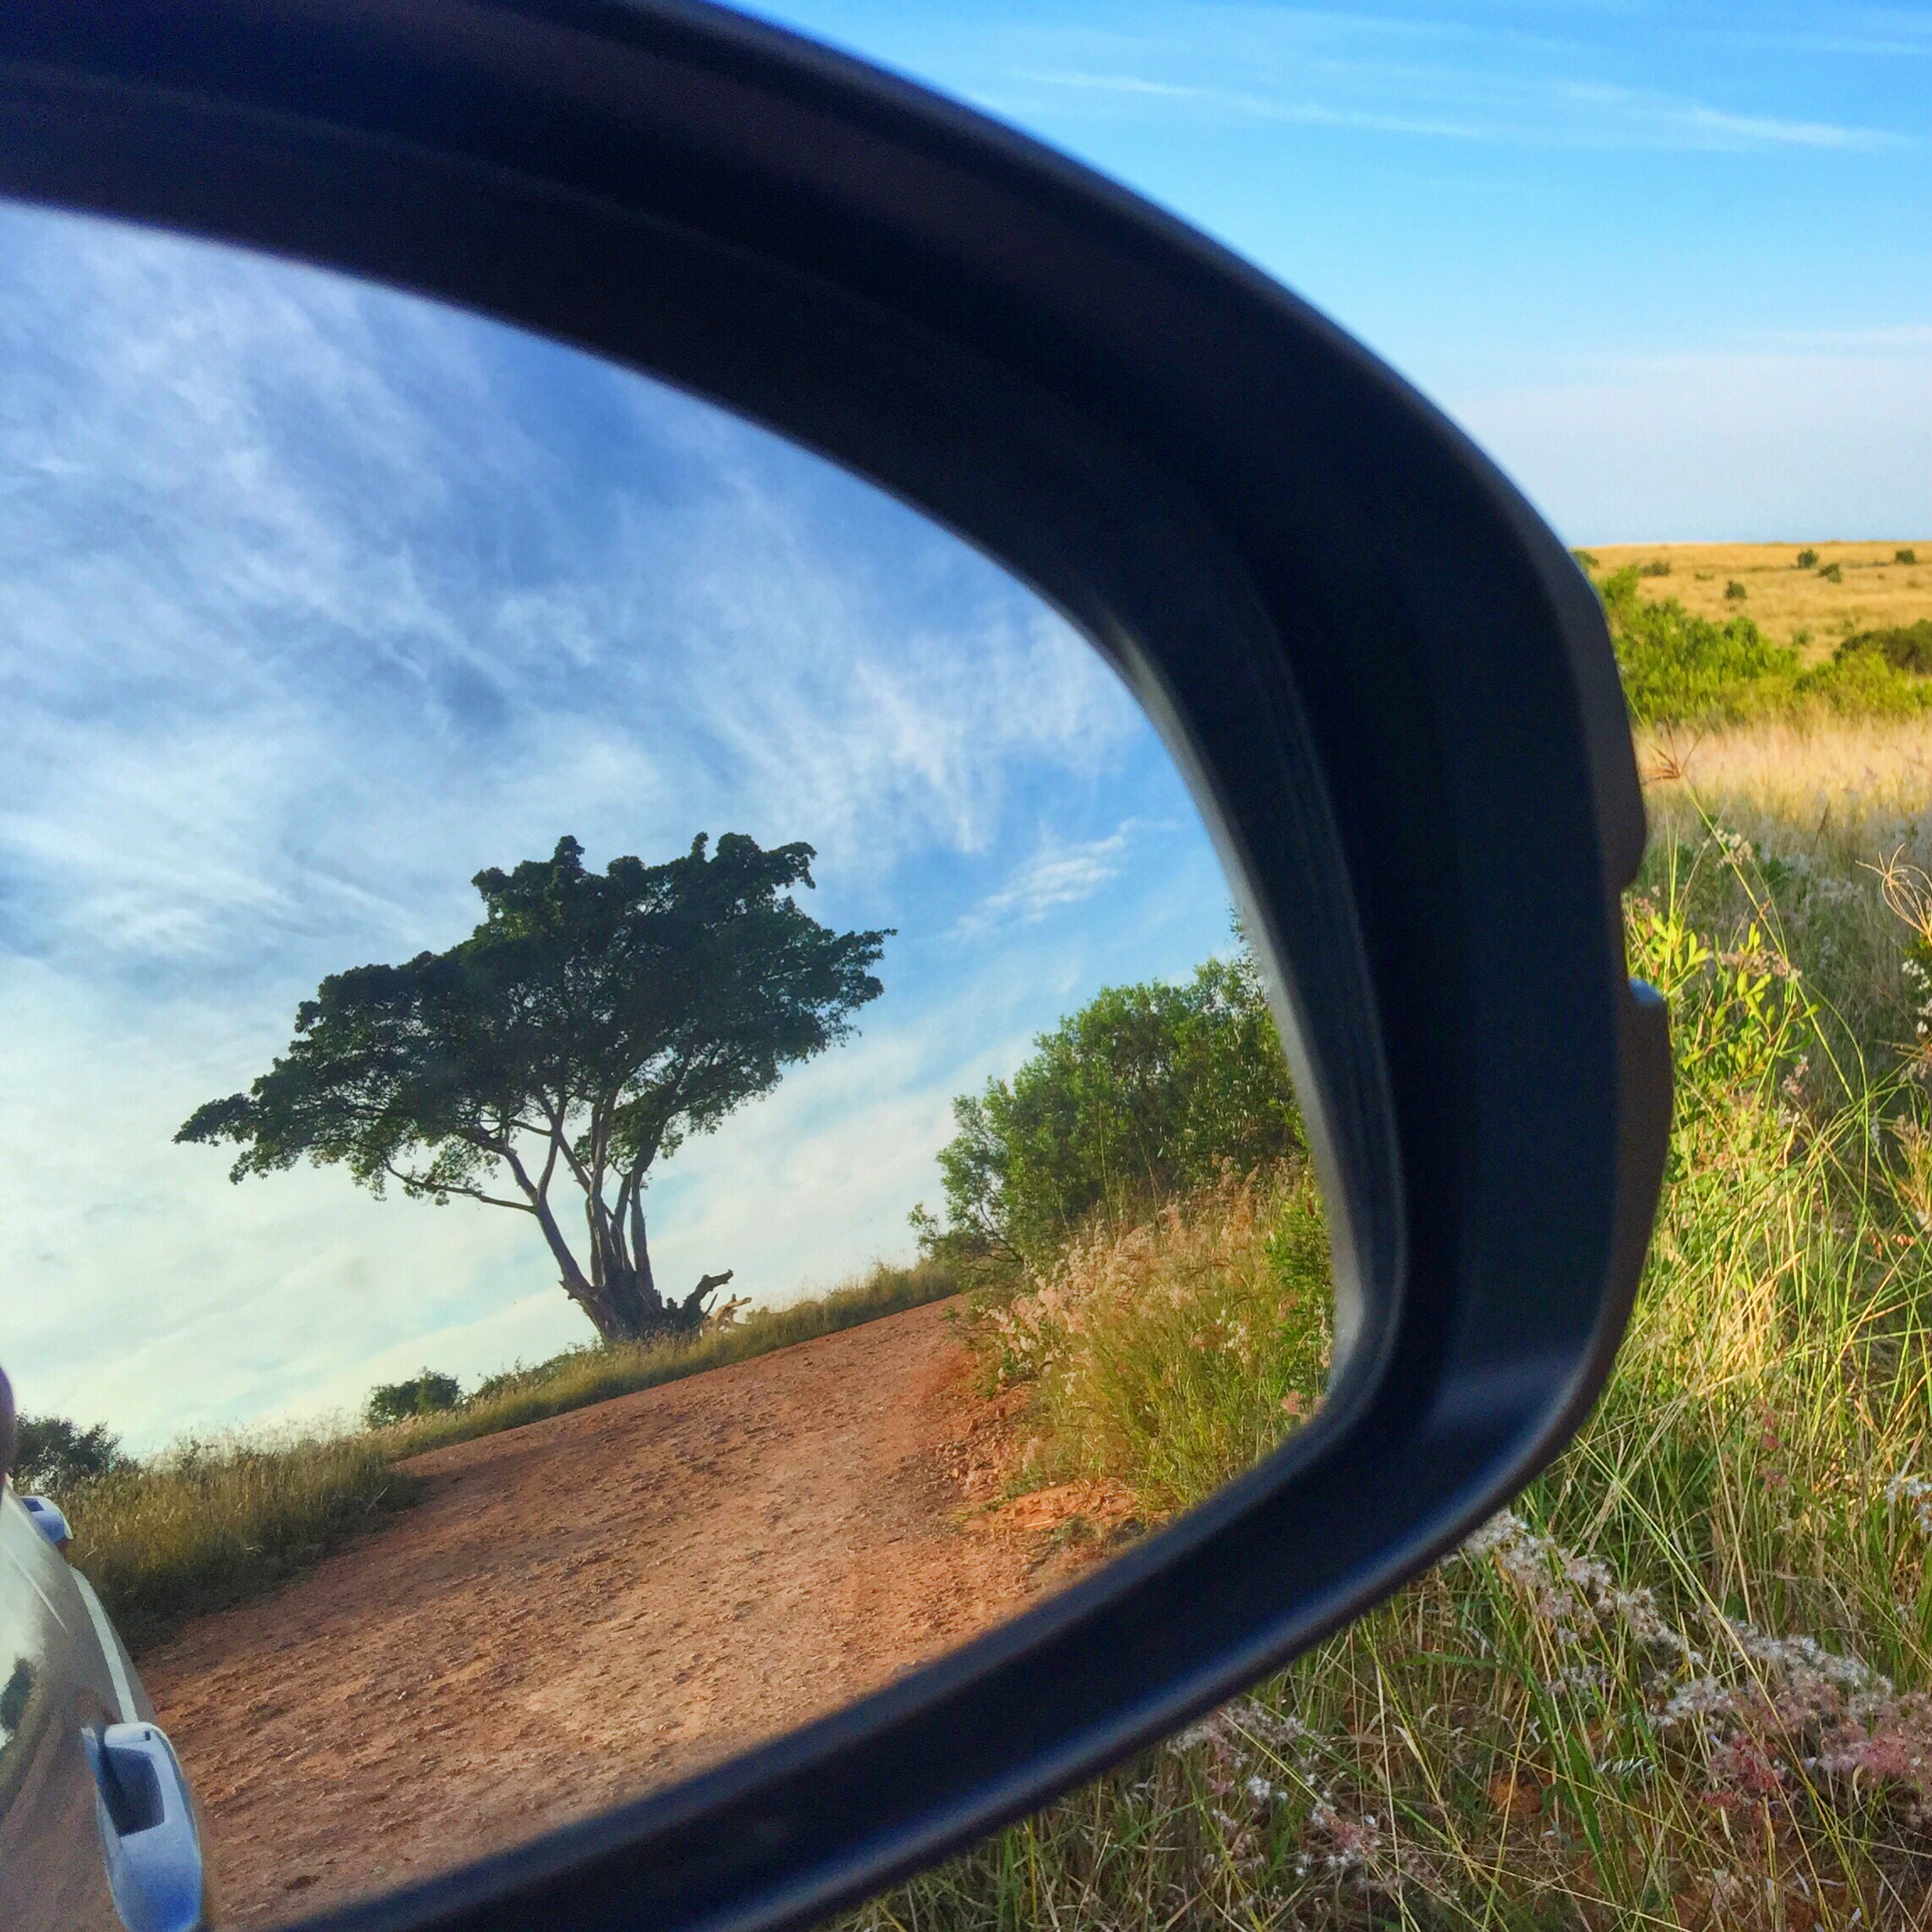
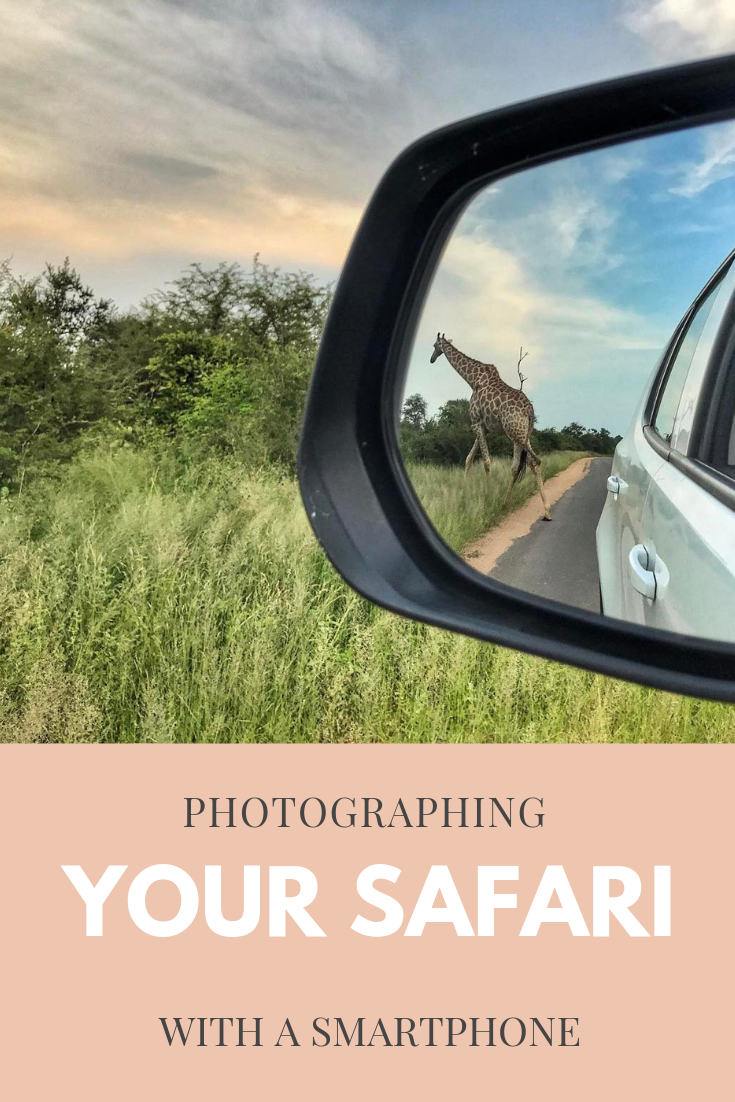
When on safari with your smartphone, think of trees, the landscape, the sky, and other animals to frame your main subject. Use the side view mirrors if you are self-driving in Kruger National Park or any other self-drive national park.
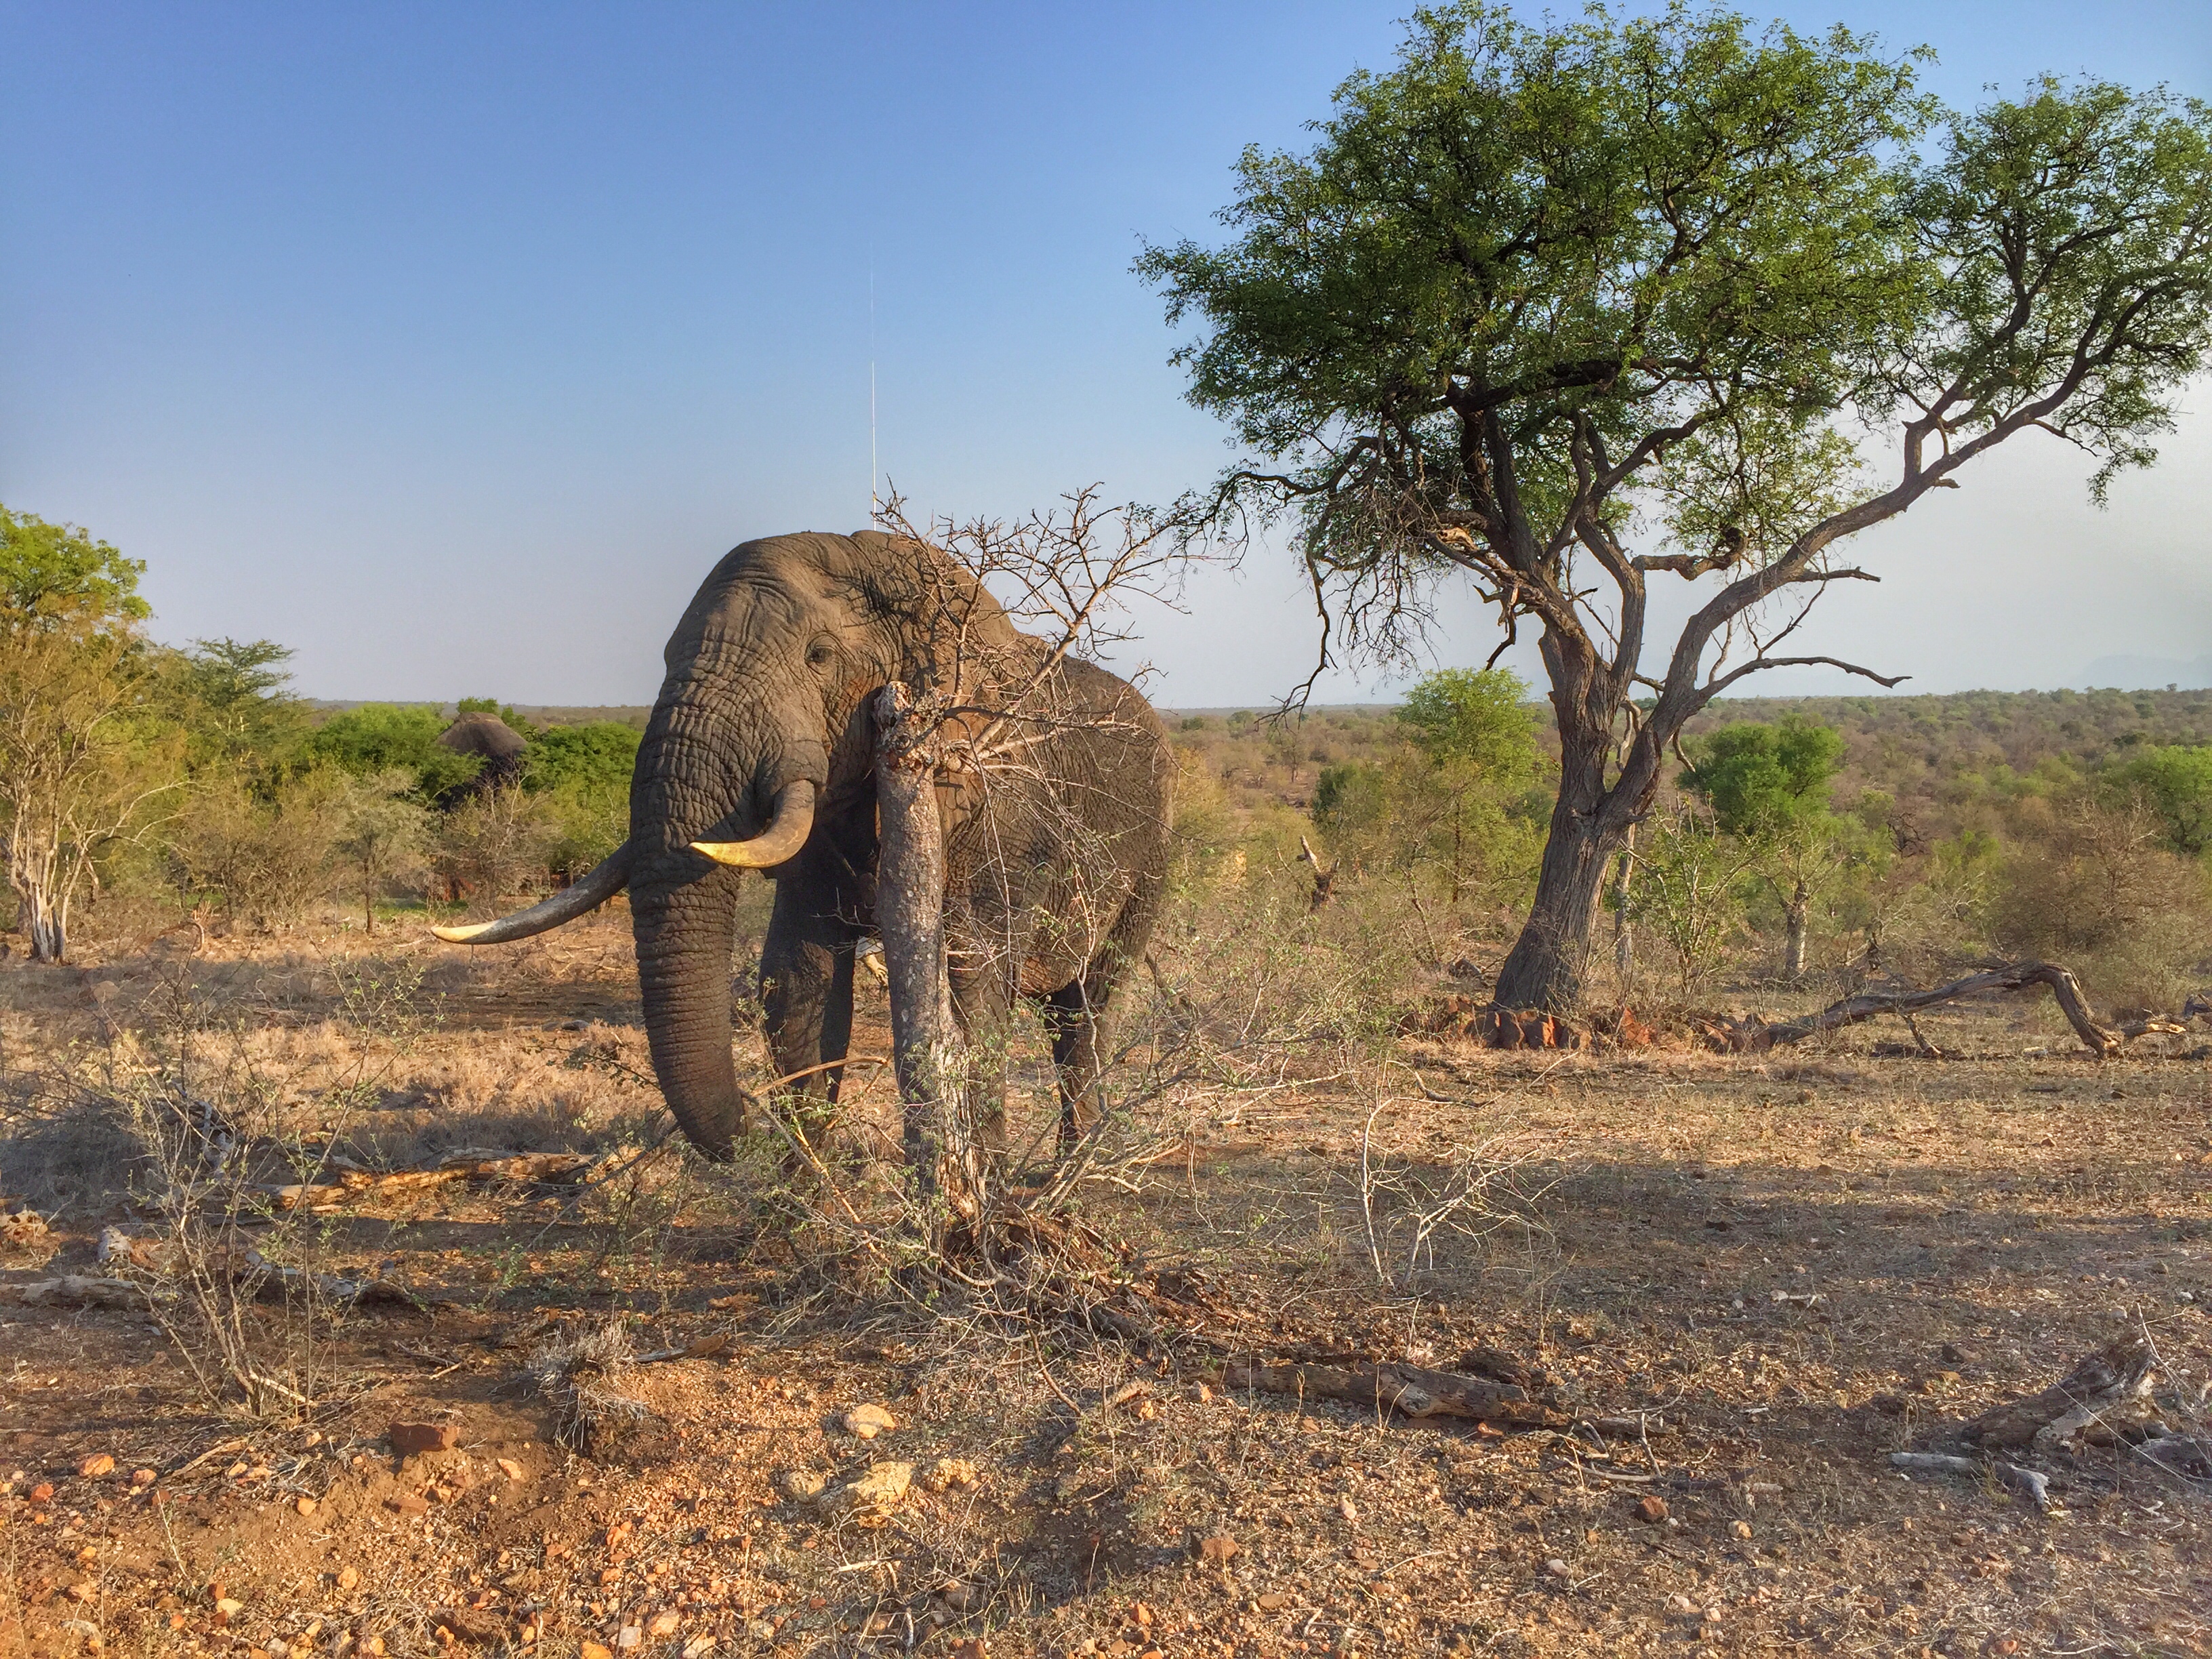
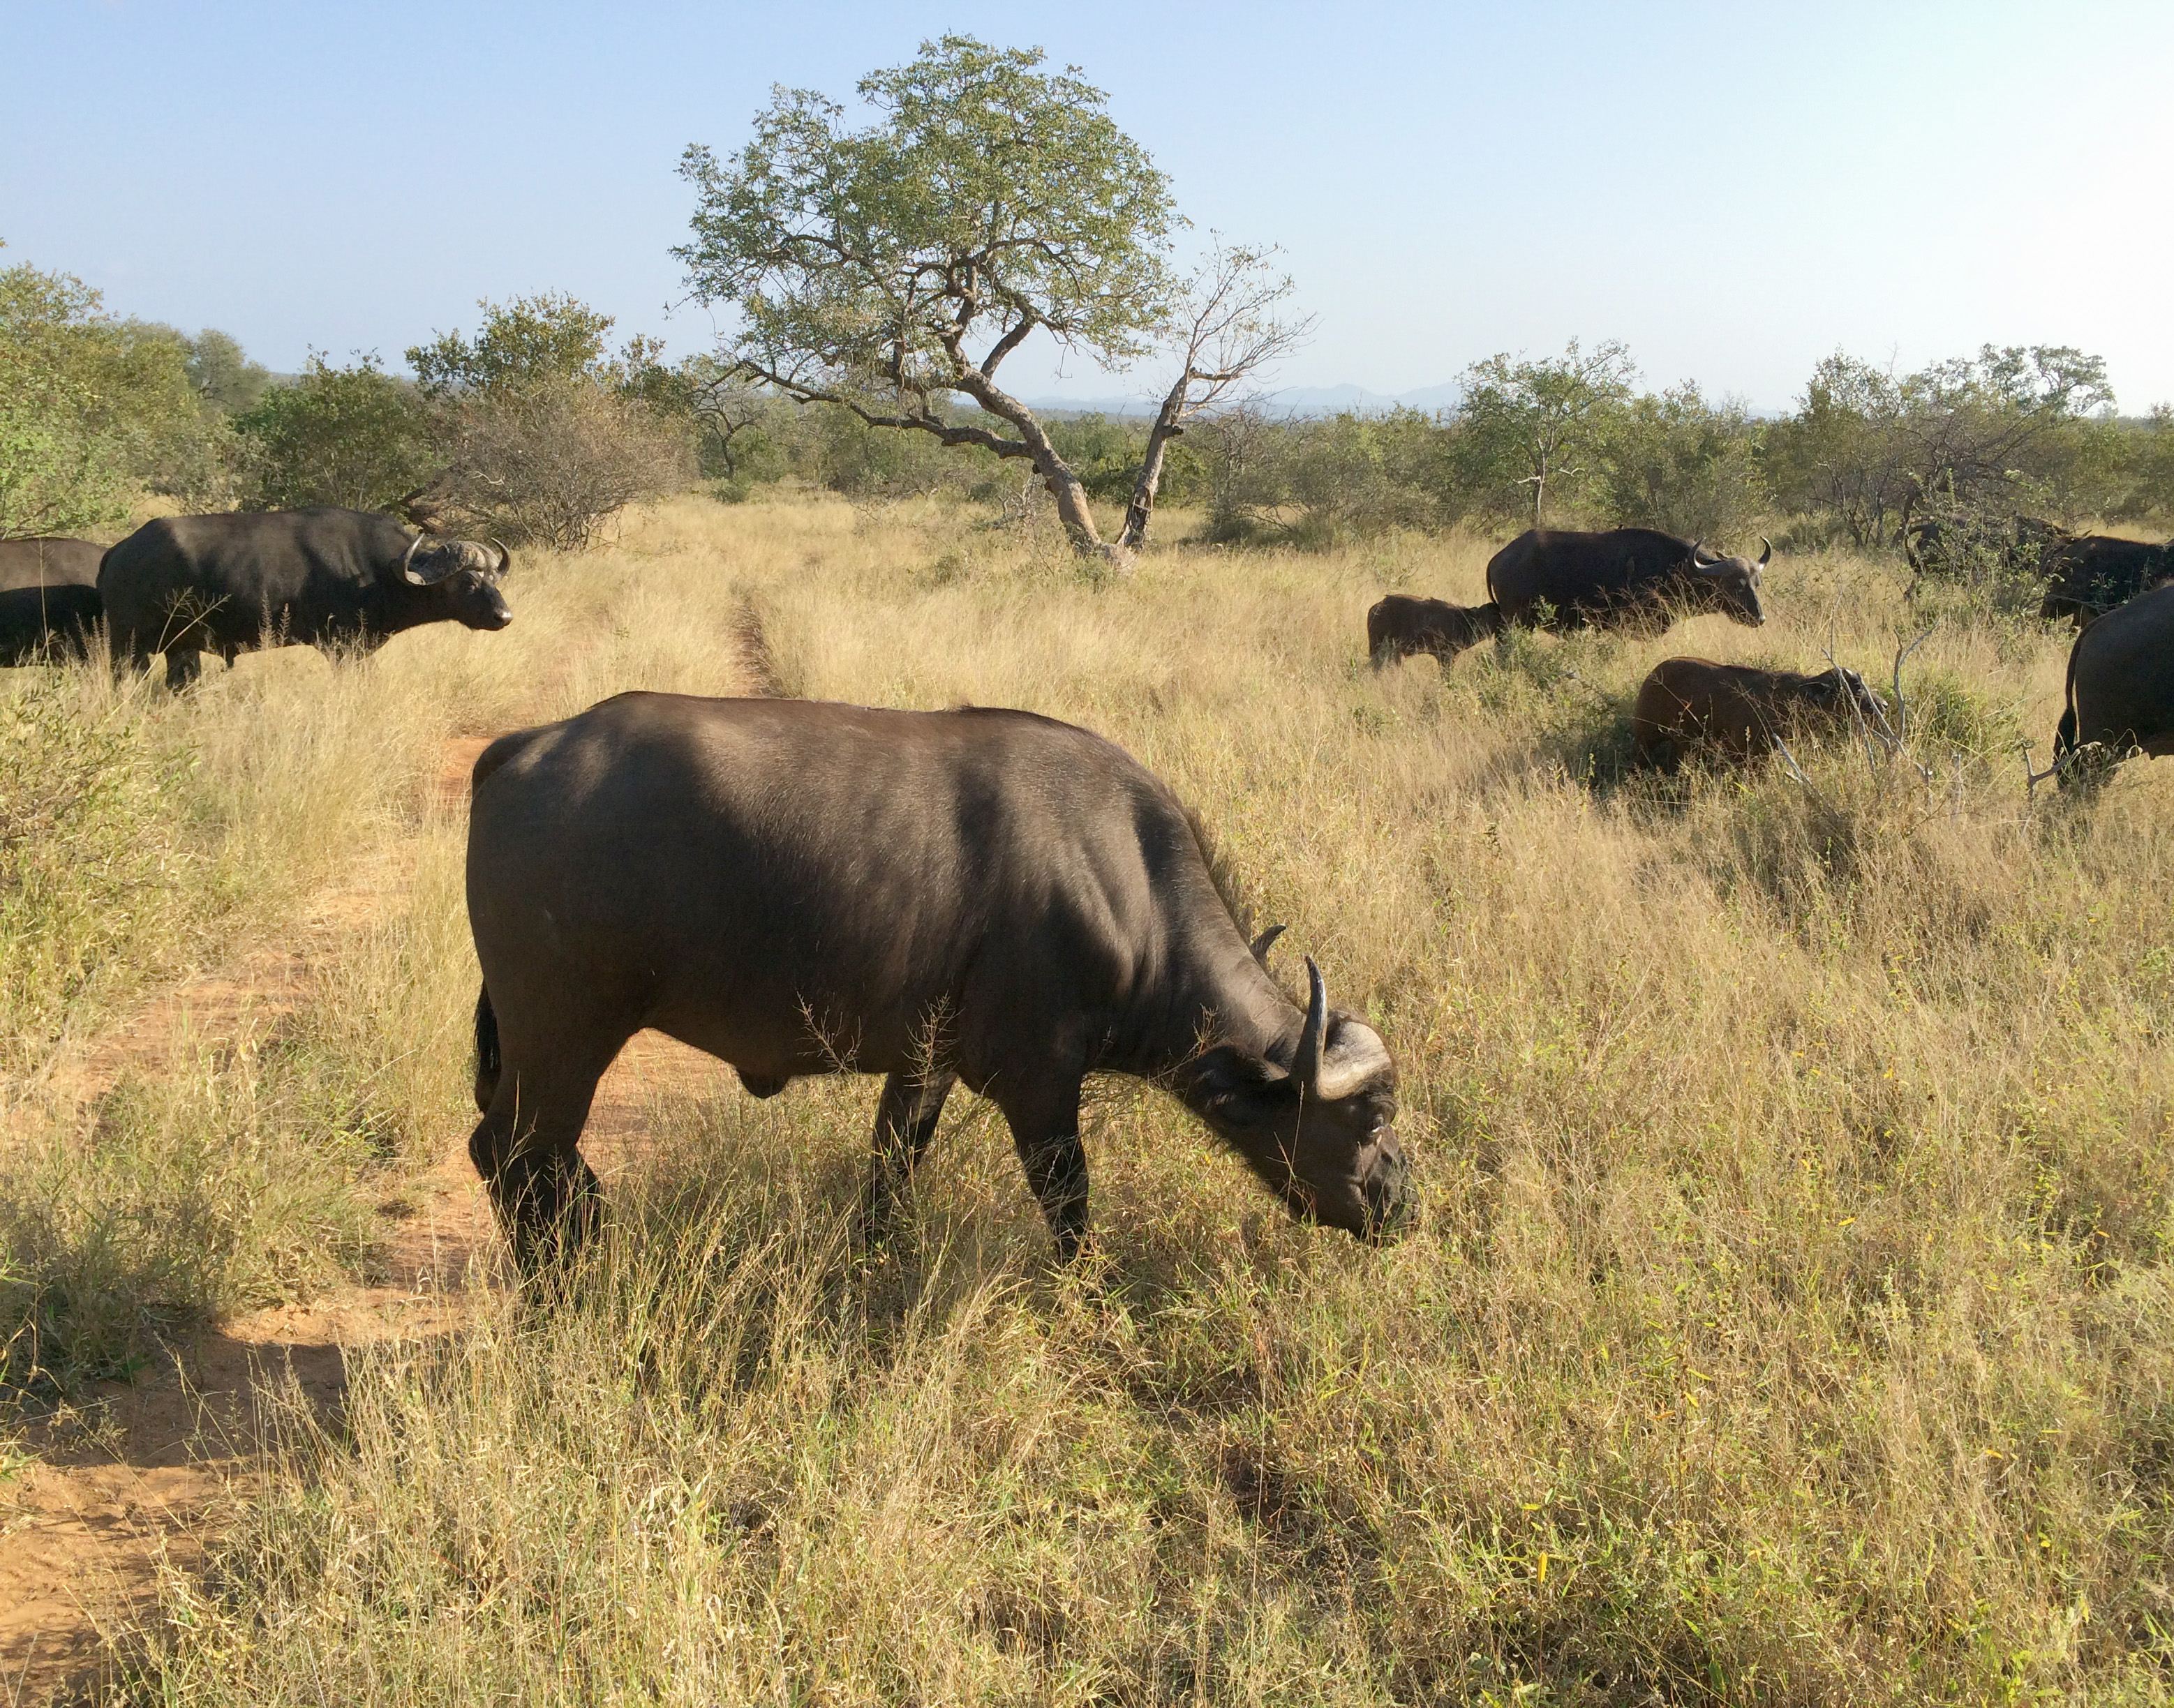
African elephant framed by the trees in Greater Kruger National Park, shot on iPhone 6s.The buffalo that surround the buffalo in the foreground help to “frame” the closest buffalo. The tree and grass also frame it. Shot on iPhone 5s.
LEADING LINES
Leading lines help to guide a viewer through a photograph. They can also direct the viewer to the subject or focal point of the image. They can be straight, diagonal, curved or suggested lines.
The line of the road leads to the tree. Shot on iPhone 5s.
RULE OF THIRDS
The rule of thirds is used to produce a balanced image. Imagine dividing this photo into 3 lines across and 3 lines down. The idea is to place the essential elements along the gridlines or at the intersections where the lines meet.
Make sure you have your grid activated on your smartphone to help you see it.
The rule of thirds works well with the idea of leaving space for the subject to look to or move into. Place the horizon along the top or bottom 1/3 for a strong compositional mobile photo.
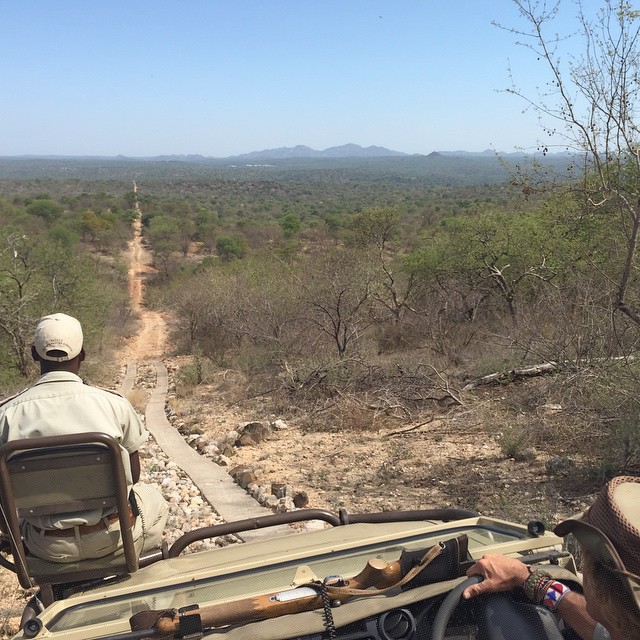
Wild Dog on the hunt in Kruger Park was shot on iPod by my oldest son, DRH. The wild dog is along the bottom 1/3 of the photo with space to move into. If you cannot achieve the rule of thirds when photographing, think about how you could do it when you crop.Considering using multiple compositional elements in a single photo for a stronger image. The horizon is along the top 1/3 of the photo (rule of thirds). The road leads to the mountains (leading lines). The vehicle and trees frame the tracker (sitting at the front, framing). Shot on iPhone 4s.
FIND THE LIGHT
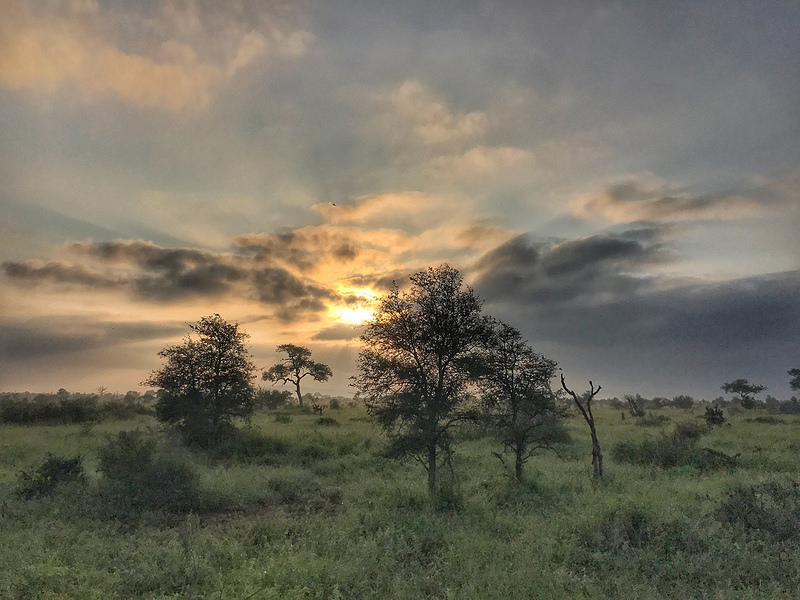
Light is an essential part of photography and is often overlooked. Light can make or break an image. It can also help tell a story. Use light to create the mood and feel of your image. Pay attention to the sun and where it is in the sky. The light within an hour after sunrise or an hour before sunset is when the sun is lower in the sky and creates a beautifully soft and warm light for photography.
Natural light is fleeting and ever-changing so don’t hesitate to take that shot.
The harsh, shadow-creating light of midday can create some interesting effects. Don’t be afraid of it.
Sunrise in Kruger National Park. Shot on iPhone 7+
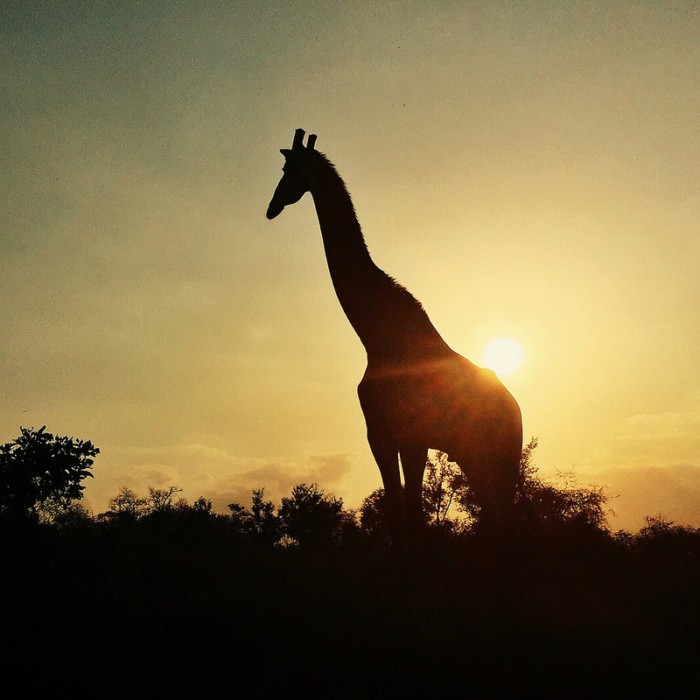
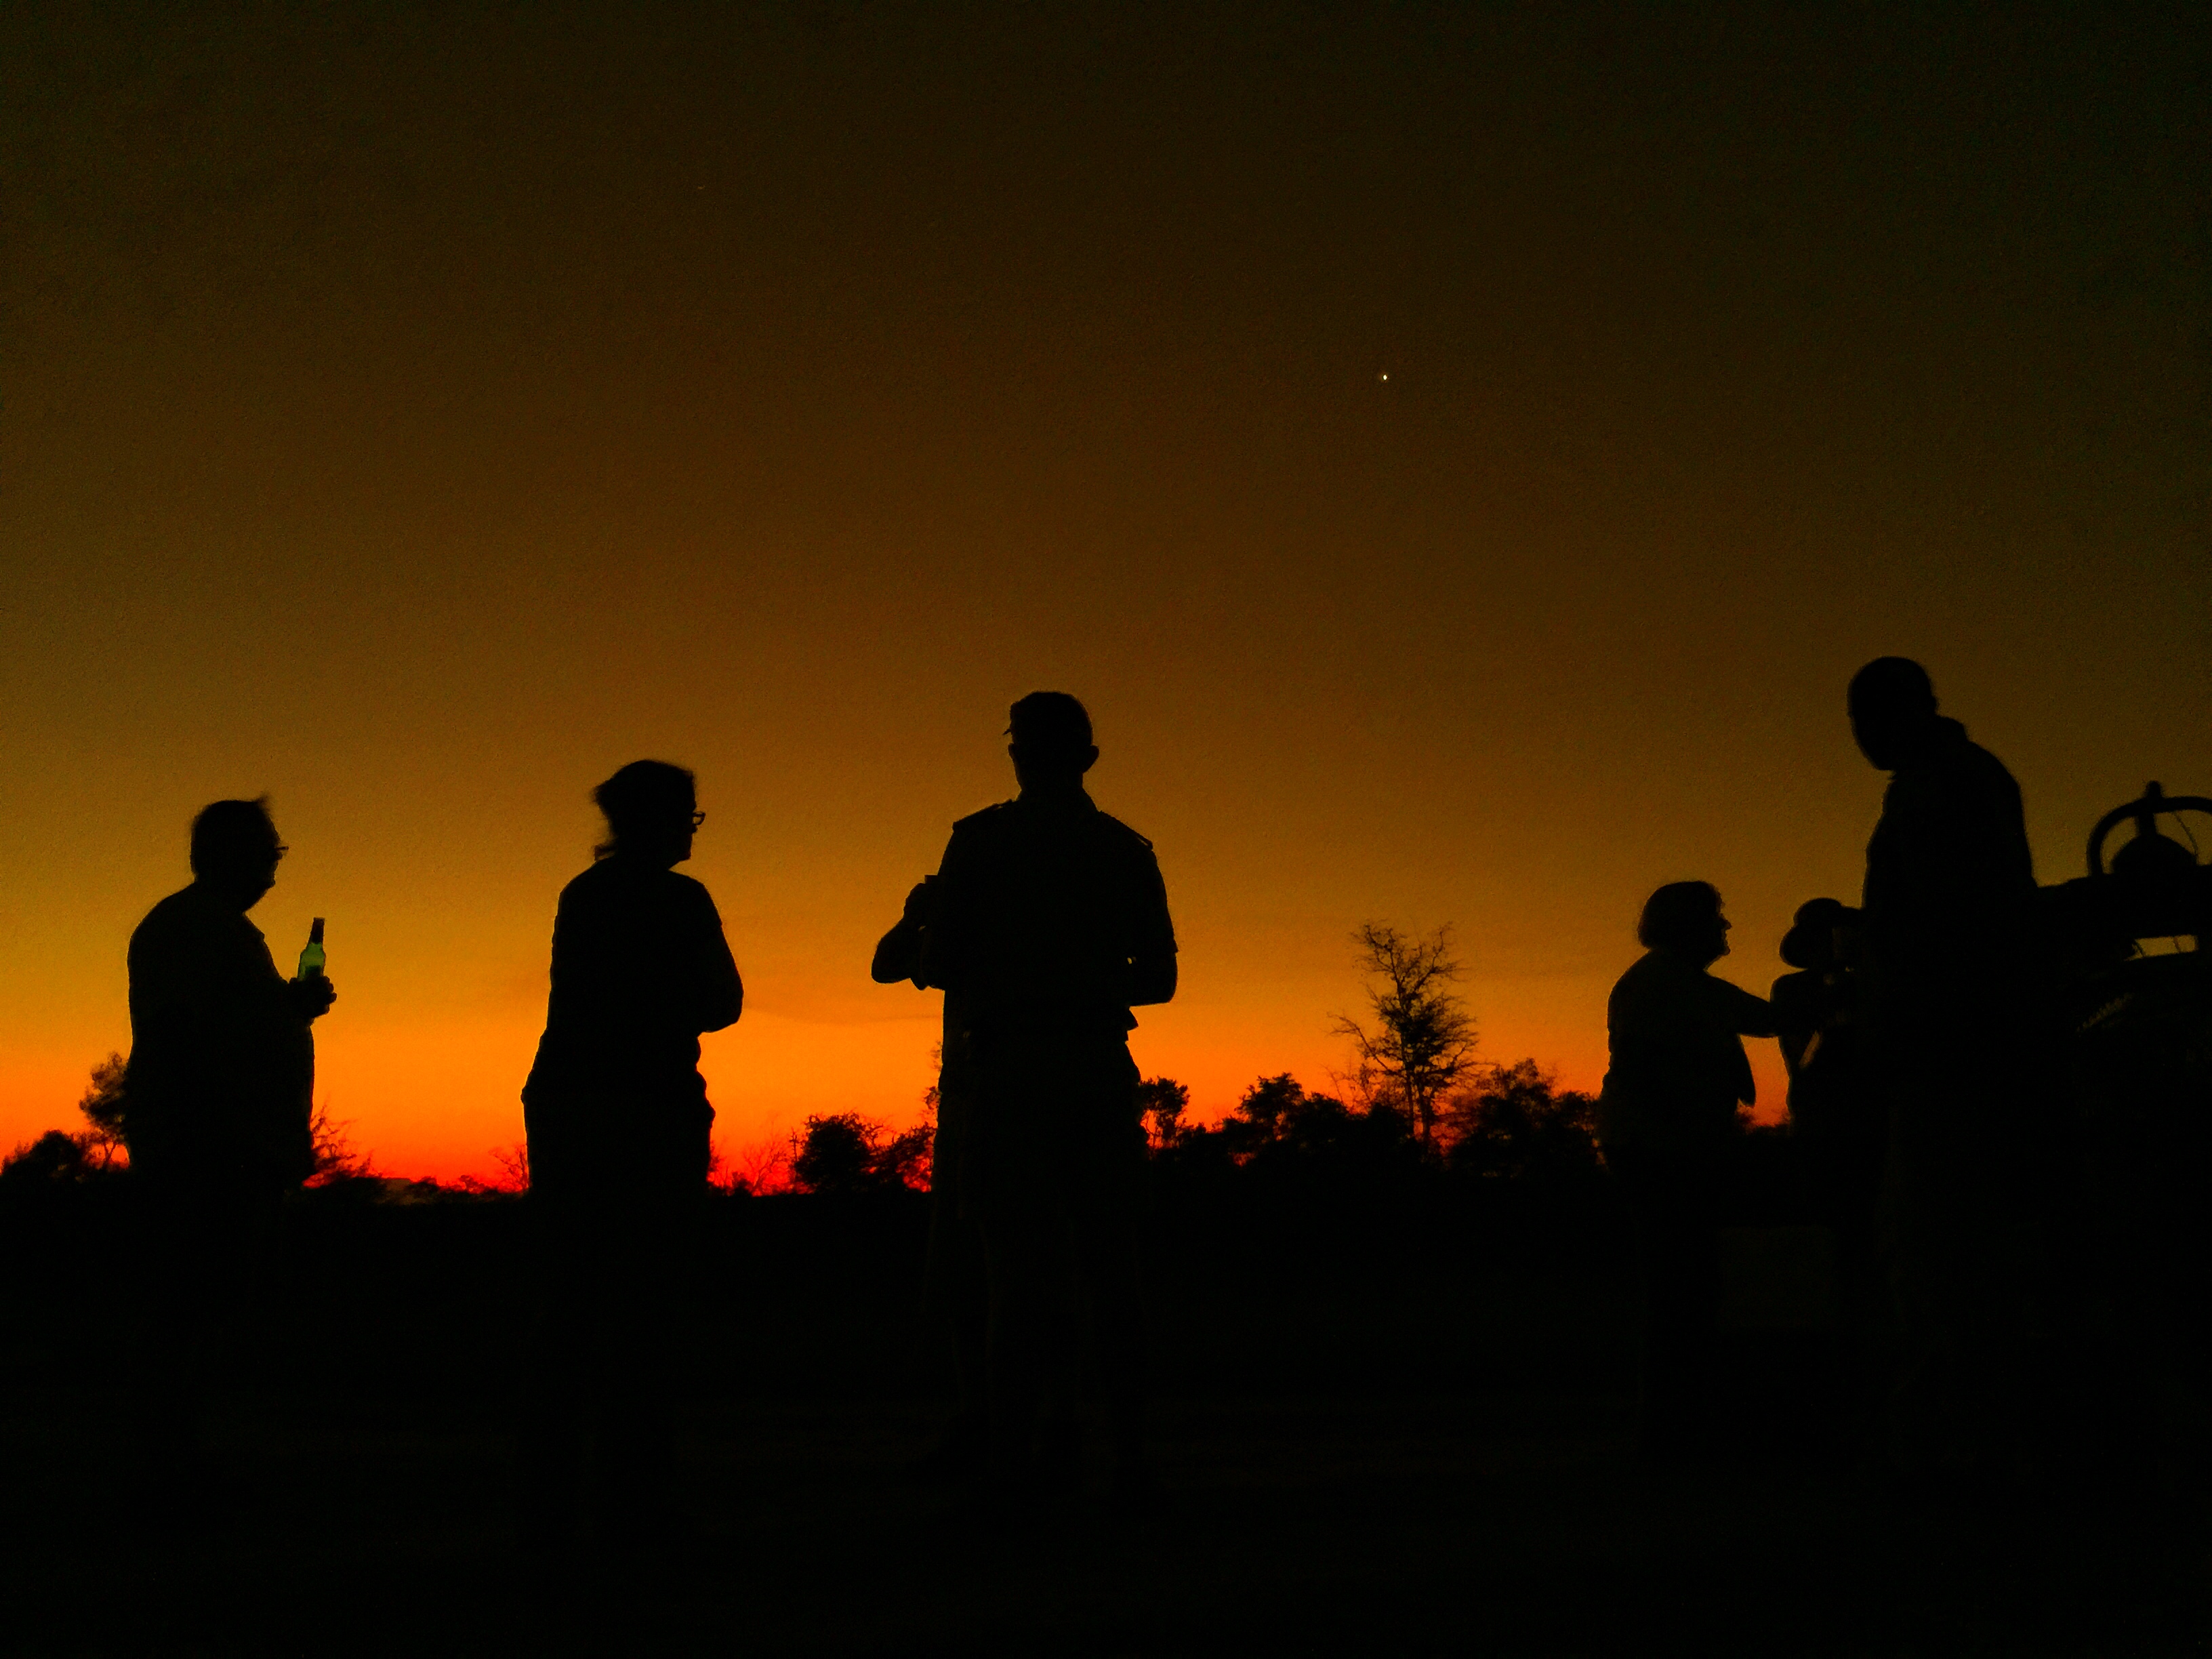
SILHOUETTES
Silhouettes are a great way to capture images when the light has faded or to create anonymity in a photo. Take advantage of the opportunity to create a silhouette image. Look for animals or trees/dead trees with the light behind them. Shoot towards the sun. You may have to get lower and point upwards to separate the subject from the horizon.
A giraffe silhouette in Kruger National Park. Shot on iPhone 6+.Sundowners in the Greater Kruger on safari with Elephant Plains. Shot on iPhone 6s.
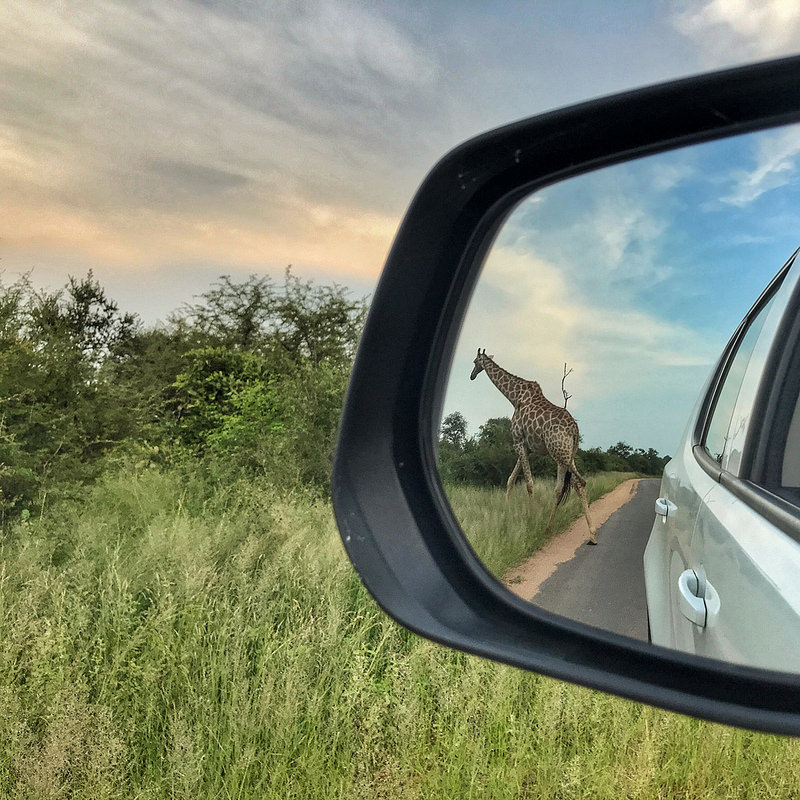
WHAT’S YOUR ANGLE?
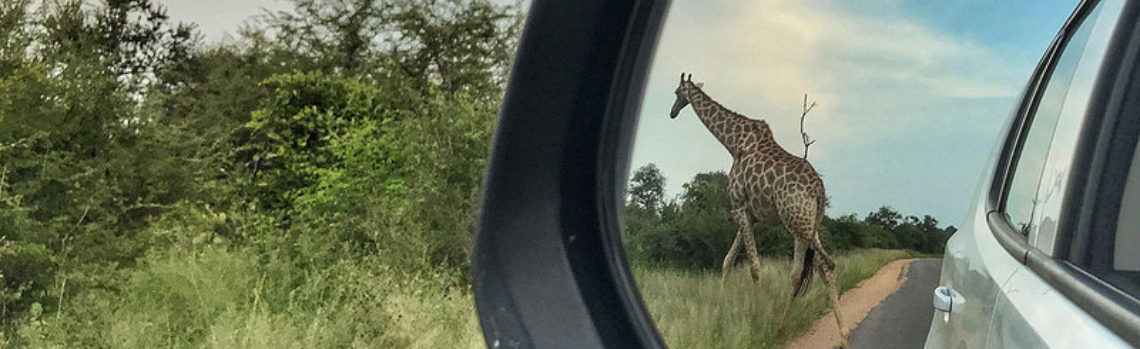
Unless an animal is nearby, it’s difficult to capture the details with a smartphone. Tell the whole story and include the animal’s environment. Try a different angle, don’t be afraid to experiment. Look in the side-view mirror and capture what’s behind you. Capture the wildlife, road, trees, and mountains using the side view mirror.
Zebra in Kruger National Park shot on iPhone 7+.Giraffe in the side view mirror, Kruger National Park. Shot on iPhone 7+.
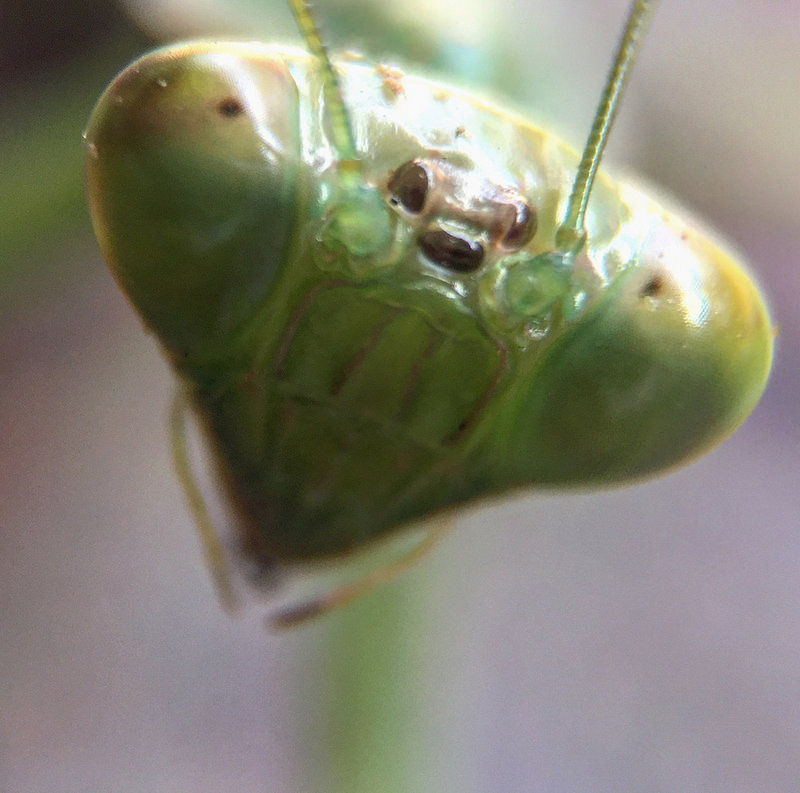
IT’S THE LITTLE THINGS: DETAILS
Capture the details of nature and your surroundings.
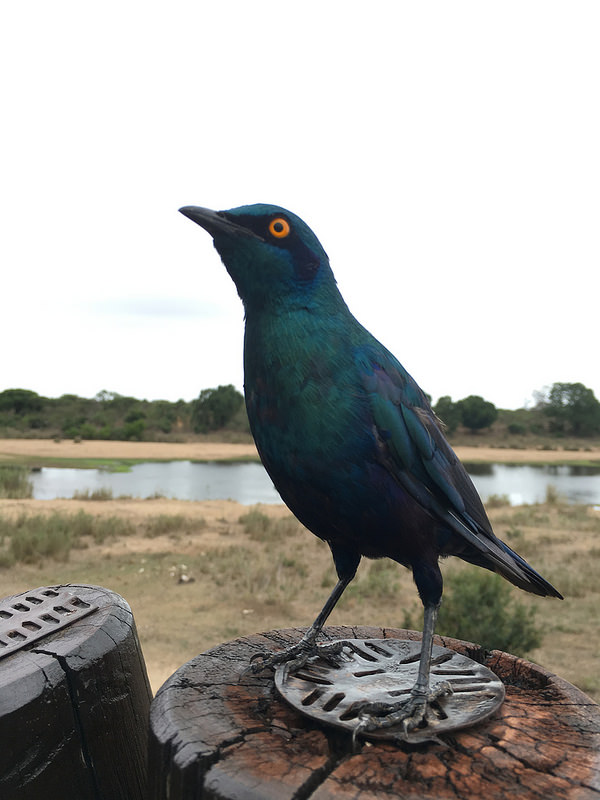
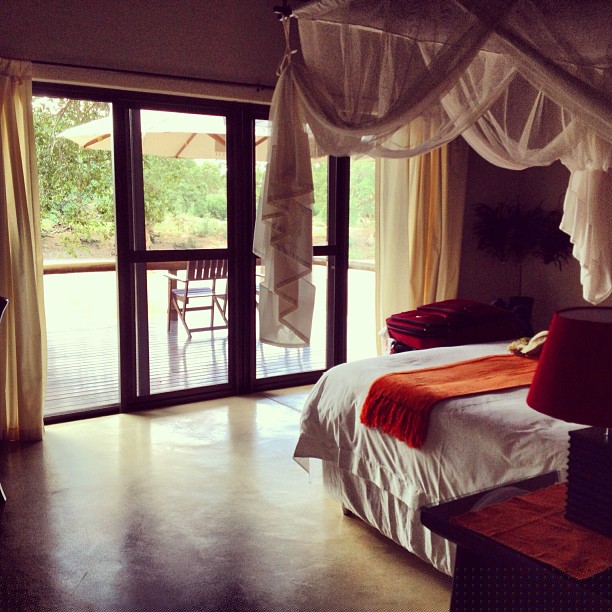
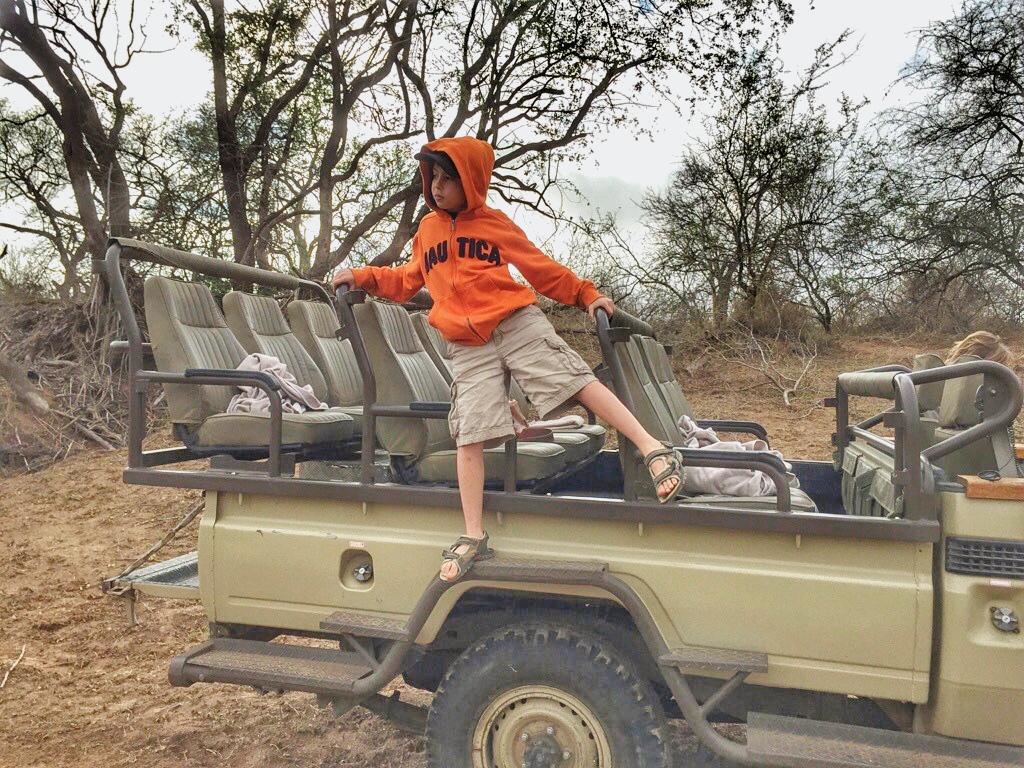
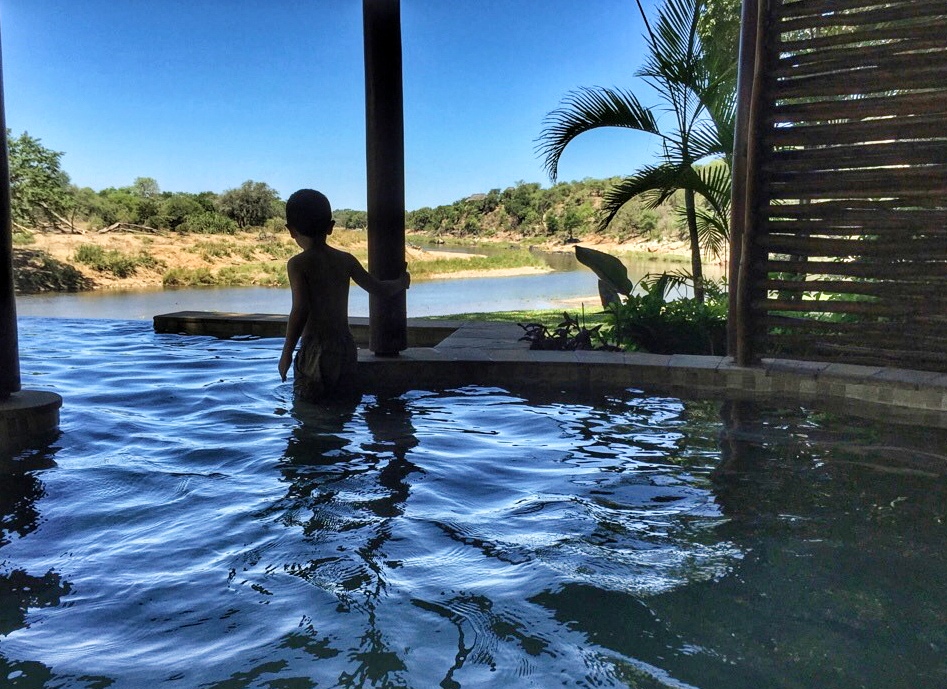
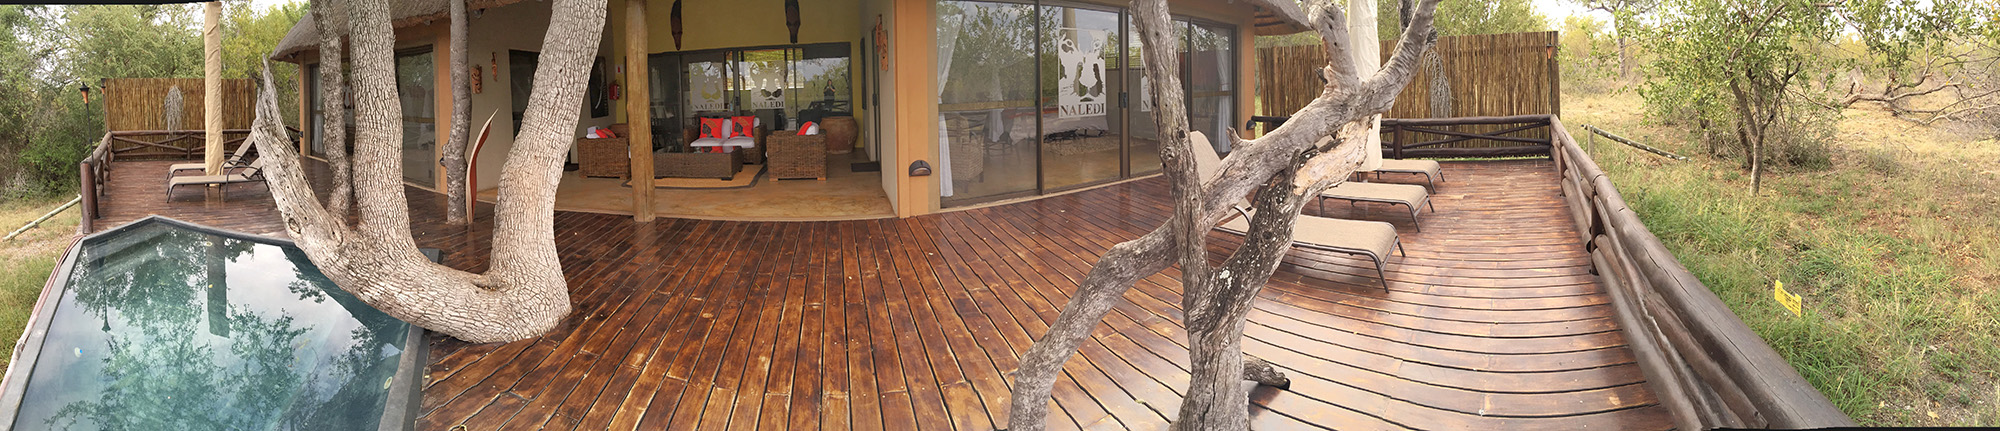
Preying Mantis in macro. Shot on iPhone 6 + Olloclip 21x macro in Kruger.A Burchells Starling at Lower Sabie Rest Camp in Kruger. Shot on iPhone 6s.Breakfast at a hide on safari with Naledi Lodges in Balule Nature Reserve. Shot on iPhone 6plus.My room at Naledi Lodges in Balule Nature Reserve. Shot on iPhone 4s.My oldest son on safari with Naledi Lodges in the Balule Nature Reserve. Shot on iPhone 5s.My youngest son at the infinity pool at Naledi Lodges in the Balule Nature Reserve. Shot on iPhone 5s.
GO WIDE AND SHOOT A PANORAMA WITH YOUR SMARTPHONE
Check to see if your smartphone has a panorama option. You’ll find it in the native camera app on the iPhone. Hold steady and keep the arrow on the line. Tip: Tap the photo square to change directions.
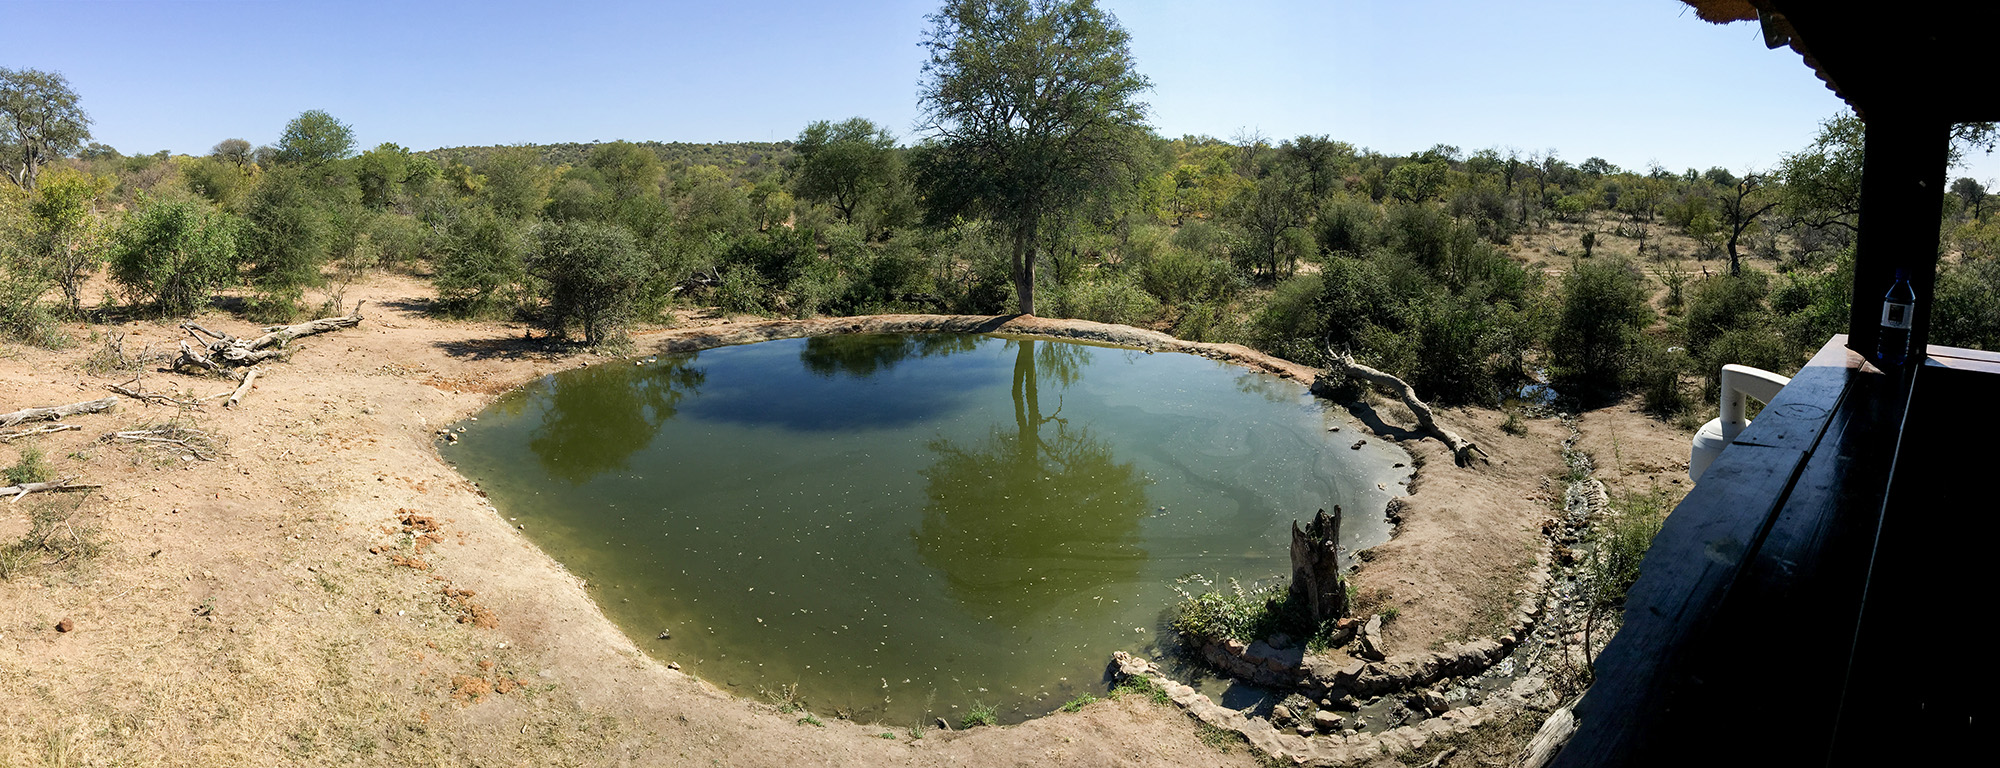
Capture the view with a panorama. Taken at the luxurious Naledi Bushcamp lodge in Balule Nature Reserve. Shot on iPhone 6+.A panoramic view from a Naledi Lodges hide. Shot on iPhone 6
Timelapses are a great way to show a busy environment – clouds, sunset/sunrises
Film close and wide shots, telling details, different angles
Film in motion (pan up/down, left/right) to move the story along
Film more video than you need, and cut (split) when editing.
Keep scenes to 2-5 seconds depending on how fast you want to cut to the next scene.
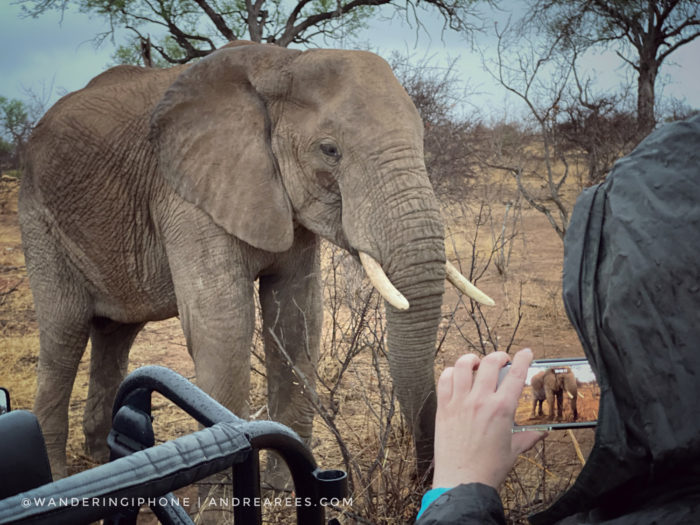
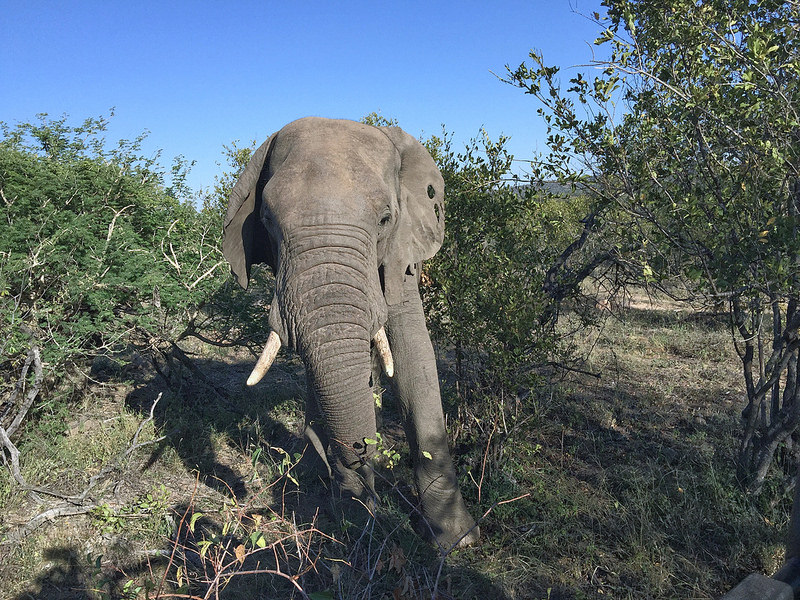
AN ENCOUNTER WITH A WILD AFRICAN ELEPHANT PHOTOGRAPHED ON IPHONE
Sometimes the animals come to you, and you have to capture the moment with your iPhone. This elephant was too close to photograph it with my Olympus OM-D E-M1 mirrorless camera and M. Zuiko 40-150mm 2.8 pro lens (the full-frame equivalent of 80-300mm).
For the full elephant encounter story and video, visit here.
Disclosure: This article may contain affiliate links for Moment products. It means that if you click on a link to purchase a product I recommend I earn a small commission. It is no additional cost to you. For more information, read my full disclosure and privacy page. If you have any questions about the Moment lenses or cases, please do not hesitate to contact me.
SOME OF MY FAVOURITE ACCESSORIES
Did you know that you can get a telephoto lens for iPhone or Android phones?
In 2012, I had a telephoto lens for my iPhone 4s, and it looked ridiculous, but aesthetics do not matter if it does the job, right? I took it on safari with me and I did capture a few images with it. Unfortunately, the photos weren’t of good quality. The lens didn’t fit well so there was a lot of vignetting. I didn’t recommend that lens to anyone and never used it again.
I had the macro and wide-angle Olloclip lenses when I had the iPhone 4s and iPhone 6. Their lenses are okay, but not as good as I hoped they would be. The 2 things that bothered me about the Olloclip system are 1. I had to remove my case and 2. if I upgraded my iPhone, I had to buy new lenses.
I had been keeping an eye on a few different smartphone lens companies for a few years, and in 2017, I decided to invest in Moment lenses. I didn’t invest in the Moment system until I heard that they offered cases that the lenses could be attached to (around the time I had an iPhone 6s). I never use my iPhone without a case on it.
MOMENT ADD-ON LENSES AND CASES
There is no loss of quality with Moment lenses and the wide lens (1x). The best part is that if you upgrade your smartphone, you only have to purchase a new compatible case and not a new set of lenses like you have to with Olloclip lenses. The lenses rotate into the case and fit perfectly. With Olloclip or other clip-on lenses, you have to line it up and hope it stays. Moment cases are available for iPhone, Samsung Galaxy and Note, Google Pixel and One Plus smartphones too.
Moment add-on lenses for iPhone
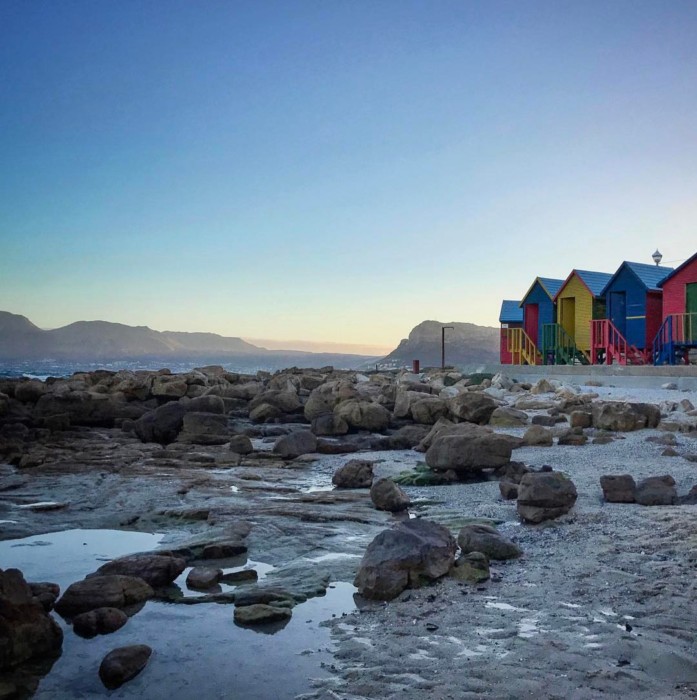
Shot on iPhone XSmax at 1x, 2x (dual lens) and 4x with a Moment telephoto lens.
Dusk at St. James Beach in Cape Town, South Africa.
MOBILE PHOTOGRAPHY WORKSHOPS
I’ve been a professional photographer since 2003 and a mobile photography educator since 2013. I offer live virtual smartphone photography workshops on Zoom and in-person workshops in Toronto, Canada.
I offer a public and private group 60-minute virtual workshop through Airbnb Online Experiences or for a private series of workshops (2 or 3 workshops), check here.
If you’re in Toronto or visiting the area and are into nature, birding and wildlife photography, I offer a birding/nature walk + photography lesson through Airbnb experiences Toronto.
I hope these tips will help you create cherished photos of your safari. If you have any questions, please do not hesitate to contact me.
SUBSCRIBE to wanderingiPhone.com for staying in the loop – exclusive opportunities, photo tours, workshops, webinars, and subscriber discounts on mobile photography workshops, consulting and more.
The bottom row of 3 photos is my home in the Baobab tree and view from the room.
It was early morning and still dark when I stepped off an overnight flight from Washington, DC onto the tarmac of the small Dakar airport. The airplane had stopped for an hour to refuel and drop off and pick up passengers before continuing to Johannesburg, South Africa. I disembarked to visit a friend and her family for the next six days, and though I was tired, I couldn’t wait to explore Senegal.
A few hours after arriving we were on our way to Palmarin and the Sine Saloum Delta in rural Senegal. A well-paved highway takes you out of the city and further onto a two-way road through towns and villages. As the sight of Dakar faded in the distance, I looked
ahead to the open road and couldn’t believe I was in Africa.
Scenes of meat and fruit stands by the roadside, unfinished buildings and crumbling sidewalks, women in colorful attire, roaming goats, salt flats and baobab trees, donkey carts and horse carts and women carrying water or pounding maize played out in front of me.
After Joal, we found ourselves on the worst road I’ve ever traveled. I thought we were going to lose a tire to the large potholes that filled the road. As we came out on the other side of that bumpy red earthy road with tires intact, I smiled.
I was on an adventure of a lifetime and on my way to spend my first night ever on the continent of Africa in a majestic Baobab tree at Collines de Niassam Lodge.
Lifeguard station at Cherry Beach in Toronto, Canada.
Cherry Beach in Toronto, Ontario is my go-to beach for it’s laid back atmosphere. It’s my favourite place to sit by the lake and take some time out. It is much less crowded
than the other Toronto beaches.
There are toilet facilities, a food truck and an off-leash dog park. You’ll often see kite boarders, kayakers, stand up paddle boarders and wind surfers. There are barbeque facilities as well, just bring the charcoal.
It was the last day of our 3-country intergenerational family trip and our final day in Milan. I love nature and any chance to be near an ocean, lake, river or any body of water; I take it. In this case, the body of water was Lake Como, and it was calling. After visiting Amsterdam, Dusseldorf and spending a day in Milan, I was yearning to get away from concrete and city chaos.
I didn’t have a plan, but I knew Lake Como was reasonably close. I chose Varenna because it was a 65-minute train ride to Varenna Esino station, picturesque and not as touristy (busy) as other destinations on Lake Como.
My two boys (10 and 6) and I headed to the Milan Central station which was one stop away on the Metro from our rental apartment in Piazza Della Repubblica. The Milan Metro has several lines which can be a little confusing but with my very limited Italian, hand gesturing and helpful Milanese, we were on our way.
We arrived at the station with time to spare. We did some window shopping on the lower levels then grabbed some pizza on level two where the platforms are. After lunch, we joined the other travellers in the waiting area near Gate A where we were to board our train.
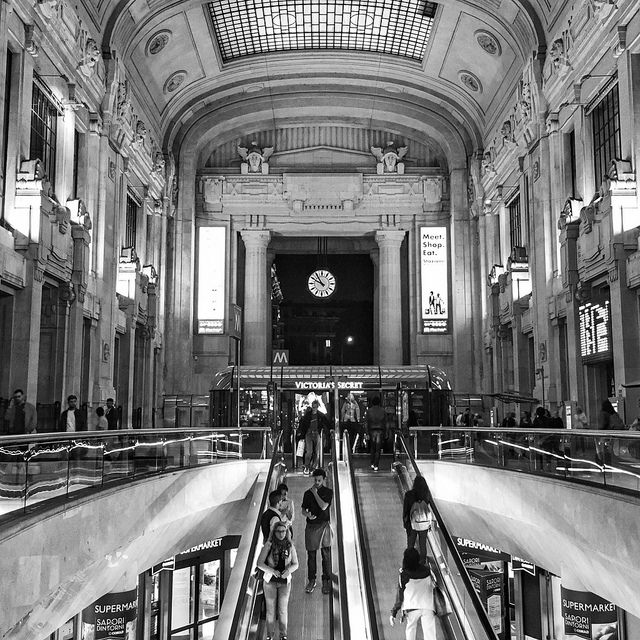
My sons at Milano Centrale
It was an easy train ride and the last twenty minutes were spectacular as the lake and mountains came into view. We took a taxi to Piazza San Giorgio, the main square, as I didn’t know how far of a walk it would be. It turns out it’s a quick 4-5 minute taxi ride and a flat rate of ten euros to get there.
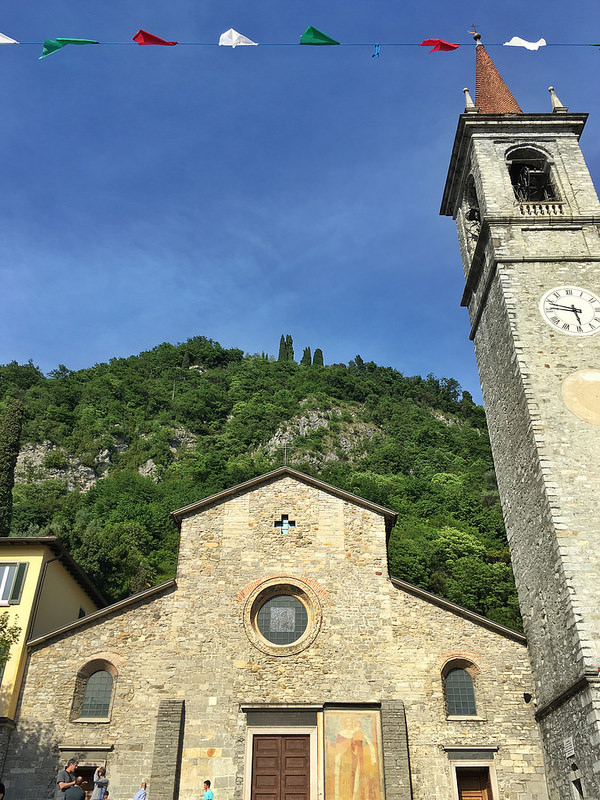
The first thing you notice upon arrival is the stone church and tower on your left, the Church of San Giorgio, consecrated in 1313. The bells chimed just after we arrived and again as we got back to the Piazza before departing Varenna.
Church of San Giorgio in Varenna, Italy
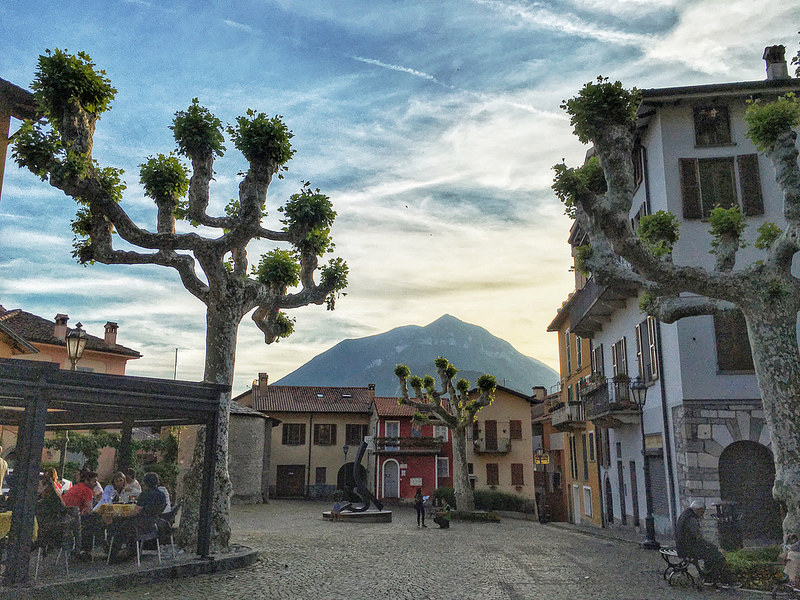
Piazza San Giorgia in Varenna, Italy.
The first glimpse of Lake Como beside Hotel Royal Victoria as you walk through the piazza.
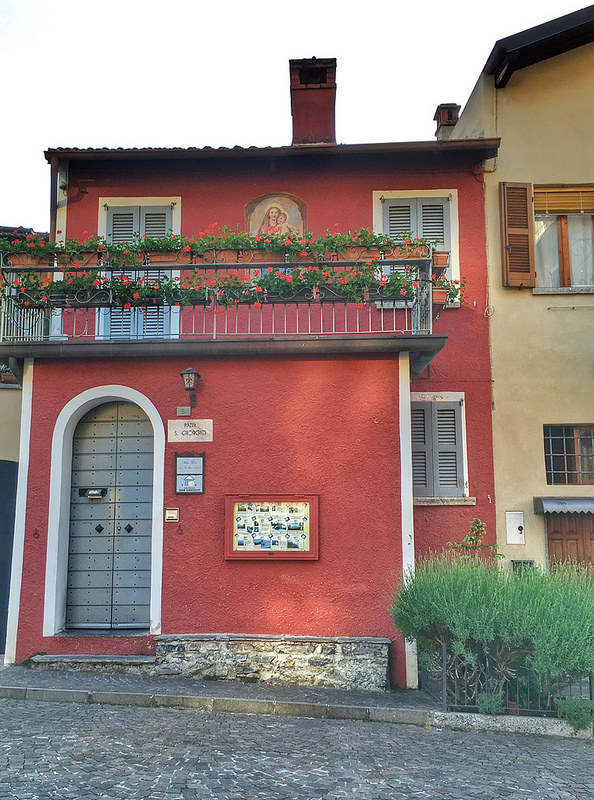
We weren’t sure which way to go to get to the waterfront, but the lane sloped downward, so we followed it. As we walked away from the church, there was a red house straight ahead; the path continued right.
A house in Varenna, Italy
Then, a house with green doors and shutters next to a house with terra cotta/orange-ish coloured walls and a window with flower pots in front of us; a mailbox was on the left corner.
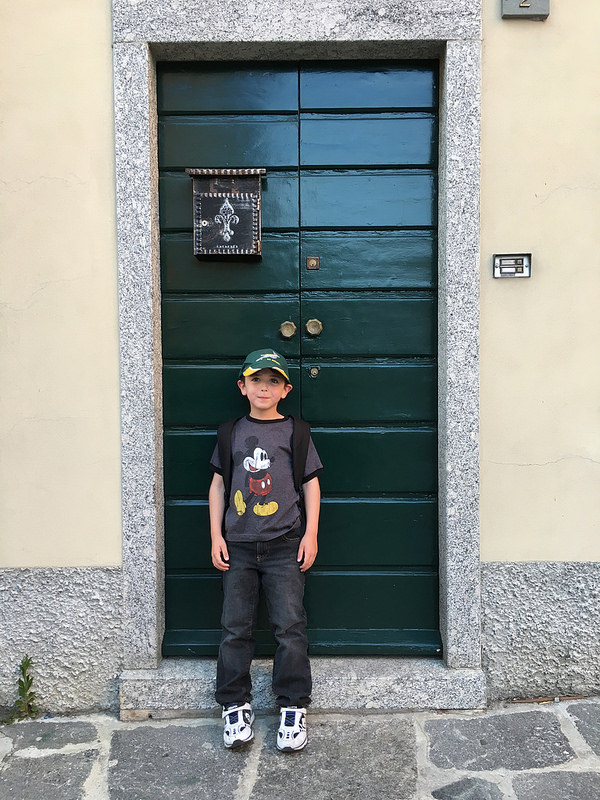
My six-year-old son in Varenna, Italy
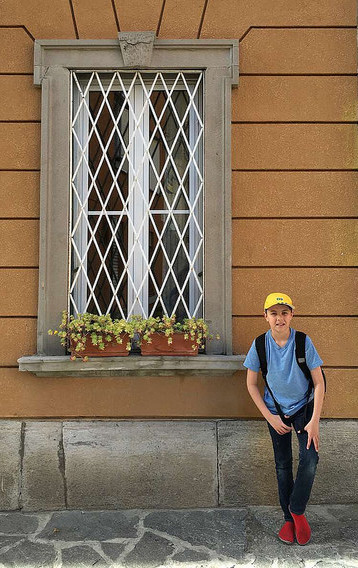
My 10-year-old son in Varenna, Italy (snapchat image)
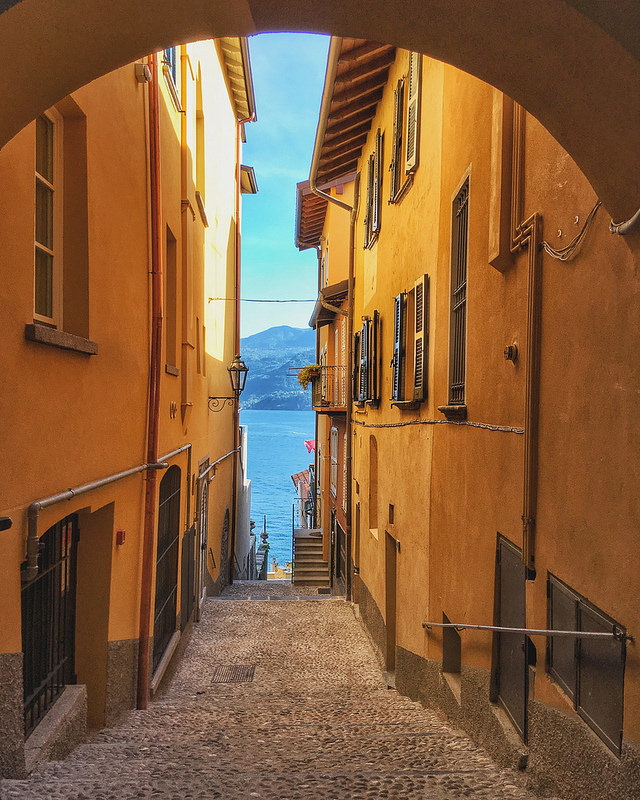
A narrow lane continued left and offered another glimpse of the water and mountains. We could either continue to walk down the continuous path or take the steep steps on the right which led down to the lake. We chose the longer way down so we could enjoy all the little details and colours along the way.
The gradual pathway down to Lake Como in Varenna, Italy
At the end of the cobblestone path, there was a restaurant on the right with a choice to go left or right; we went right. As we continued, there was a small outdoor patio with a view of the lake on the left and then another and another. There were restaurants and more seating across the pathway on the right. We passed the restaurants in search of a gelateria.
Just after we passed the restaurants there was a stone ‘beach’, children were laughing and playing in the lake, and anchored boats were in the harbour. There were benches with views of the lake and mountains with the Alps in the distance behind them. Shops, galleries and gelaterias were also to be found. There was a pier with a water taxi service which also offered tours around the lake. Signs pointed to the ferry boat that takes passengers to Bellagio.
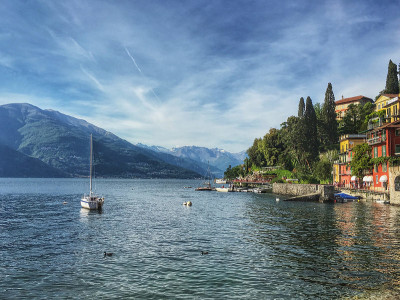
Lake Como from the waterfront promenade in Varenna, Italy
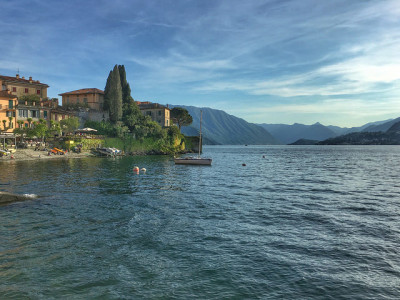
A view back to the photo above and the stone beach in Varenna, Italy
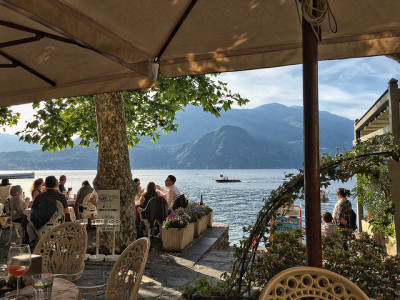
After a while, we turned back to Gelateria Riva di Riva Duilio, one of the gelato shops we had passed. My youngest son is a big fan of gelato, my oldest son, not so much. We both had the mint gelato; it was so fresh, creamy and minty and we were in gelato heaven. We sat on the stone steps beside the gelateria which had seat cushions for its patrons to enjoy their gelato with a view. After our gelato, we continued walking back in the direction we originally came from and made our way to one of the waterfront restaurants, Bar Il Molo. The patio nearer to the lake was full, but we managed to snag the last table across the pathway.
Lakeside patio views from Bar Il Molo in Varenna, Italy.
We were enjoying our time in Varenna so we opted for one of the latest trains back to Milano Centrale, one that got us back to Milan just after 9:30 pm. We had a minor blip on our trip back as we ended up on a train going in the wrong direction. No big deal I thought, we’ll just get off at the next stop. Luckily it was only a few minutes away; we were about 6-7 minutes ahead of our schedule, and the right train was delayed for ten minutes.
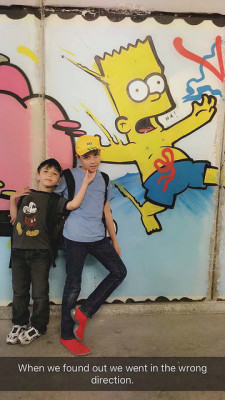
Note: If you’re at Varenna Esino train station and are going to Milan, take the stairs to the lower level and go through a short tunnel under the tracks to get to the other side. ‘Getting lost made for an adventure and thanks to helpful people that pointed us in the right direction. There is some street art in the tunnel, mostly The Simpsons.
Street art in the tunnel at Varenna Esino station. (Snapchat image).
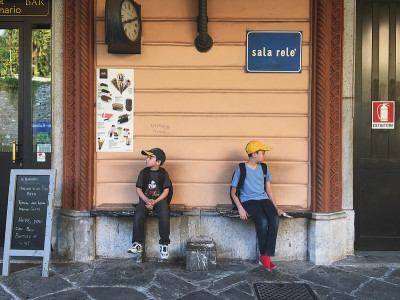
Waiting for the train to Milano Centrale at the Varenna Esino station in Italy
It was an uneventful ride back to Milan and a short trip back to our apartment. It was the perfect day trip with my two sons. They loved both Varenna and Milan, though I think it was the pizza and gelato that sealed the deal.