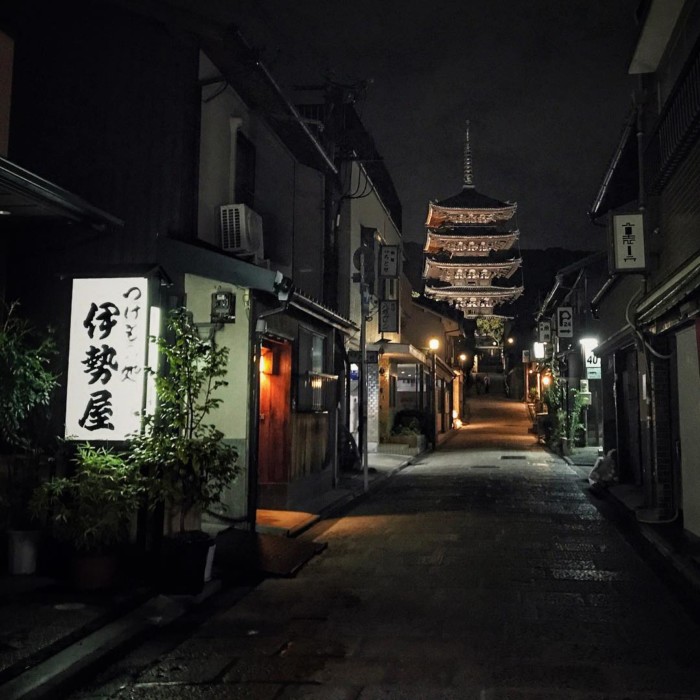
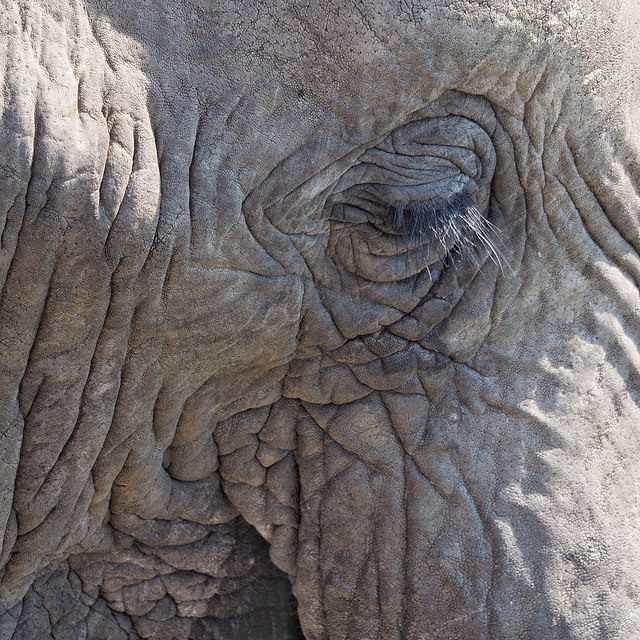
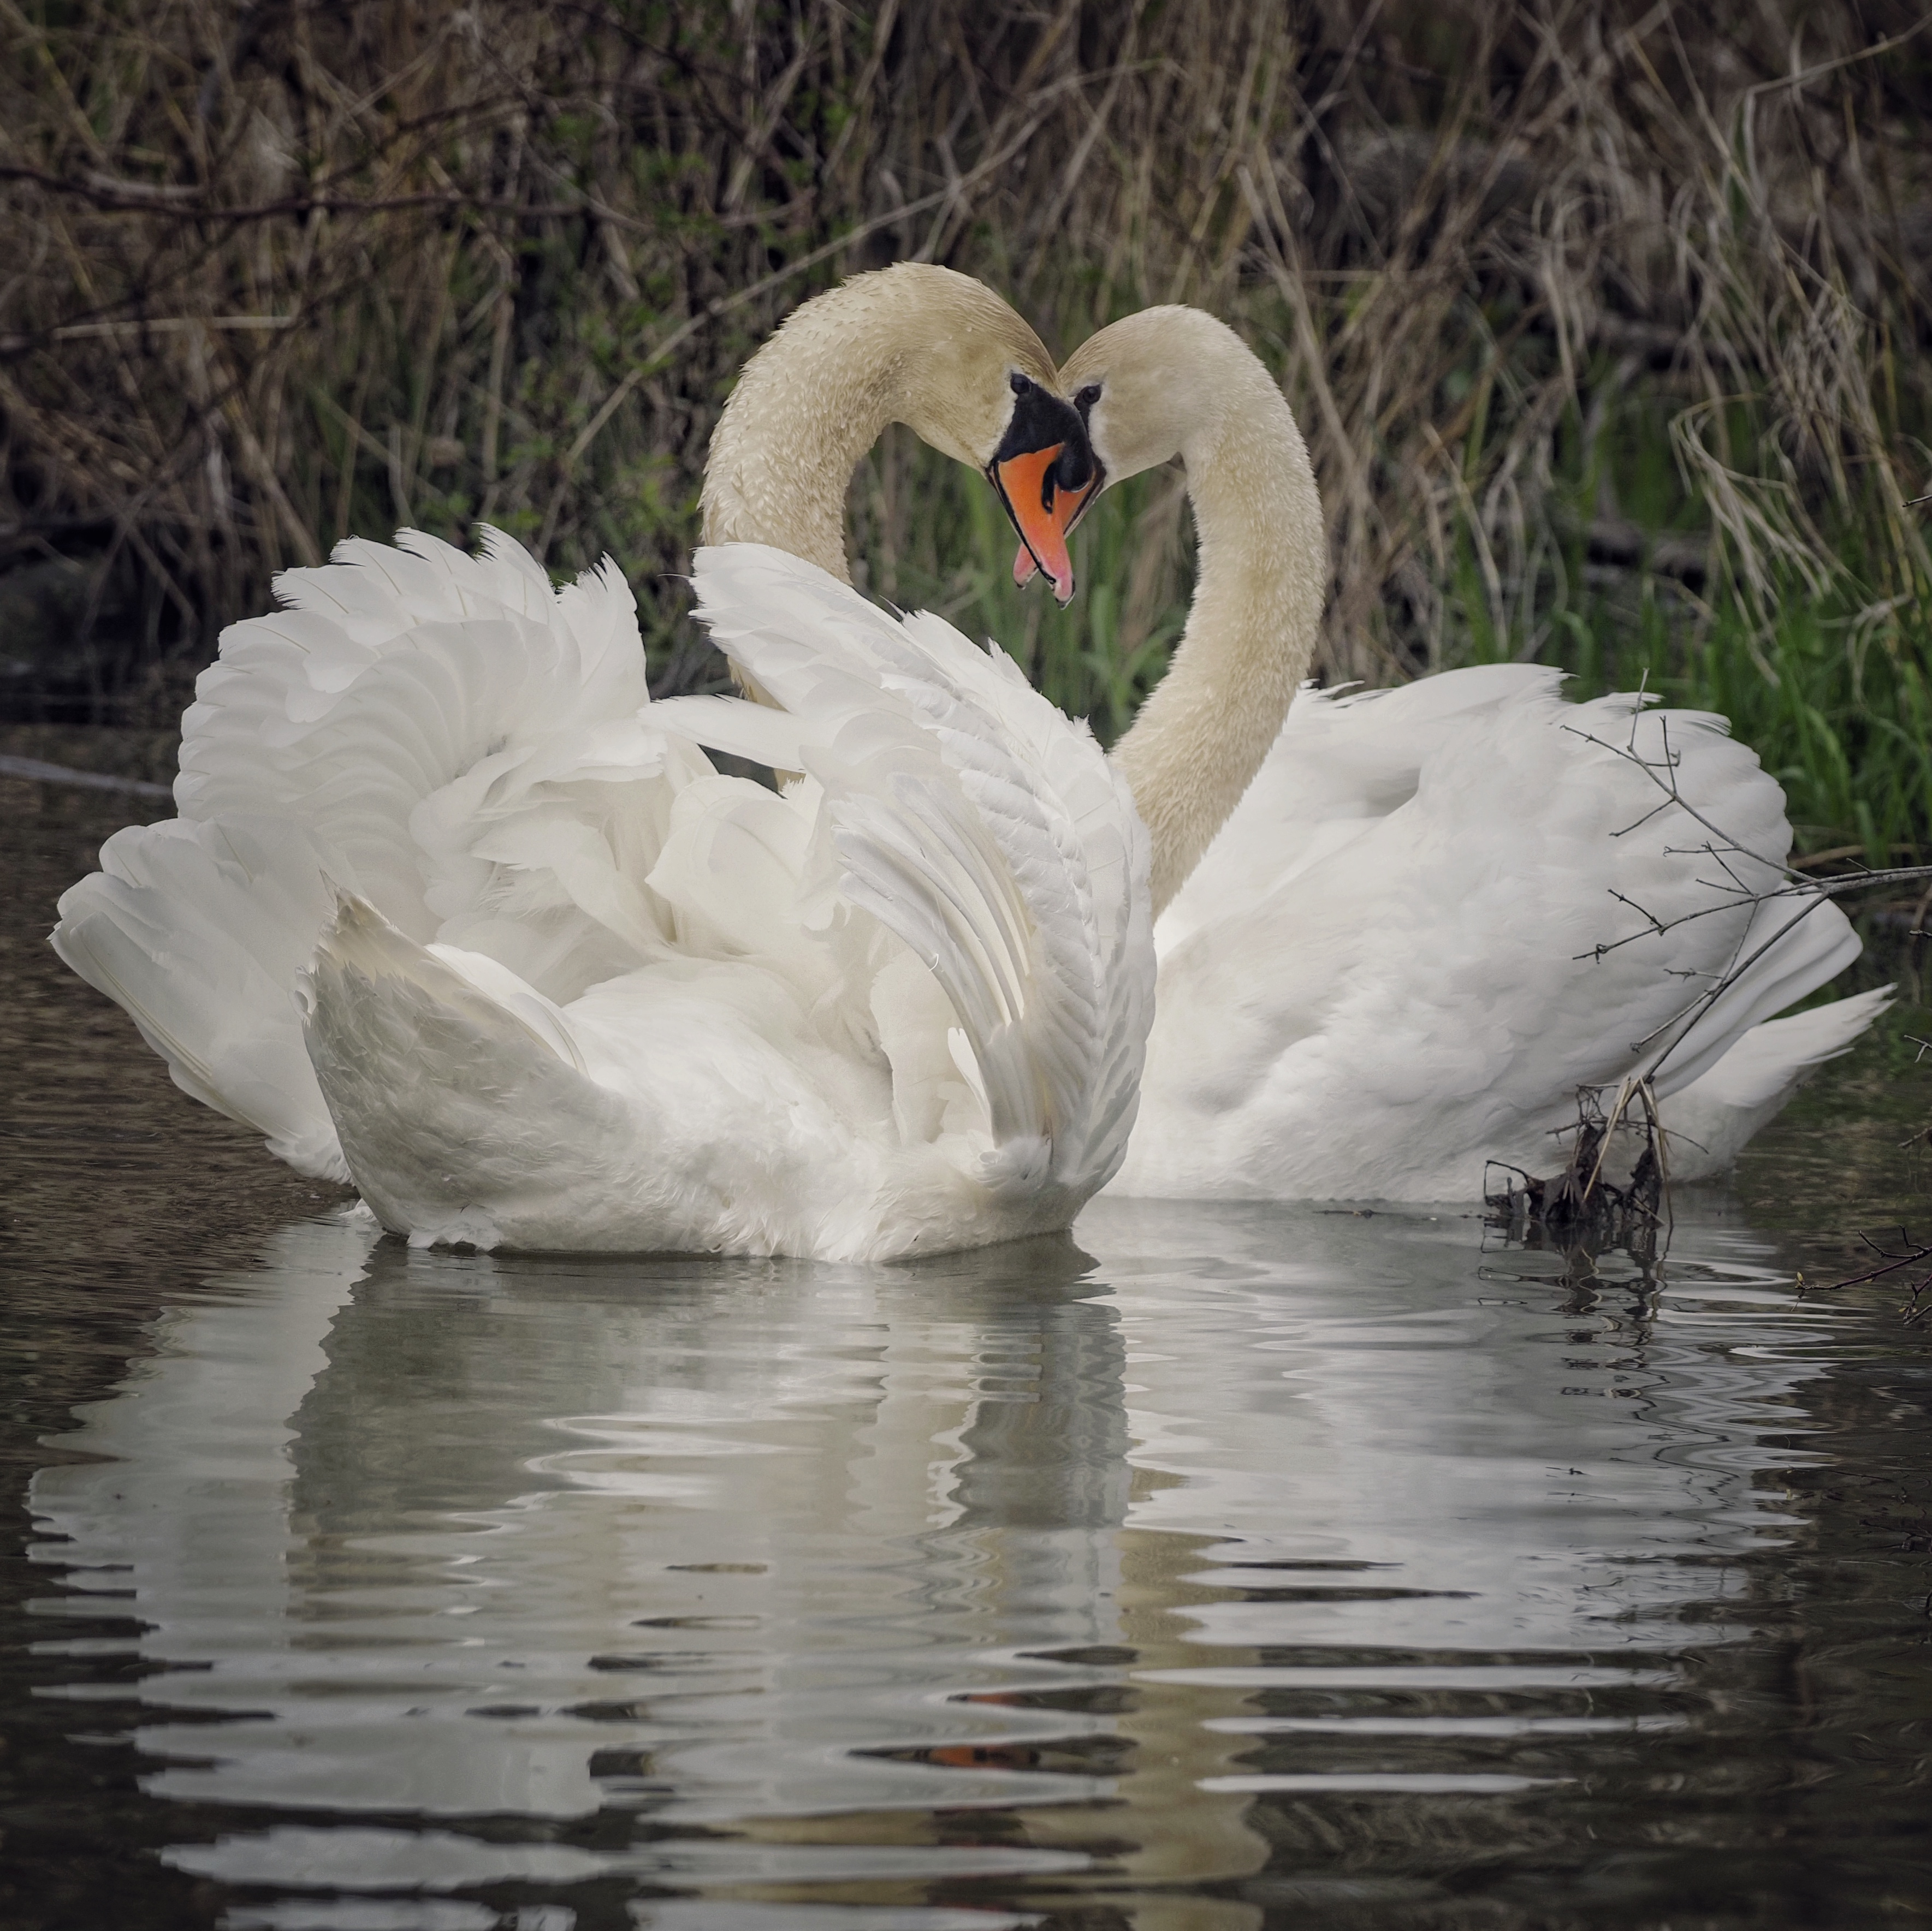
Do you ever wonder why some mobile photography portraits look professional? I’ll let you in on a little secret — it’s the lighting. Learn mobile photography lighting to create professional-looking high-quality mobile photography portraits.
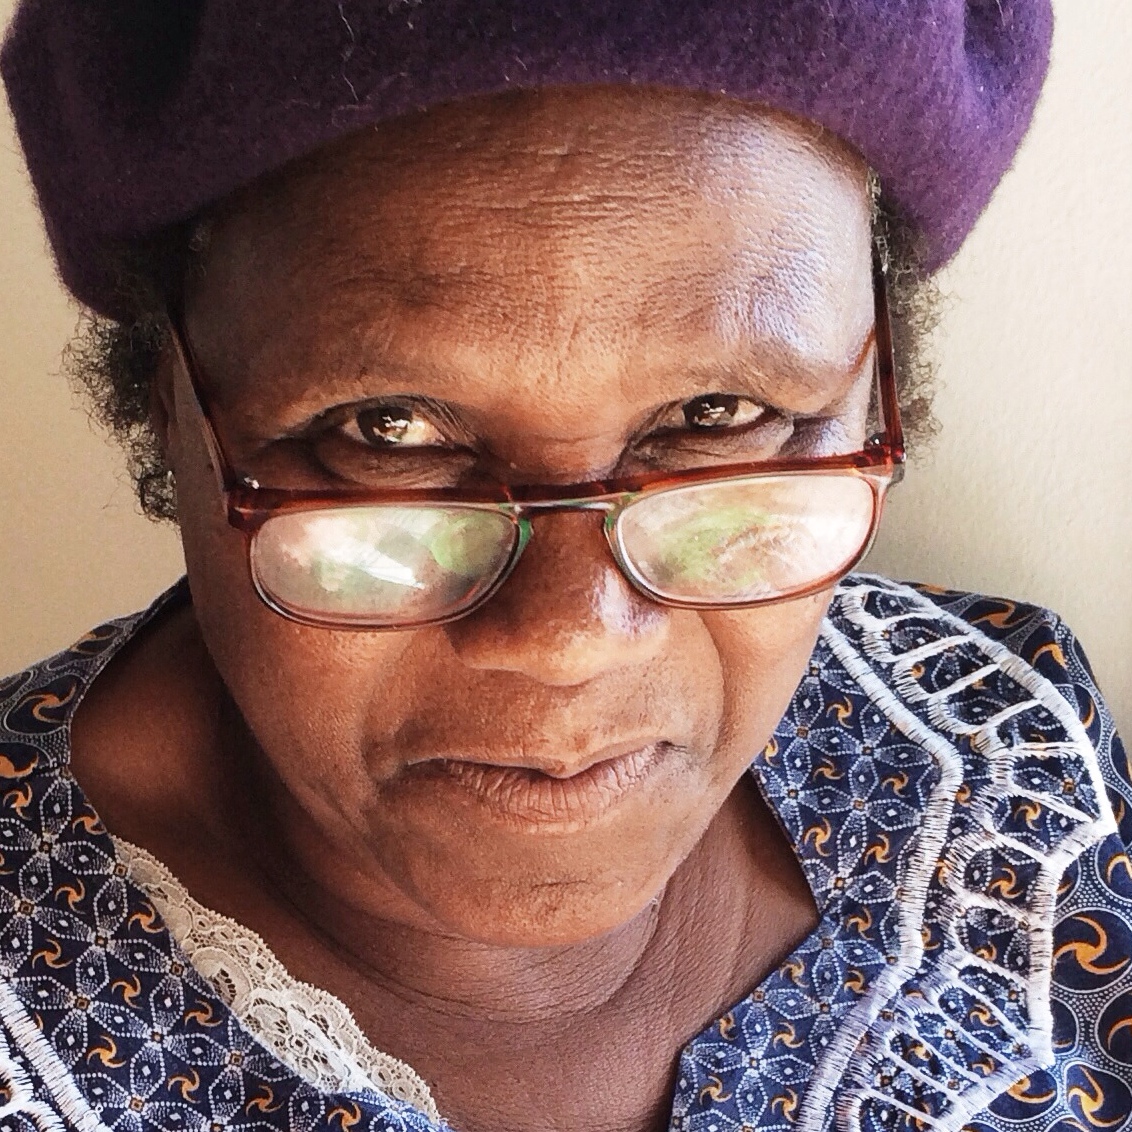
A portrait taken with a smartphone camera using open shade lighting.
Lighting is a very important aspect of photography and is often overlooked. It is what makes a photo come alive and feel three dimensional. It can make or break a photo, and will often be the difference between a good photo and a bad one.
LIGHTING FOR MOBILE PHOTOGRAPHY PORTRAITS
Lighting is especially important in mobile photography because the quality of the photo will be dramatically affected by poor light. Personally, I do not like to use the flash on my iPhone as I don’t like the quality it produces. Often, the flash on the smartphone camera will produce portraits with “red-eye” as the flash on the iPhone is directional. Simply, that means that it can’t be bounced off a ceiling or wall to help make the light softer and look less harsh and flattering.
While the low light cameras on smartphones these days are getting better – like the iPhone 11 Pro, my favourite type of light for mobile photography portraits is natural light. It’s what I prefer to rely on as it is all around us, and smartphone lighting accessories are not needed.
In this article, I will discuss two types of light for mobile photographers and how it can improve the quality and look of your mobile photography portraits.
TWO TYPES OF NATURAL LIGHT FOR MOBILE PHOTOGRAPHERS
OPEN SHADE LIGHTING FOR MOBILE PHOTOGRAPHERS
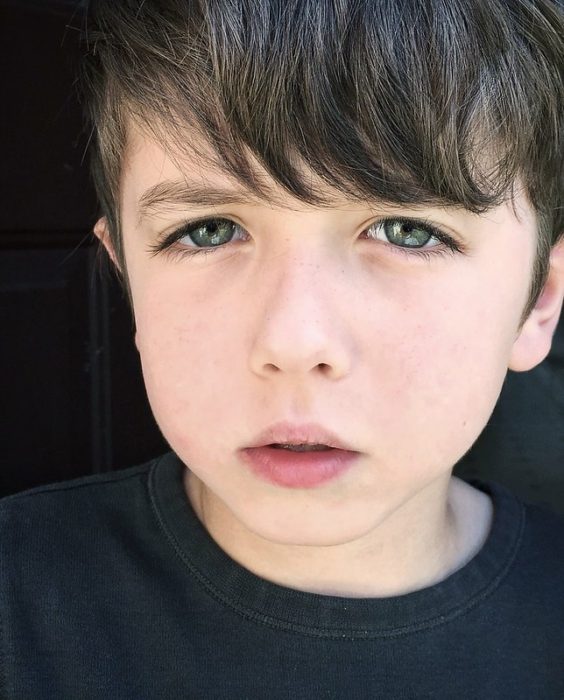
A mobile photography portrait using the light from the sky in front of the subject. This photo of my son was taken on a porch using open shade and an iPhone.
Open shade is light that is not direct and it is soft. It is easily found in the shadow of a large building, under leafy trees, on a porch, in a garage or on a cloudy day – anywhere where you are not directly in sunlight. Simply, it shields your subjects from direct sun. One way to find it is to stand on a veranda and ask your subject to turn slowly (a full 360 degrees). As you look into their eyes, watch the light change. No, this is not some scene from a romance movie, you’re looking for that little sparkle in their eyes. That sparkle is called a catchlight and is produced by the light source such as the sky or a window if you are indoors. Catchlights are the reflection of the light in the eyes and can range in size. It is the sparkle that you didn’t know you were searching for. You will notice the best light comes when your subject is facing the light source (open sky).
One note of caution, if you are under trees, the lighting can change quickly and you need to beware of dappled light. While you may be in open shade and generally protected by directional light under a tree, some dappled light could come through and affect the outcome, making the portrait less desirable.
Sometimes, the light may fall short (not reaching the subject fully) so you can position the subject to be closer to the edge of a porch, the trees etc. If your subject is wearing a hat, you may want to try and get them to look up a bit. If you’re photographing a candid photo, then you will want to wait until they look up (depending on the age of your subject). Notice the catchlights in the eyes on the portraits displayed in this article.
Open Shade from the open sky behind me, my son is on the side of a building
WINDOW LIGHT FOR MOBILE PHOTOGRAPHERS
A smartphone portrait taken with an iPhone using the natural window light.
Window light is my favourite indoor light. You can use the window the same way you’d use the open sky when outdoors. The window light should be in front of the subject and at the back of the photographer.
Another way to use window light, and for a more dramatic effect, is to have the window on one side of your subject. The side of the subject that is away from the window will be darker and thus a more dramatic and moody feel. It’s a great type of light for portraiture.
Have your subject turn slowly so you can see how the light appears in their eyes, find the catchlights. The window light will change significantly as your subject moves. You don’t need to worry about the exact angle, just look at how it falls when your subject moves and what you prefer.
If the light source is at a 90-degree angle to the subject you will find a very dramatic look, at a 45-degree angle you will find a softer feel.
MOBILE PHOTOGRAPHY LIGHTING TIPS
Pay attention to how the light falls in your home over a day or two. Natural light is constantly changing so look at it at different times of the day. That way, when the opportunity comes to catch that perfect moment, you will know how to deal with it.
As a photographer, I see the light very differently and operate intentionally. If I see the light is particularly beautiful in one area of the home or outdoors, I will wait patiently for the right moment when my subject(s) enter that area.
Hopefully, this gives you a bit more insight into two types of natural light for mobile photographers. I hope these tips will help you create fantastic portraits with your smartphone.
Caution, after reading this article and practicing with these two types of light, you may find yourself seeing catchlights everywhere.
If you’re in Toronto or visiting the area and are into nature, birding and wildlife photography, I offer a birding/nature walk + photography lesson through Airbnb experiences Toronto.
I hope these tips will help you create cherished photos of your safari. If you have any questions, please do not hesitate to contact me.
SUBSCRIBE to wanderingiPhone.com for staying in the loop – exclusive opportunities, photo tours, workshops, webinars, and subscriber discounts on mobile photography workshops, consulting and more.
What if the only camera you own is an iPhone, Samsung of Google Pixel smartphone and you want to take safari photos? You might not see a smartphone on the best camera for wildlife photography lists, but does that mean you can’t capture great wildlife photography? Does it mean you should not go on a photo safari? Absolutely not.
With these smartphone photography tips, I’ll show you how it’s possible to photograph a safari with a smartphone. You’ll come home from your African safari trip with images you love, are proud to share and want to print.
You might be thinking that great safari photography can only be achieved with bulky and heavy dedicated cameras, long lenses, f-stop this and aperture that.
I’m here to say that the best camera for your safari is the one that is with you. Please don’t miss out on one of the most incredible experiences because you don’t have what some might consider a safari camera or wildlife photography camera or worse, don’t know how to use it.
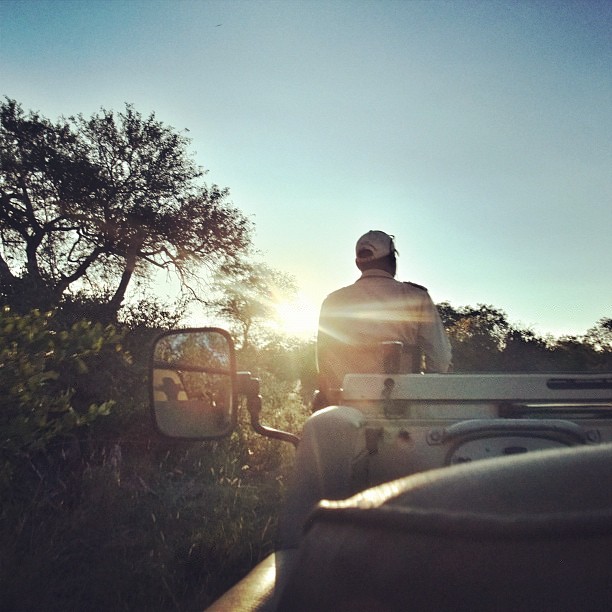
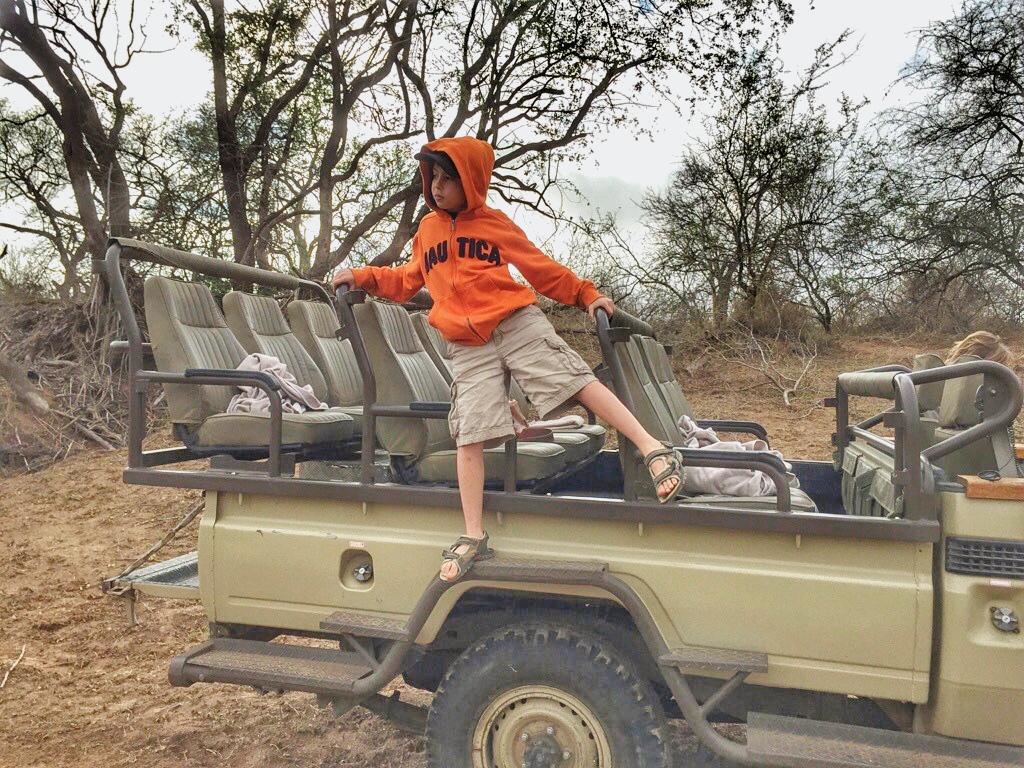
Photographing my first South African safari
On safari with Naledi Game Lodge in South Africa. Shot on iPhone 4s.
The first time I went on a safari in 2012, I photographed the wildlife, nature, and landscapes of the Greater Kruger National Park in South Africa with an iPhone 4s. True story.
As a professional portrait photographer that worked mostly in the studio back then, I didn’t have a telephoto lens for my Nikon cameras, and I didn’t want to invest thousands of dollars for a once-in-a-lifetime experience as I wasn’t a professional wildlife photographer. The photos were only for my memories. Some of those photos are featured in this article.
Although I travel with an Olympus OM-D e-m1 mark III mirrorless camera and 40-150 mm M.Zuiko 2.8 pro lens with a teleconverter on safari these days, I always, always take photos with my iPhone too. Some of my most cherished wildlife photos have been taken with my smartphone.
Tips to photograph the wildlife, landscapes, and nature with the phone in your pocket, your smartphone.
On safari with Tours de Mornay in Kruger National Park. Shot on iPhone 11 Pro Max.
ON THIS PAGE I DISCUSS: (click on the link below to jump to the topic)
First, let’s start with some things to think about before you take the shot.
Make sure the lens on the smartphone is clean. Consider carrying a small lens cleaning cloth.
Tap your finger on the screen where you want to focus to activate the yellow square for focus and exposure (iPhone). The yellow sun icon will appear, drag up and down to adjust. For Android, tap the yellow sun icon and use the slider to change. ProTip: Purchase the ProCamera app as it will allow you to separate the focus and exposure. Tap the blue square for focus and the yellow circle for exposure.
The shutter trips after you lift your finger off (white circle button on the iPhone).
Keep steady. For sharper photos, slightly tuck in your elbows or lean against something.
Keep level and watch your horizon.
Photograph horizontally for a wider scene, photograph vertically for tall buildings, trees and close portraits (headshots). These rules can be broken.
If possible, use your feet to get closer. Zoom if you have a dual-lens (2x or 3x on iPhone) smartphone or an add-on telephoto lens for your iPhone or Android phone (see below).
ProTip: Use the + (up) volume button on your iPhone (some Android phones) to trigger the shutter.
WHAT TO PHOTOGRAPHY ON SAFARI WITH A SMARTPHONE?
Go beyond the animal mug shot: Capture the Details
Remember to capture your unique, safari story. The safari lodge you choose for your South Africa safari holiday might be one of the most luxurious accommodations you’ve ever stayed at. It certainly has been the case for me.
Photograph your room and the view, the environment and all the luxurious details – the bed, the decor, the grounds, and the surrounding area.
Photograph beyond the animal mug shot, show wildlife in their habitat and surroundings. This is something that should you do whether you use an iPhone, Samsung, Google Pixel, Sony, Nikon, Canon, Fuji or Olympus camera for your wildlife photography. Focus on telling the animal’s story.
Capture the sunrises and sunsets, the landscapes, trees, flowers, insects, and silhouettes.
The natural beauty of South Africa is some of the best I’ve experienced anywhere. The Kruger National Park has one of the most diverse wildlife, landscapes, and fauna. It truly is a special park and is one of my favourite places in the entire world. For many, a safari is a once-in-a-lifetime experience, and every detail deserves to be captured.
SAFARI PHOTOGRAPHY TIPS AND THE BEST COMPOSITIONS
FRAMING
Use literal, structural, architectural or environmental elements to bring focus to your subject.
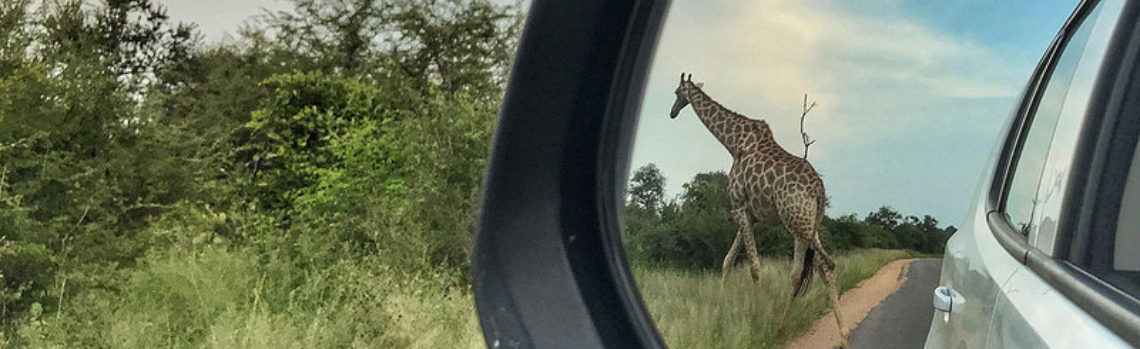
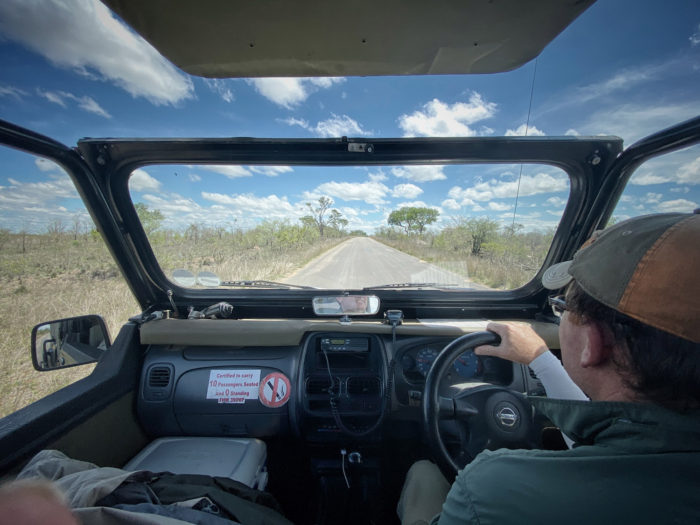
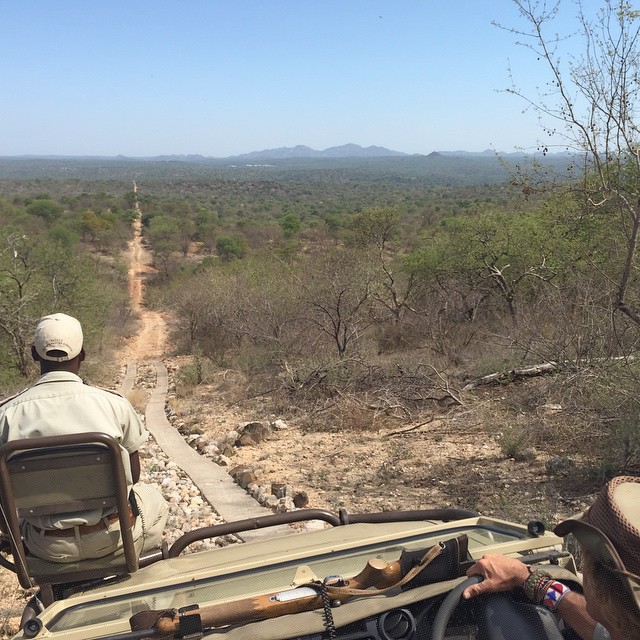
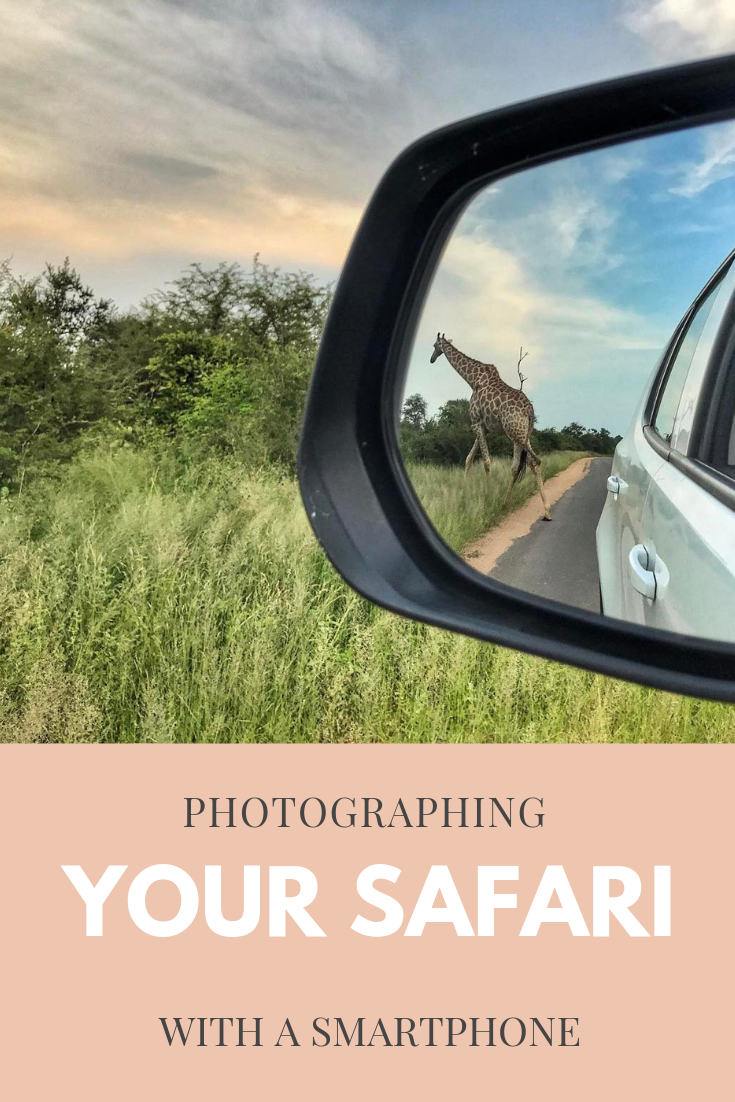
When on safari with your smartphone, think of trees, the landscape, the sky, and other animals to frame your main subject. Use the side view mirrors if you are self-driving in Kruger National Park or any other self-drive national park.
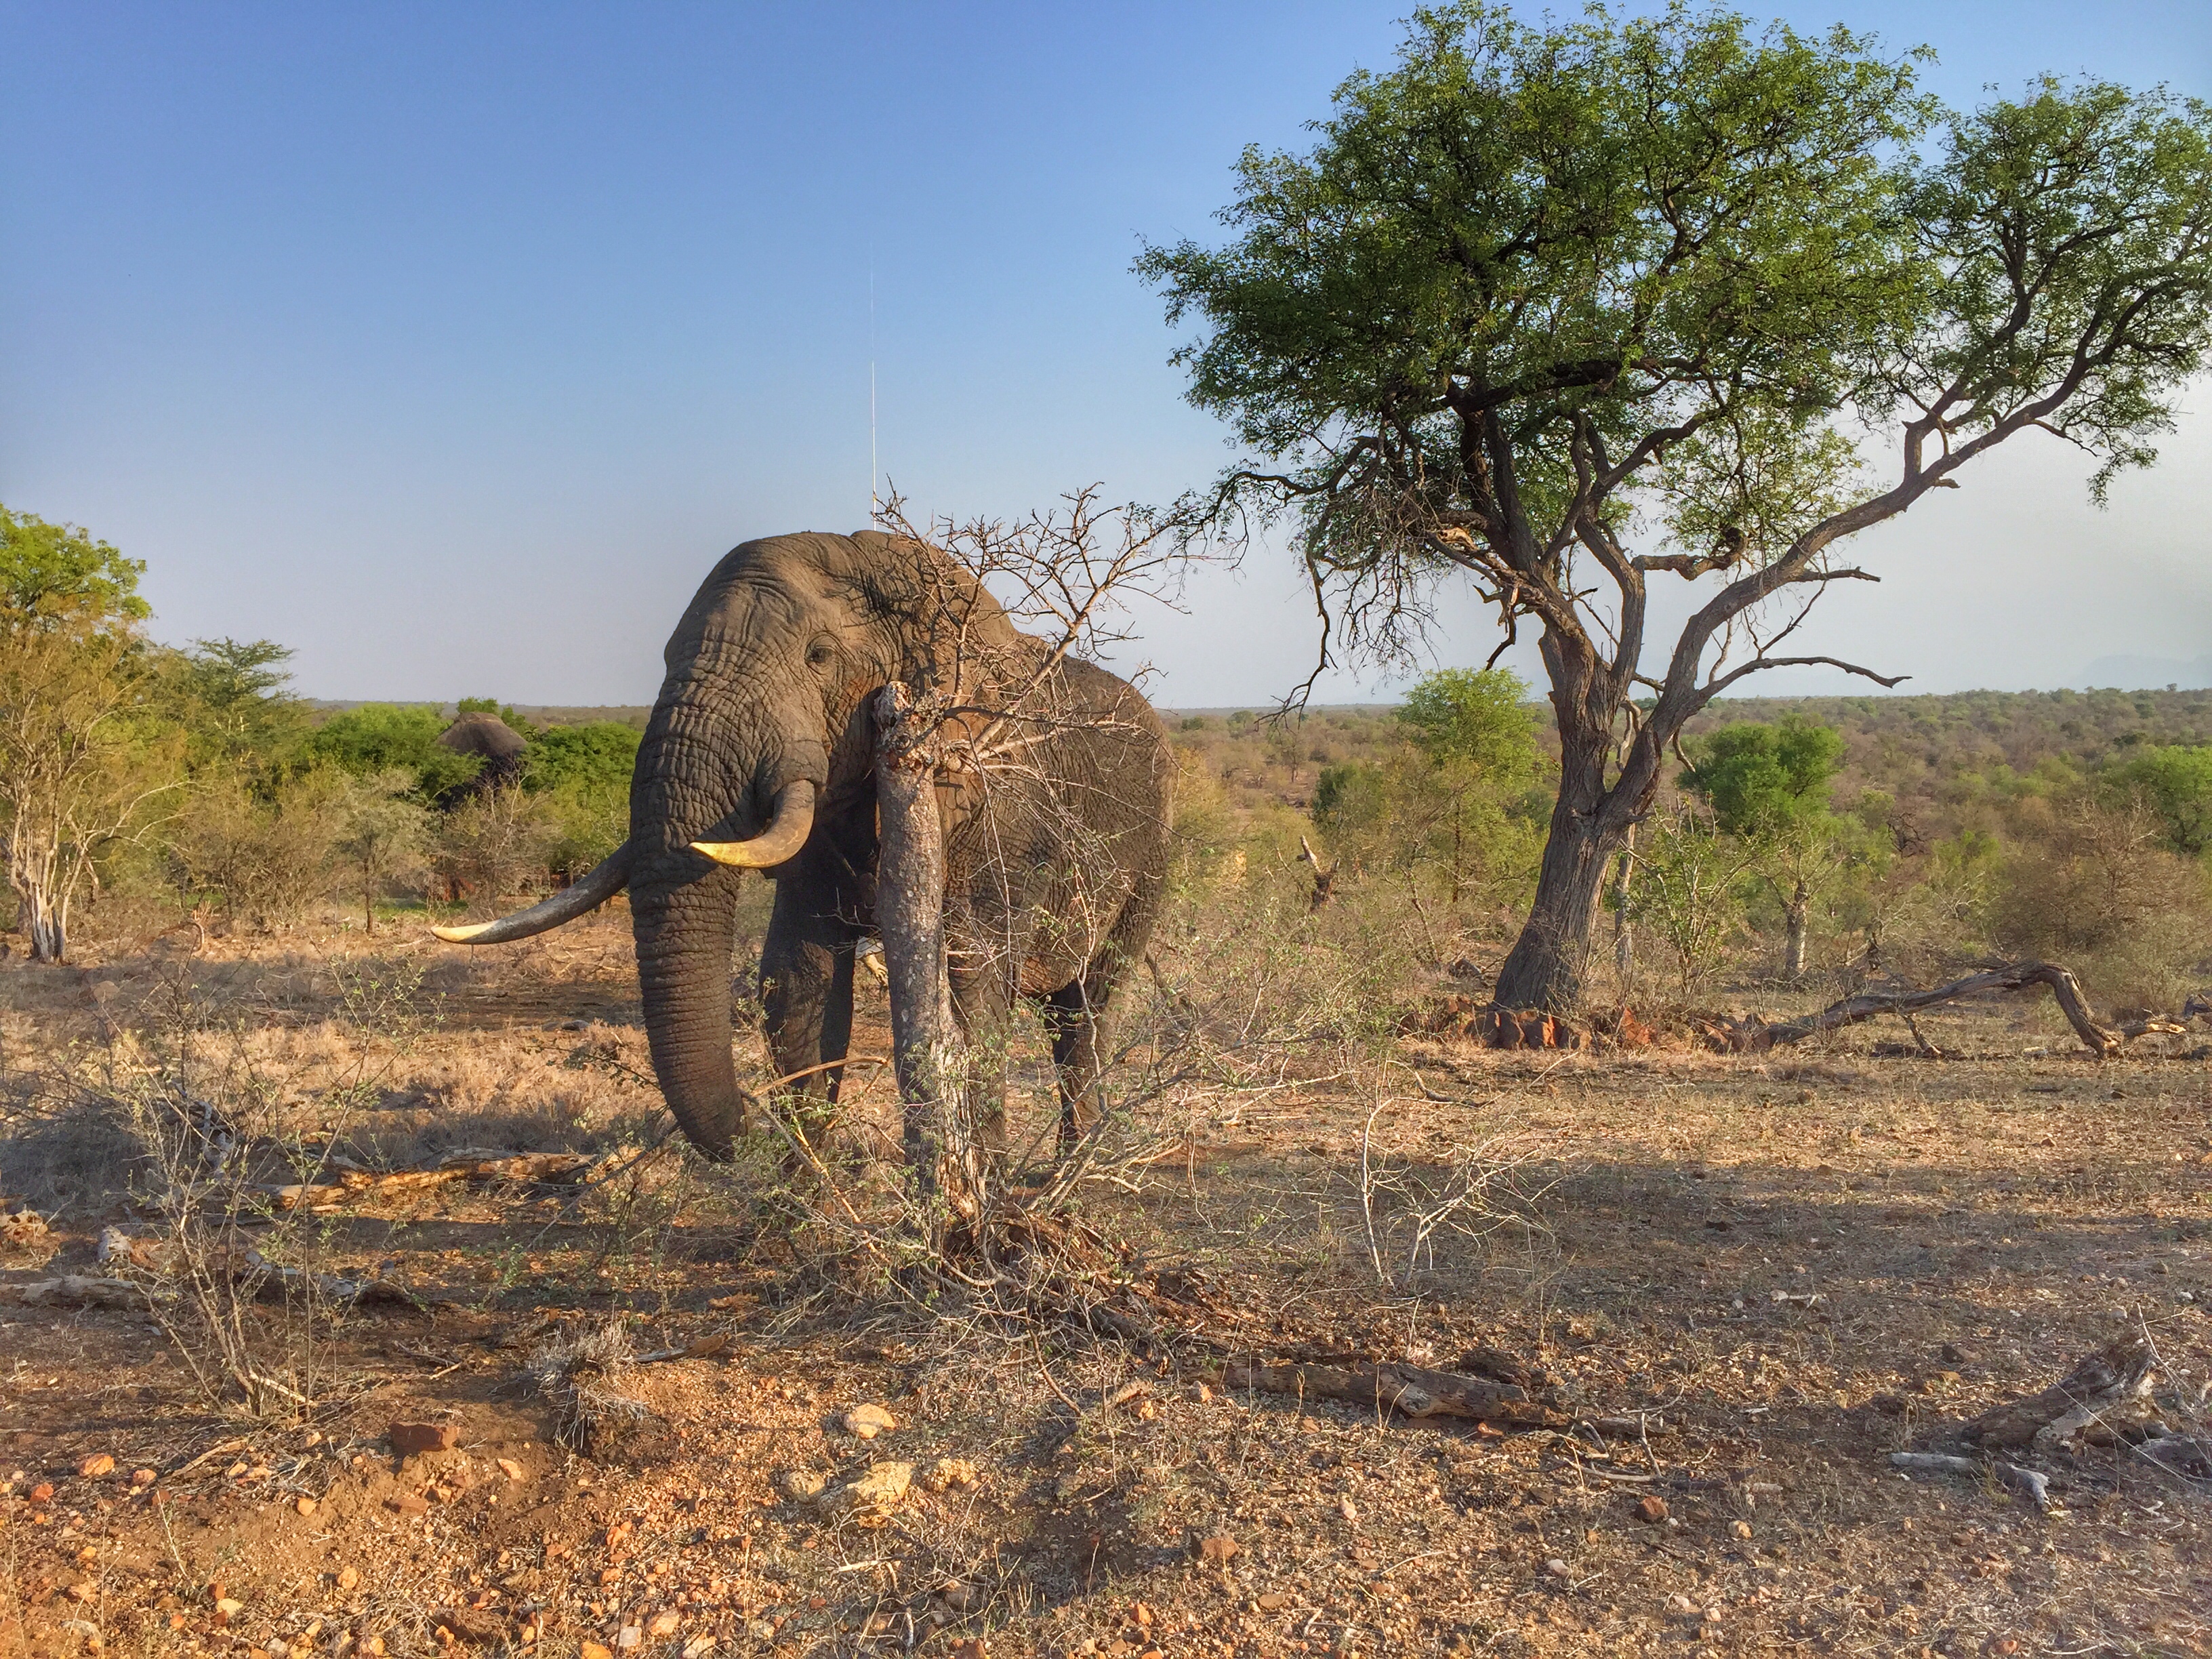
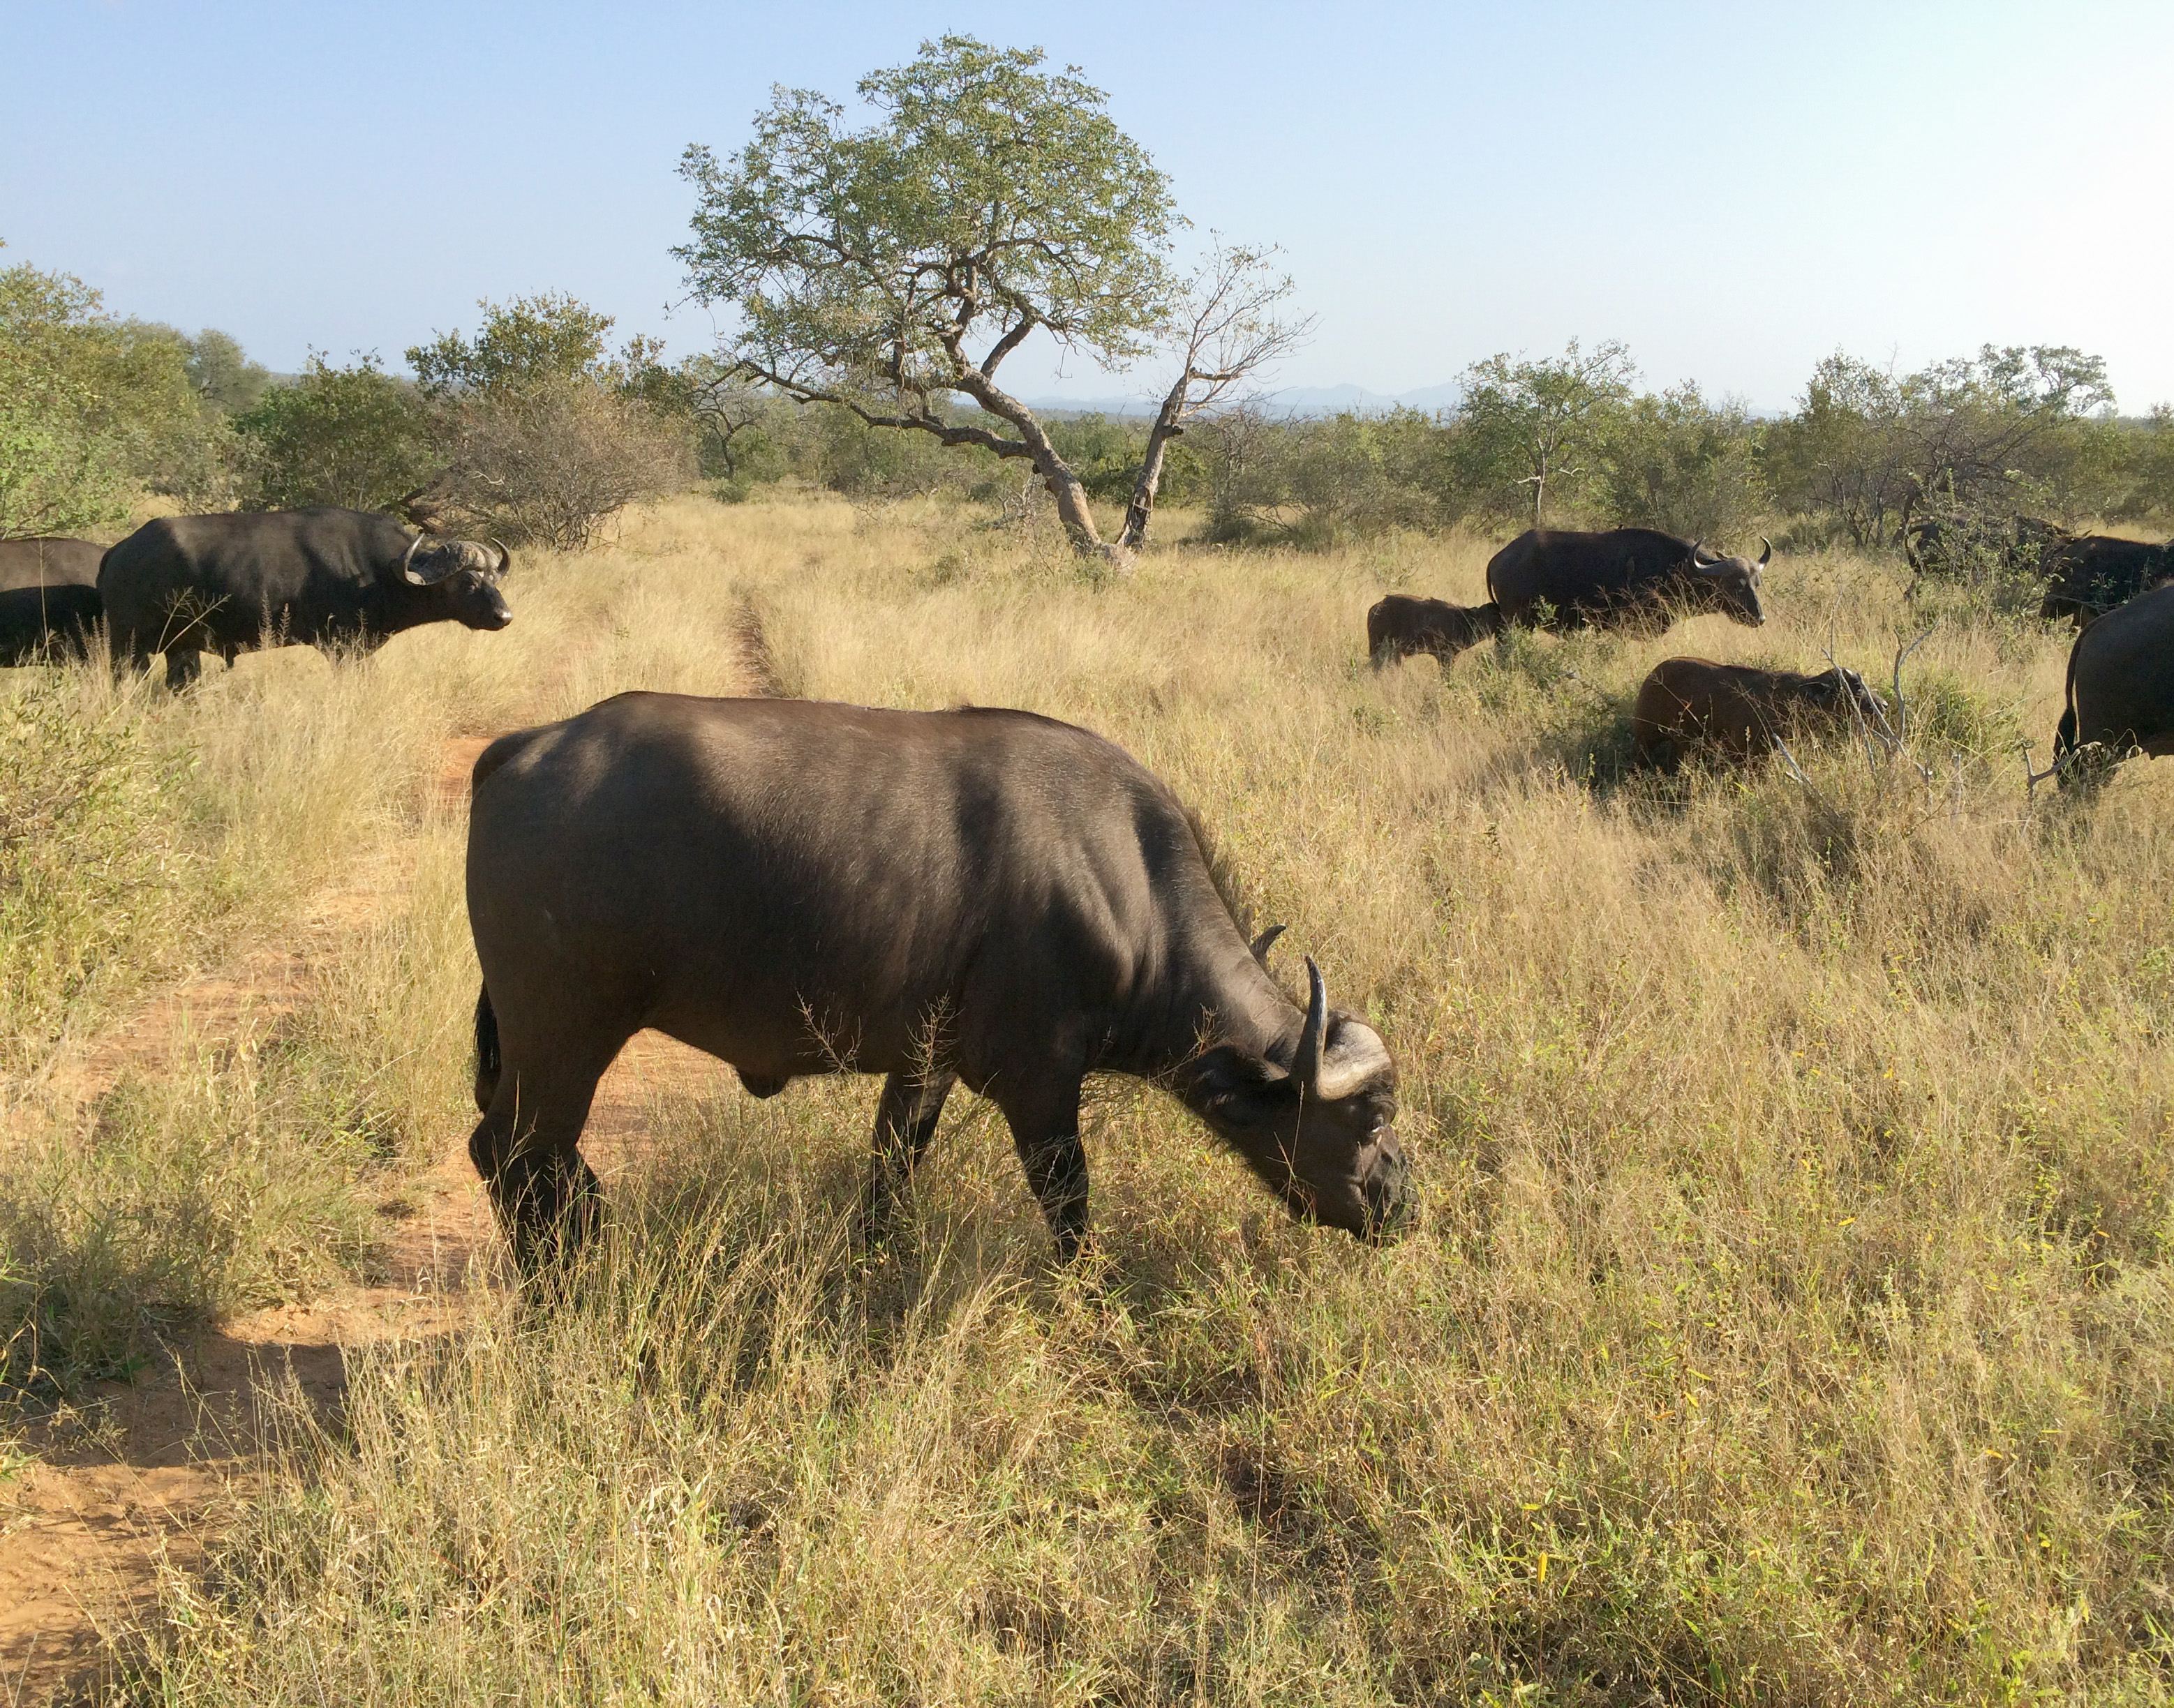
African elephant framed by the trees in Greater Kruger National Park, shot on iPhone 6s.The buffalo that surround the buffalo in the foreground help to “frame” the closest buffalo. The tree and grass also frame it. Shot on iPhone 5s.
LEADING LINES
Leading lines help to guide a viewer through a photograph. They can also direct the viewer to the subject or focal point of the image. They can be straight, diagonal, curved or suggested lines.
The line of the road leads to the tree. Shot on iPhone 5s.
RULE OF THIRDS
The rule of thirds is used to produce a balanced image. Imagine dividing this photo into 3 lines across and 3 lines down. The idea is to place the essential elements along the gridlines or at the intersections where the lines meet.
Make sure you have your grid activated on your smartphone to help you see it.
The rule of thirds works well with the idea of leaving space for the subject to look to or move into. Place the horizon along the top or bottom 1/3 for a strong compositional mobile photo.
Wild Dog on the hunt in Kruger Park was shot on iPod by my oldest son, DRH. The wild dog is along the bottom 1/3 of the photo with space to move into. If you cannot achieve the rule of thirds when photographing, think about how you could do it when you crop.Considering using multiple compositional elements in a single photo for a stronger image. The horizon is along the top 1/3 of the photo (rule of thirds). The road leads to the mountains (leading lines). The vehicle and trees frame the tracker (sitting at the front, framing). Shot on iPhone 4s.
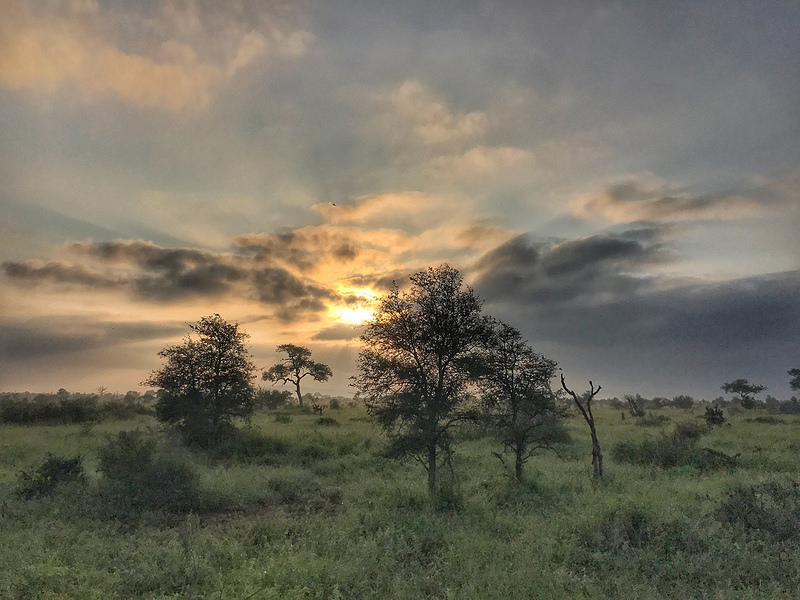
FIND THE LIGHT
Light is an essential part of photography and is often overlooked. Light can make or break an image. It can also help tell a story. Use light to create the mood and feel of your image. Pay attention to the sun and where it is in the sky. The light within an hour after sunrise or an hour before sunset is when the sun is lower in the sky and creates a beautifully soft and warm light for photography.
Natural light is fleeting and ever-changing so don’t hesitate to take that shot.
The harsh, shadow-creating light of midday can create some interesting effects. Don’t be afraid of it.
Sunrise in Kruger National Park. Shot on iPhone 7+
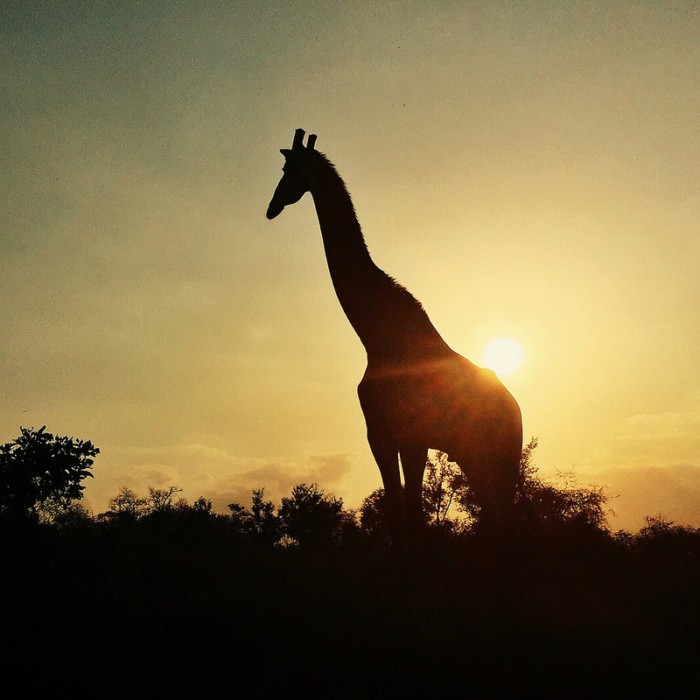
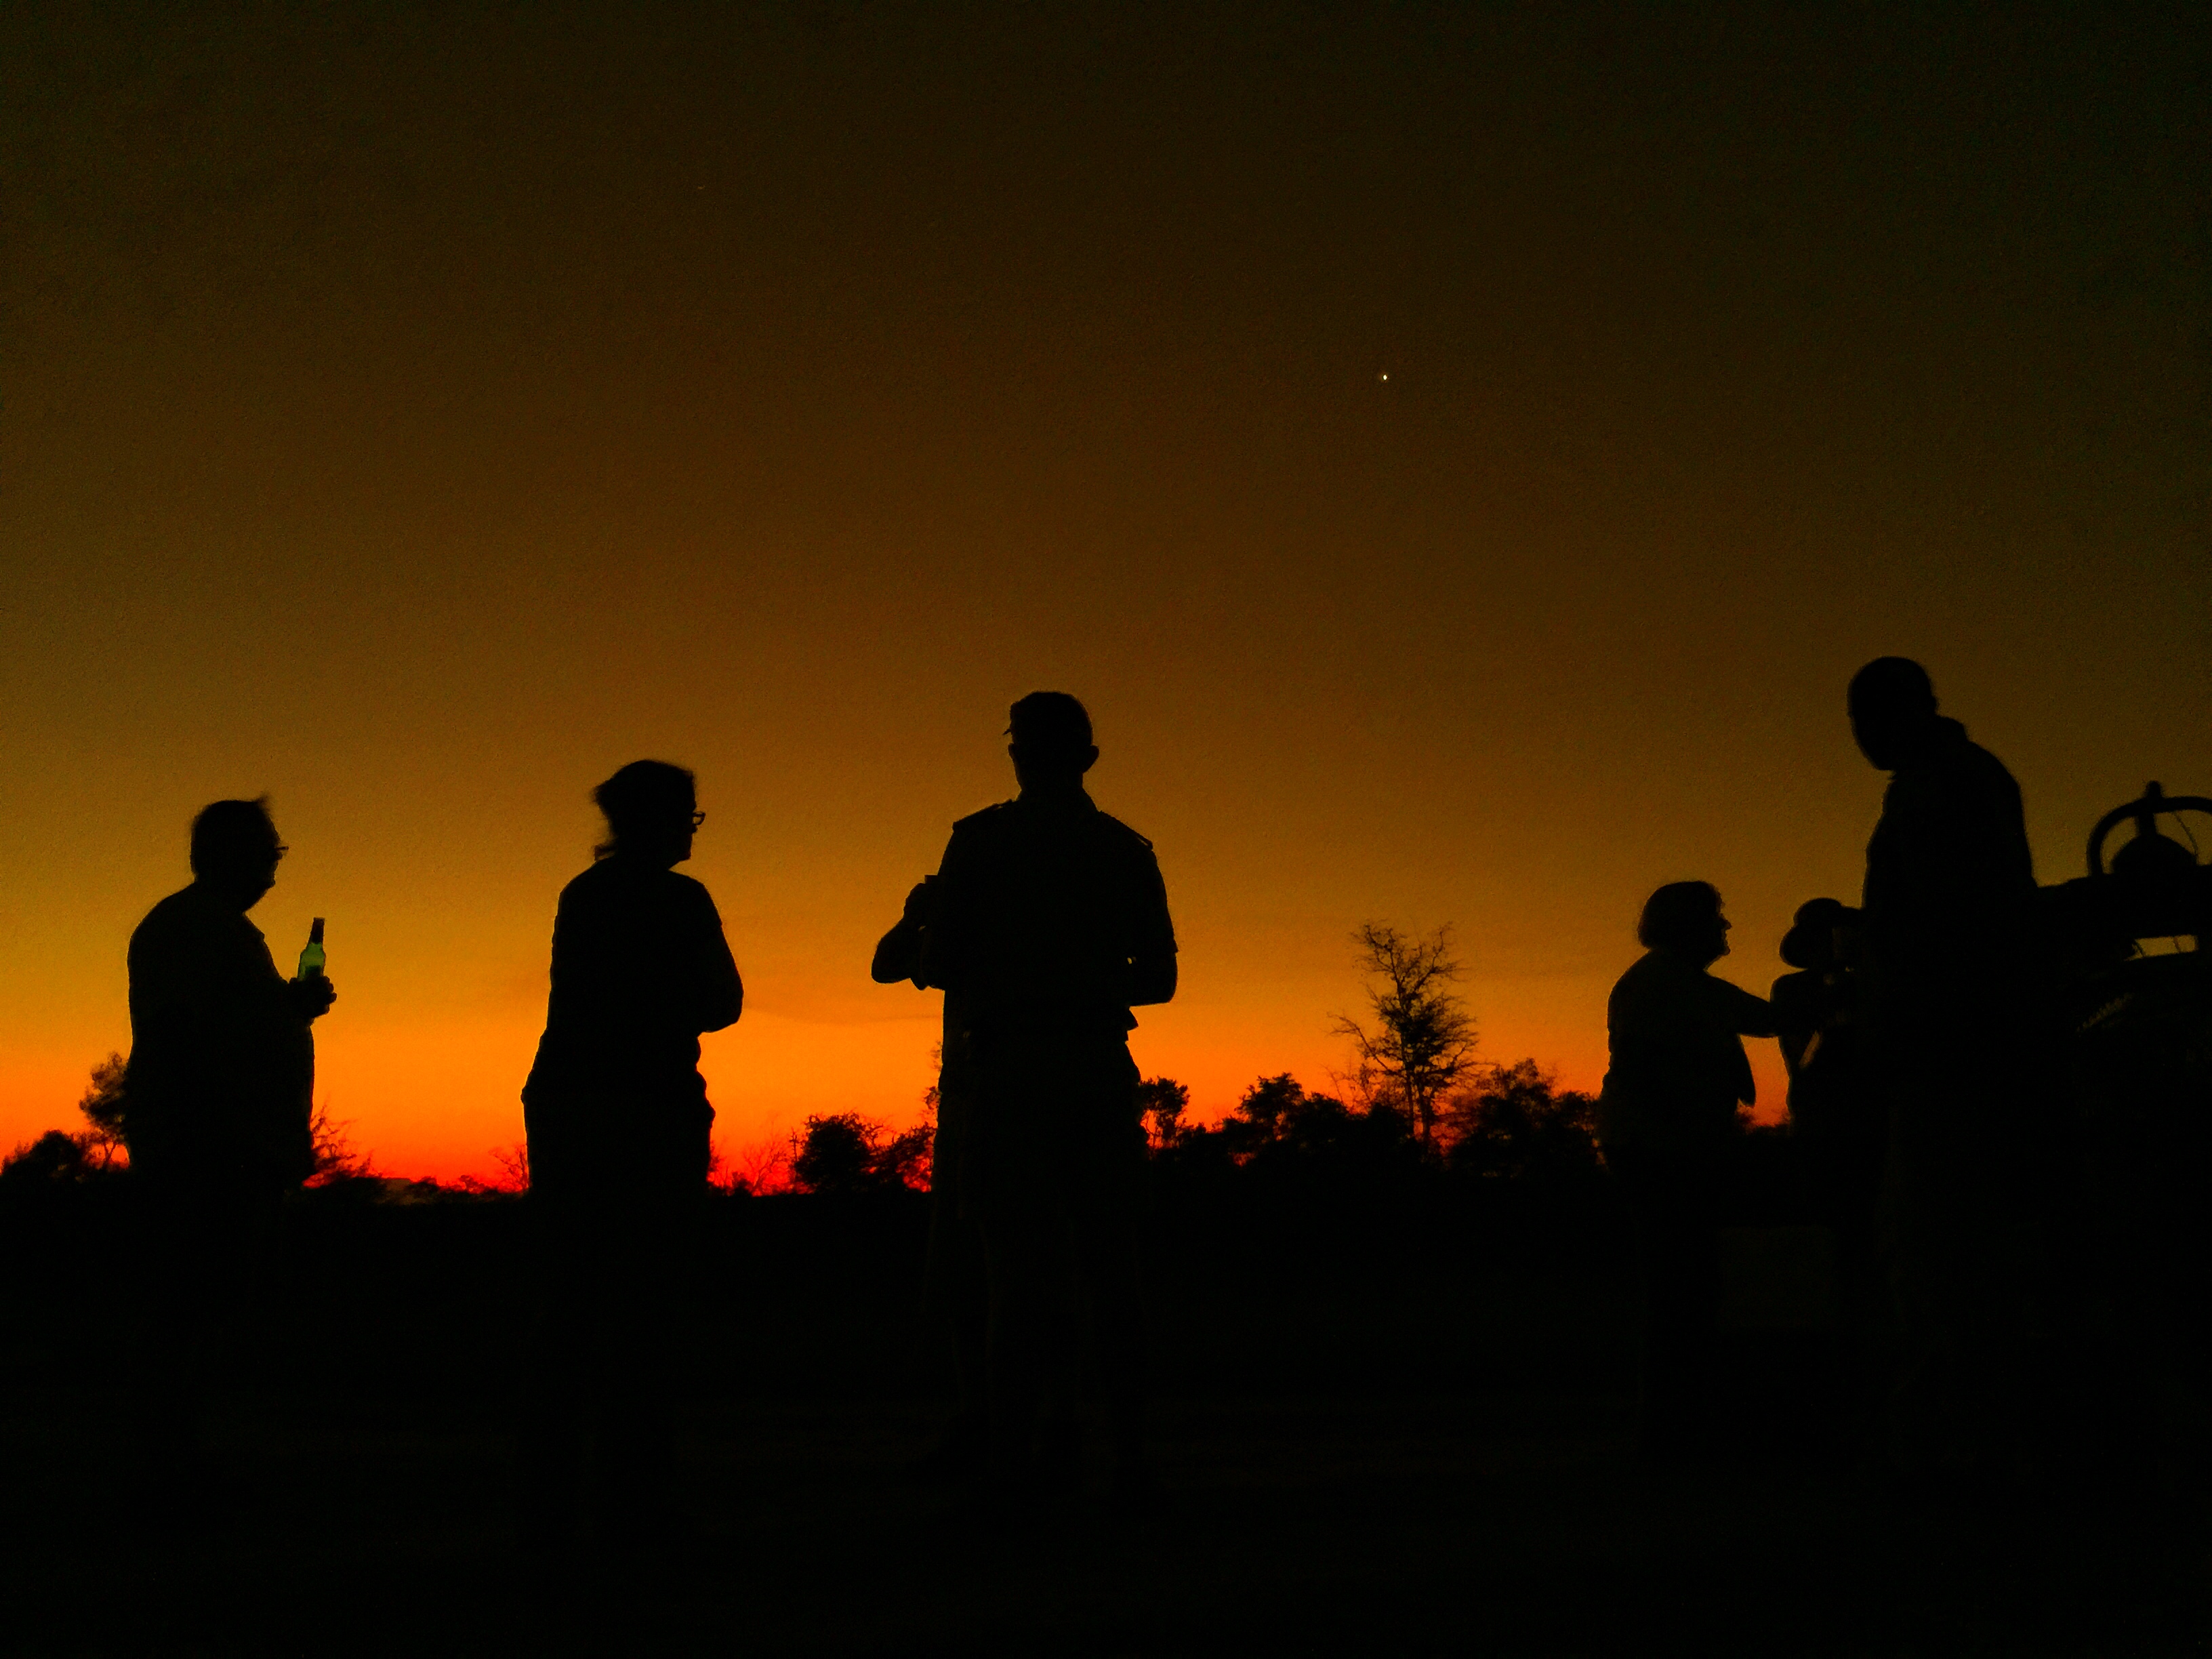
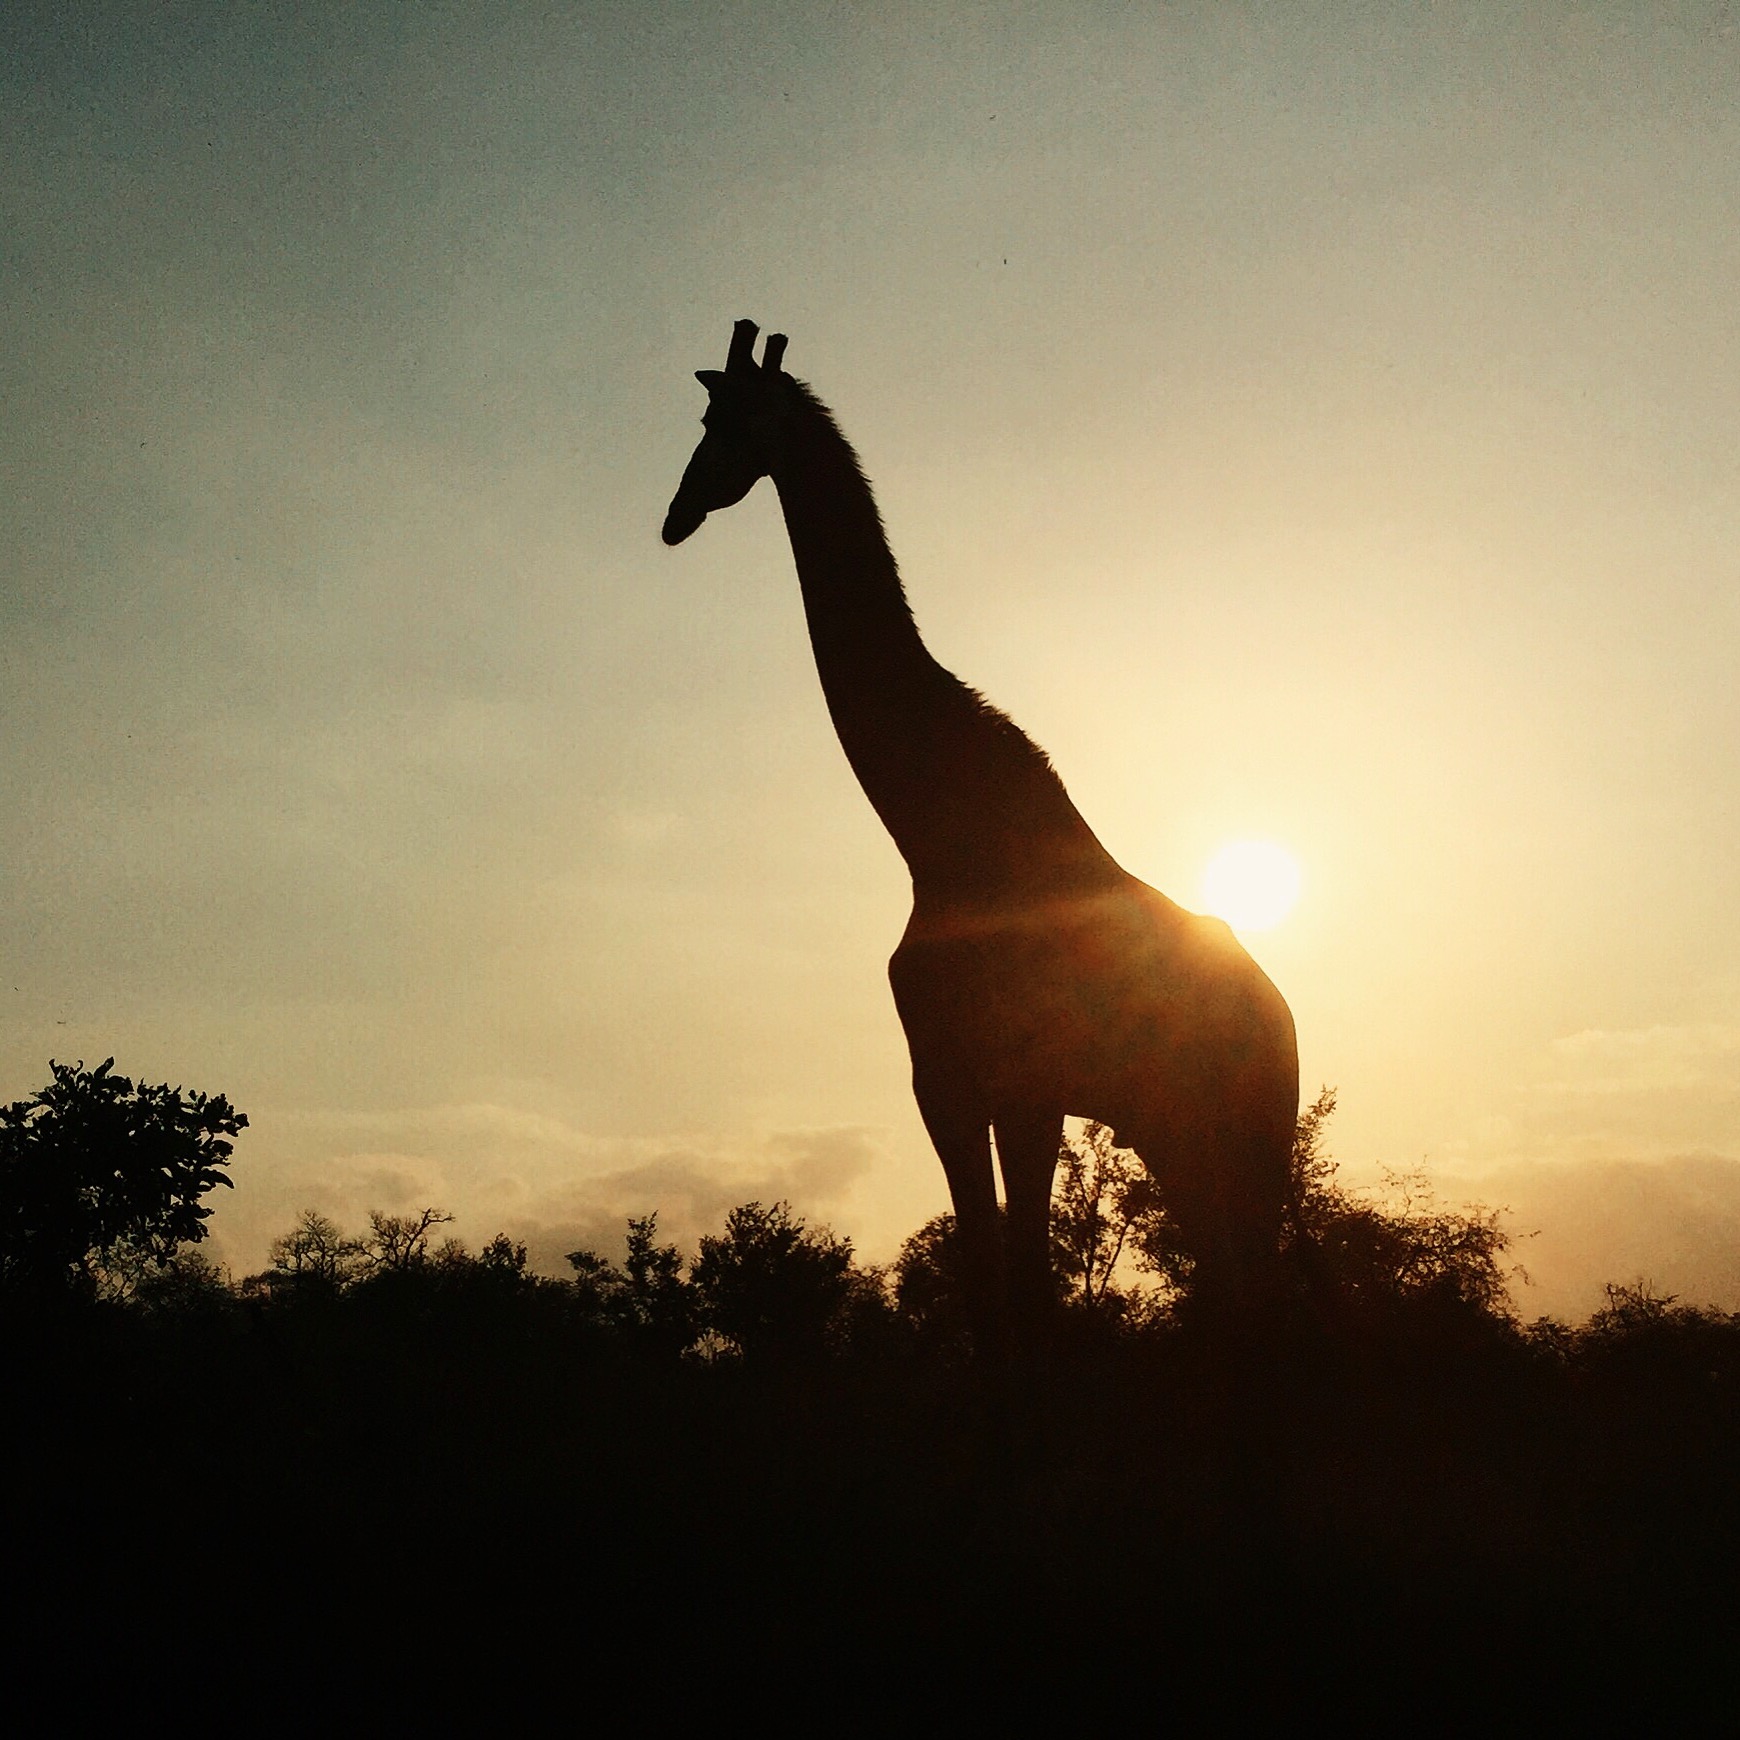
SILHOUETTES
Silhouettes are a great way to capture images when the light has faded or to create anonymity in a photo. Take advantage of the opportunity to create a silhouette image. Look for animals or trees/dead trees with the light behind them. Shoot towards the sun. You may have to get lower and point upwards to separate the subject from the horizon.
A giraffe silhouette in Kruger National Park. Shot on iPhone 6+.Sundowners in the Greater Kruger on safari with Elephant Plains. Shot on iPhone 6s.
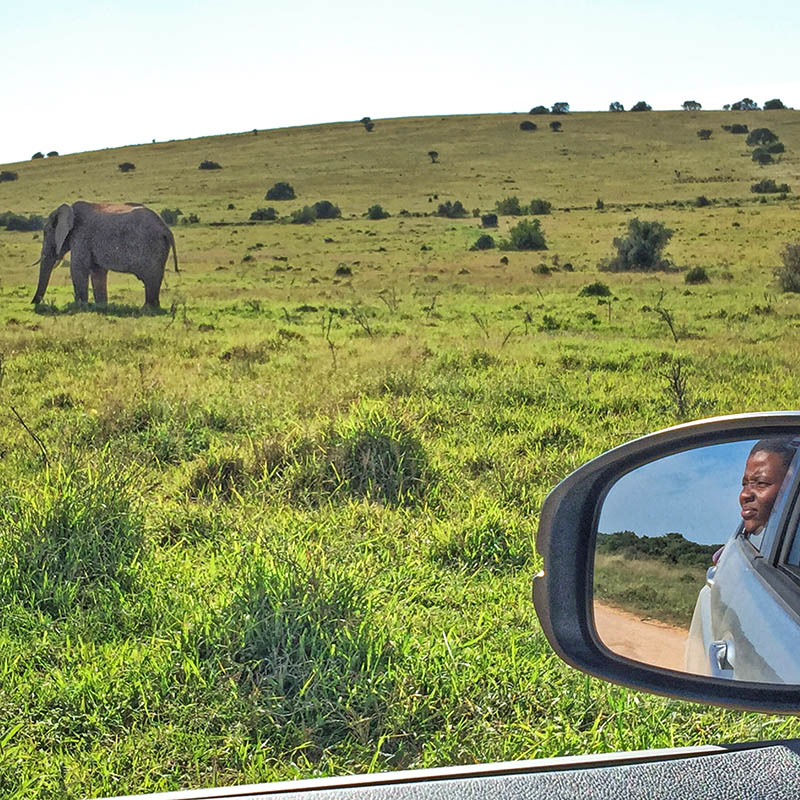
WHAT’S YOUR ANGLE?
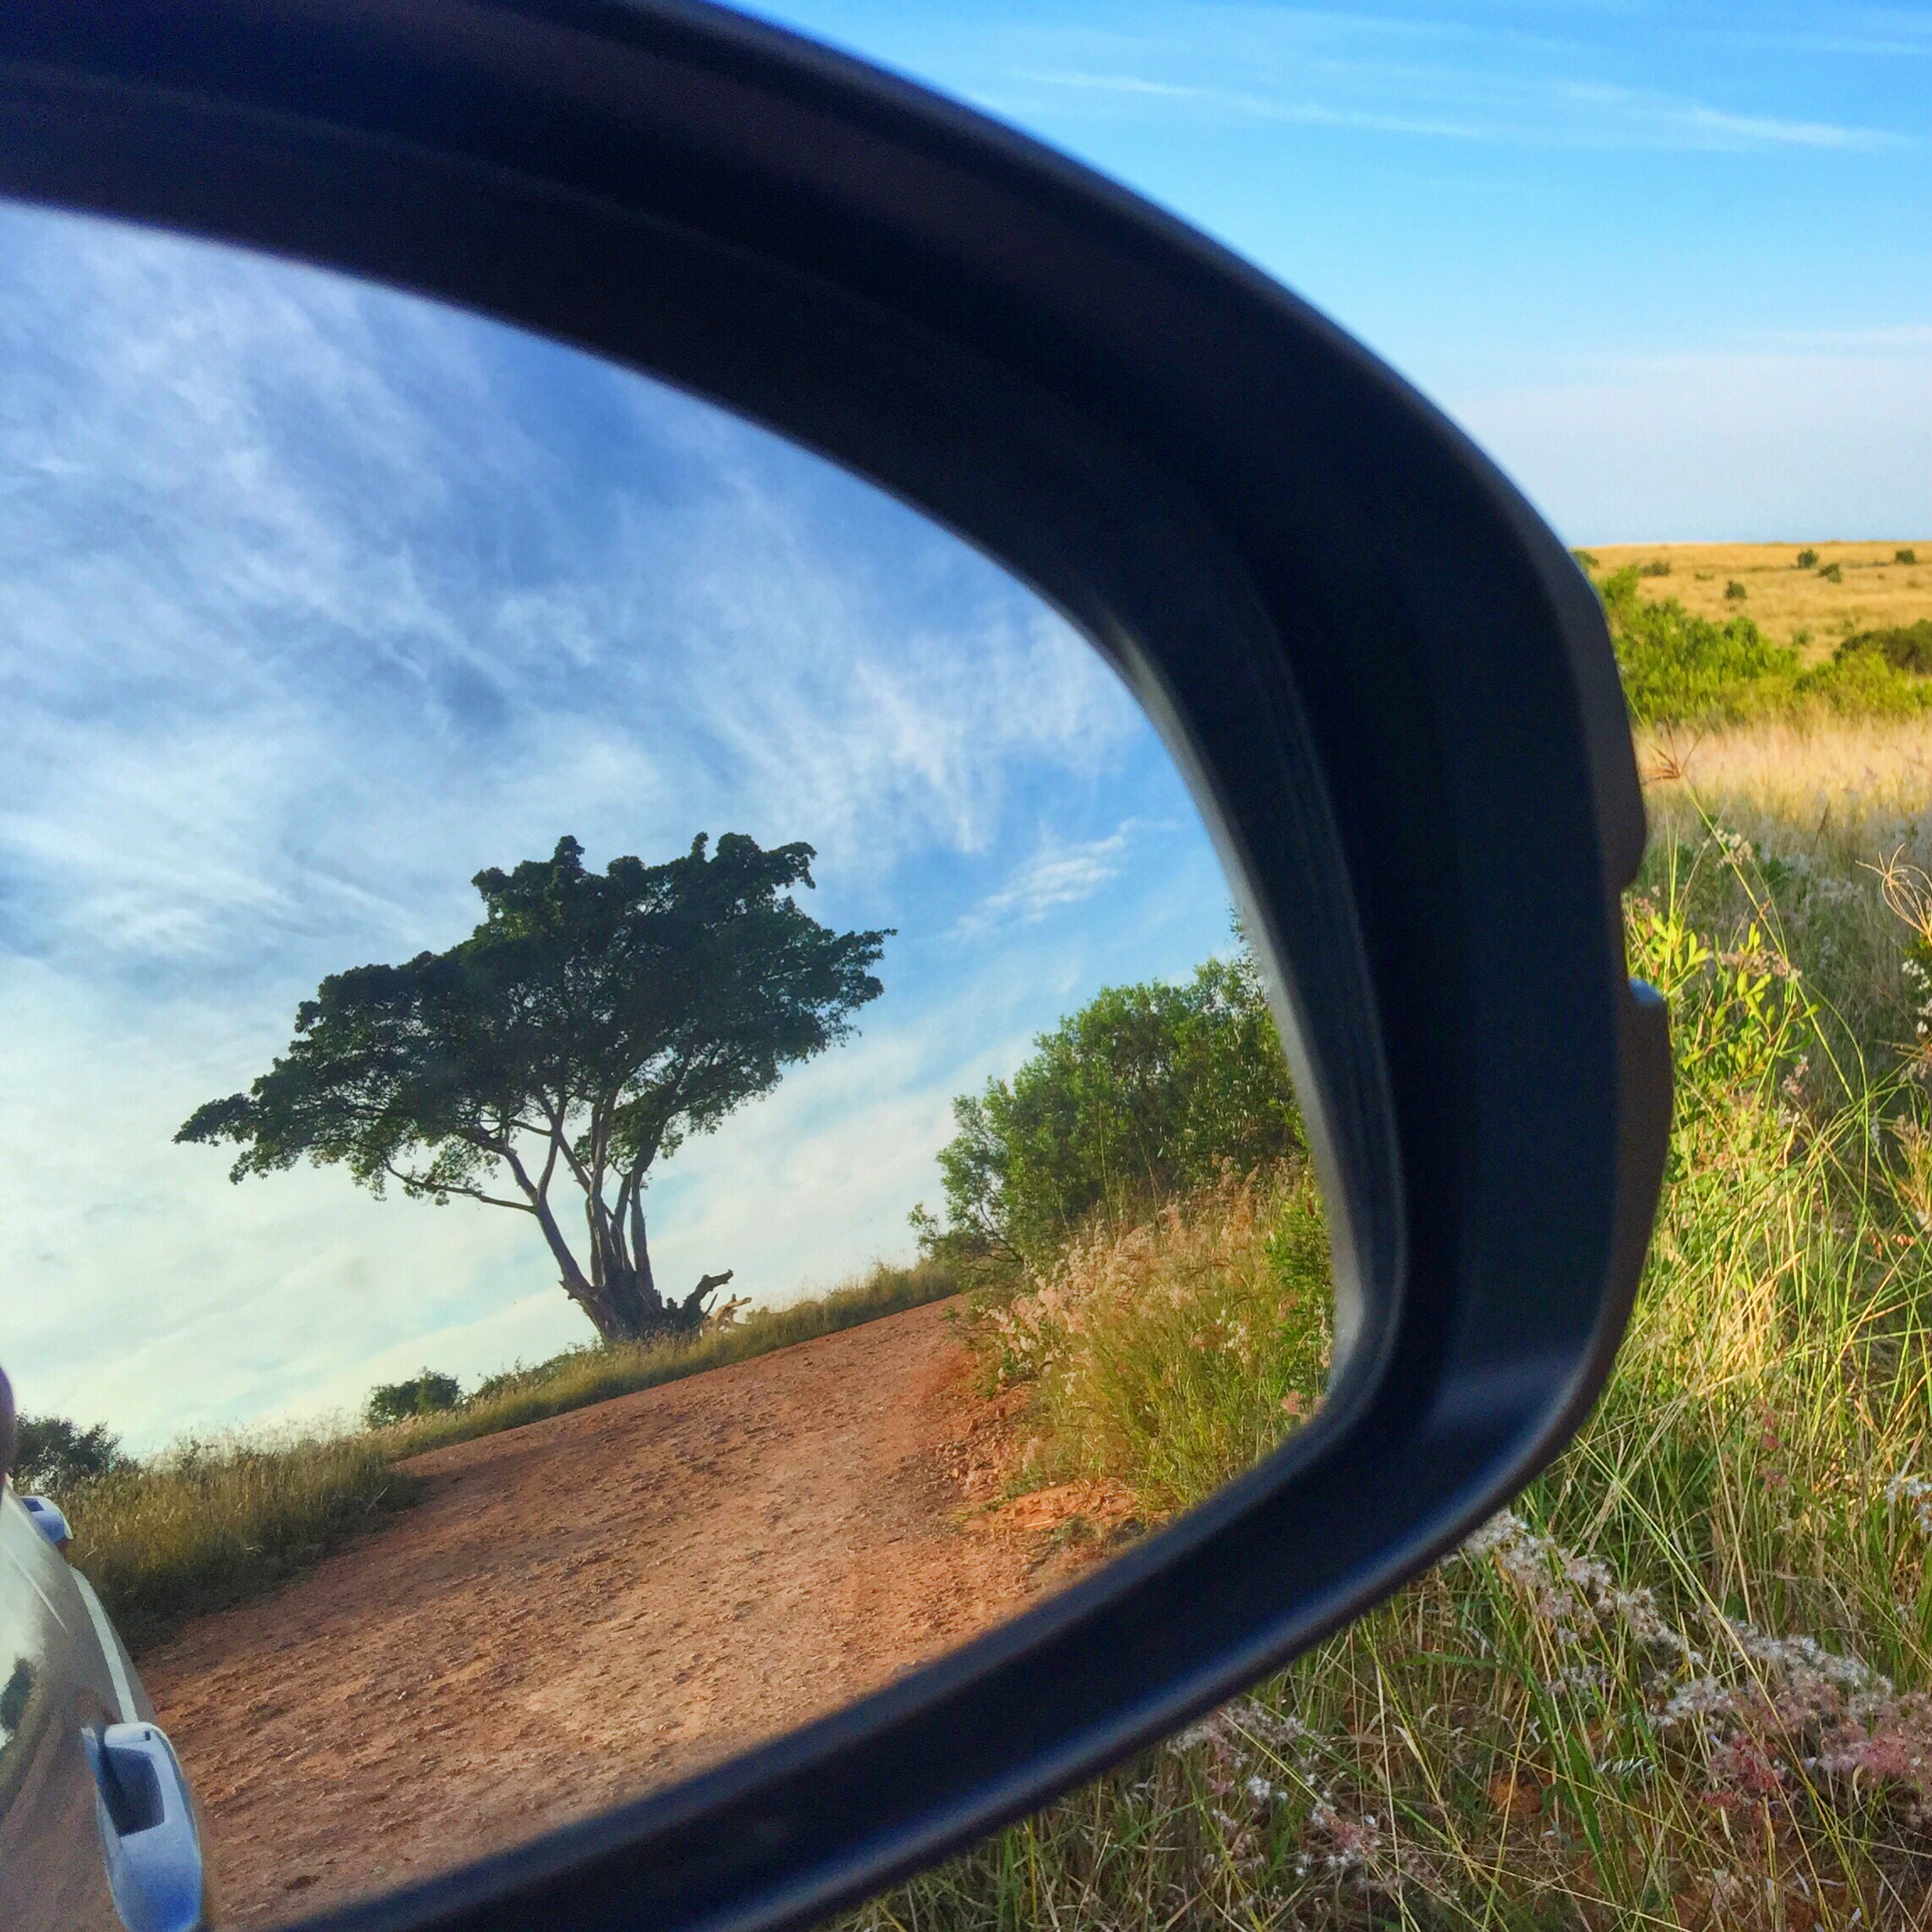
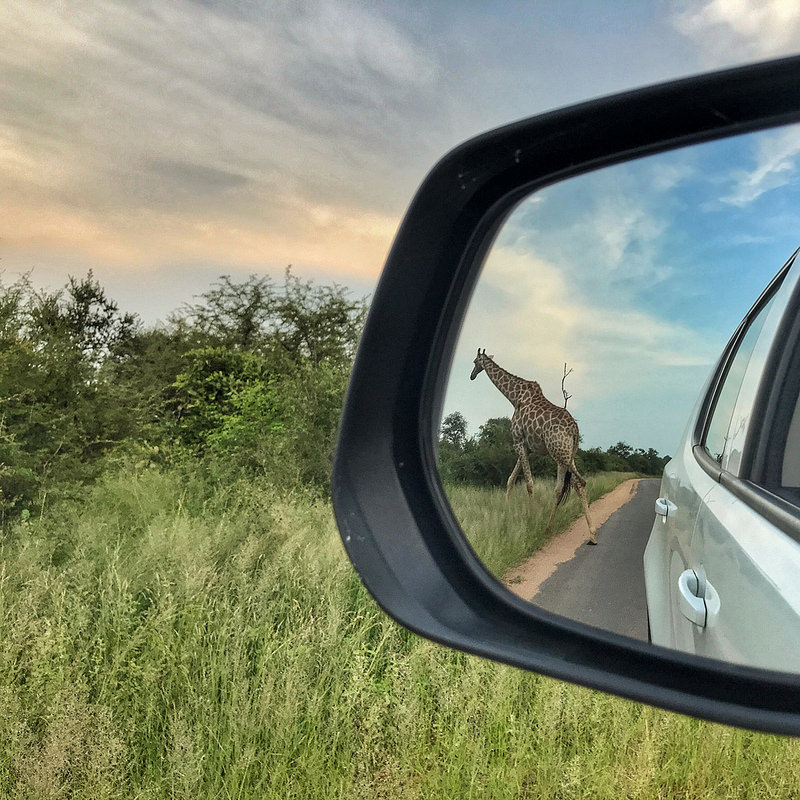
Unless an animal is nearby, it’s difficult to capture the details with a smartphone. Tell the whole story and include the animal’s environment. Try a different angle, don’t be afraid to experiment. Look in the side-view mirror and capture what’s behind you. Capture the wildlife, road, trees, and mountains using the side view mirror.
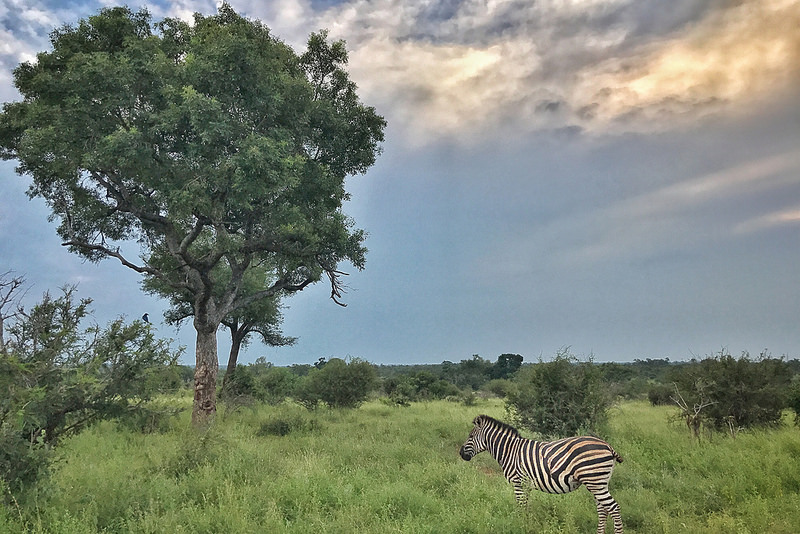
Zebra in Kruger National Park shot on iPhone 7+.Giraffe in the side view mirror, Kruger National Park. Shot on iPhone 7+.
IT’S THE LITTLE THINGS: DETAILS
Capture the details of nature and your surroundings.
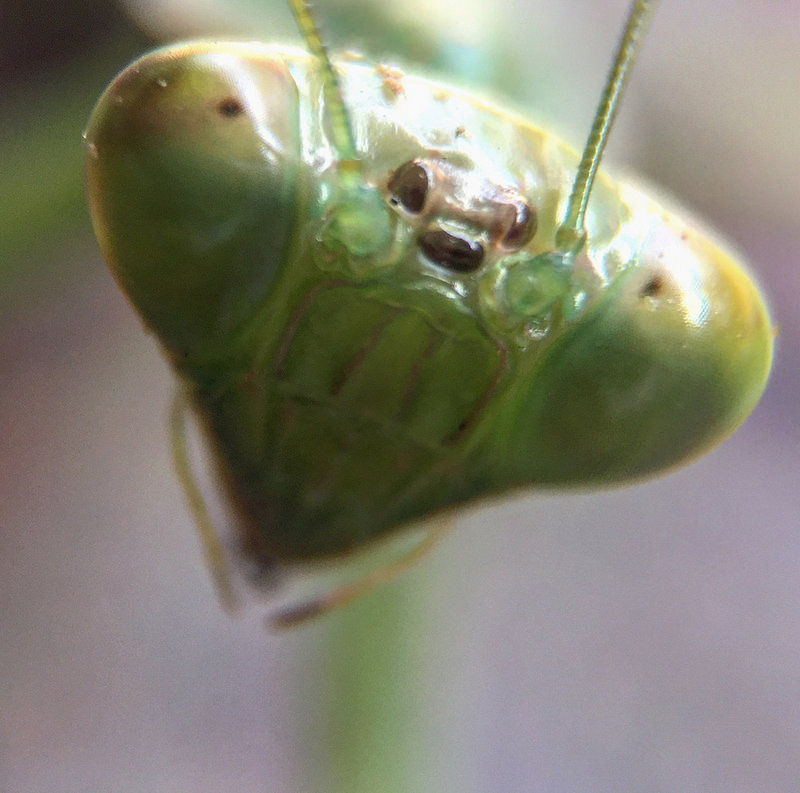
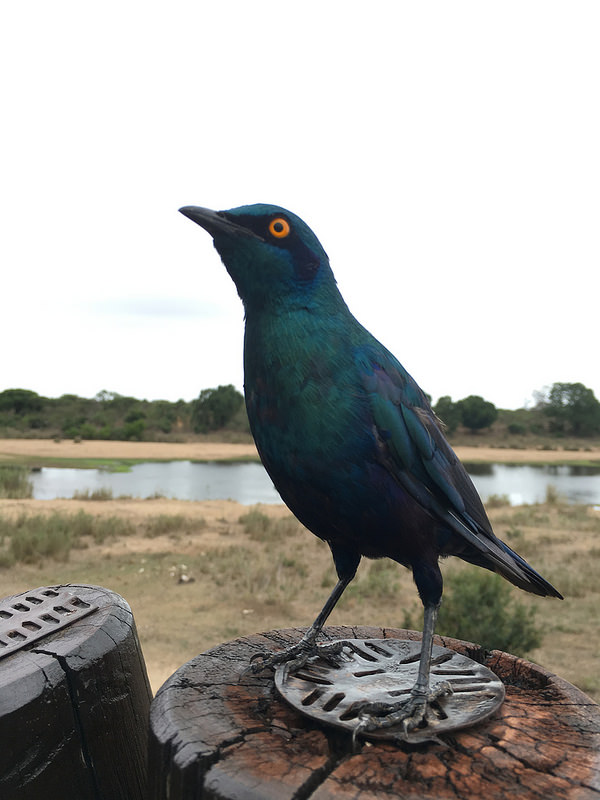
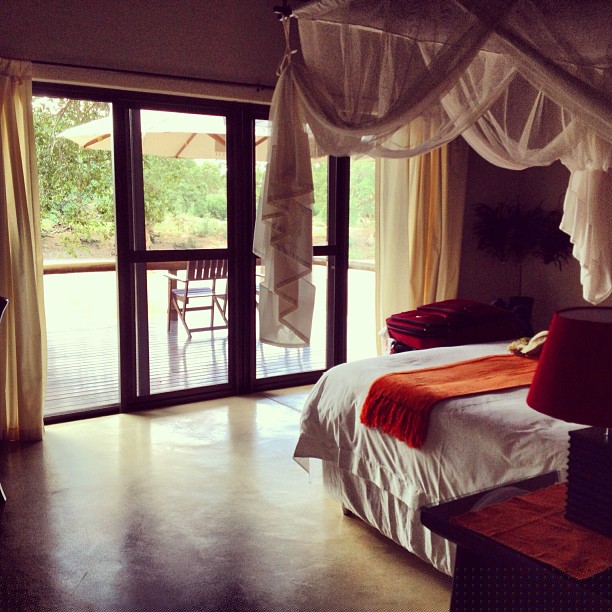
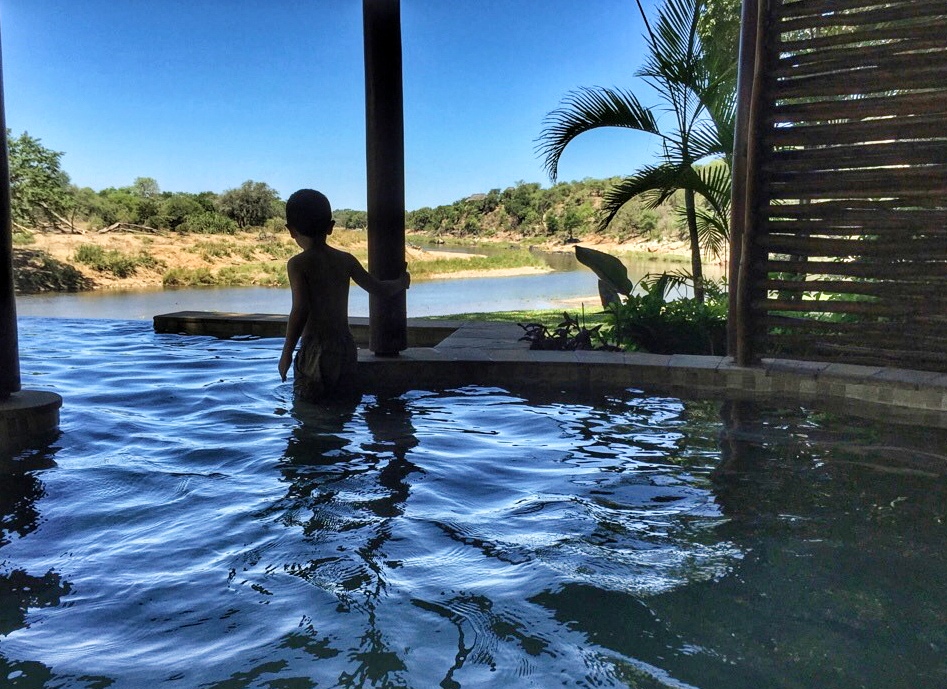
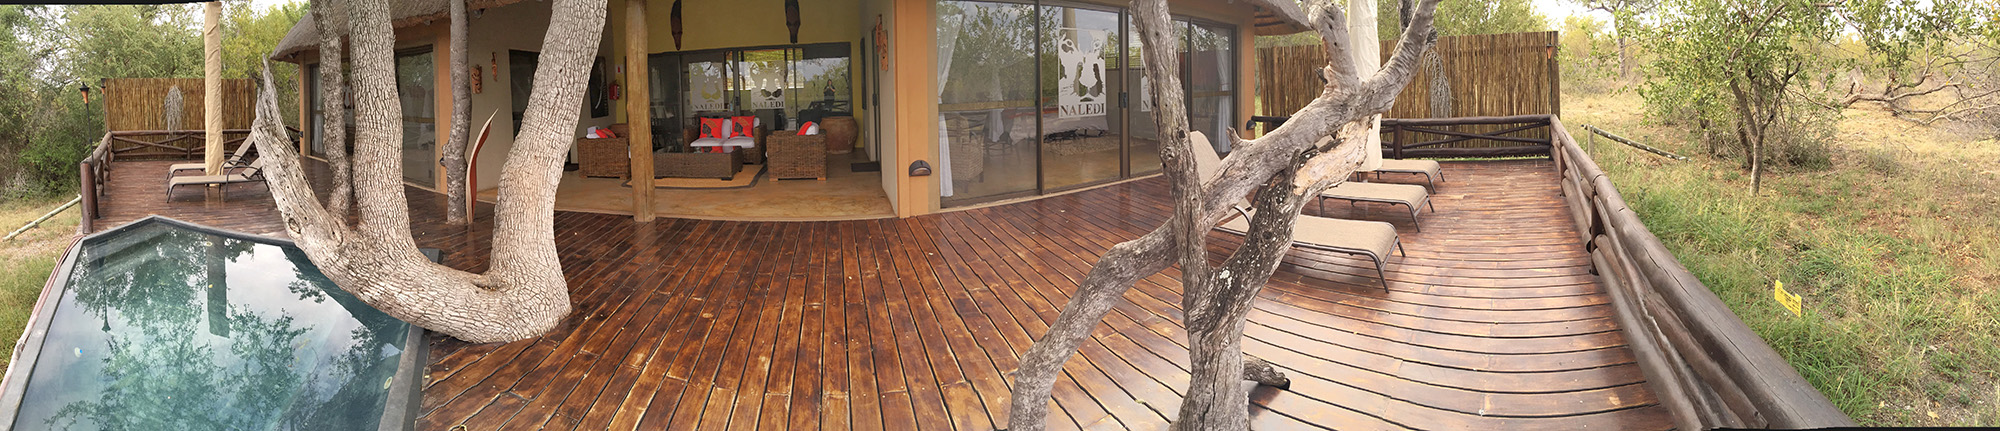
Preying Mantis in macro. Shot on iPhone 6 + Olloclip 21x macro in Kruger.A Burchells Starling at Lower Sabie Rest Camp in Kruger. Shot on iPhone 6s.Breakfast at a hide on safari with Naledi Lodges in Balule Nature Reserve. Shot on iPhone 6plus.My room at Naledi Lodges in Balule Nature Reserve. Shot on iPhone 4s.My oldest son on safari with Naledi Lodges in the Balule Nature Reserve. Shot on iPhone 5s.My youngest son at the infinity pool at Naledi Lodges in the Balule Nature Reserve. Shot on iPhone 5s.
GO WIDE AND SHOOT A PANORAMA WITH YOUR SMARTPHONE
Check to see if your smartphone has a panorama option. You’ll find it in the native camera app on the iPhone. Hold steady and keep the arrow on the line. Tip: Tap the photo square to change directions.
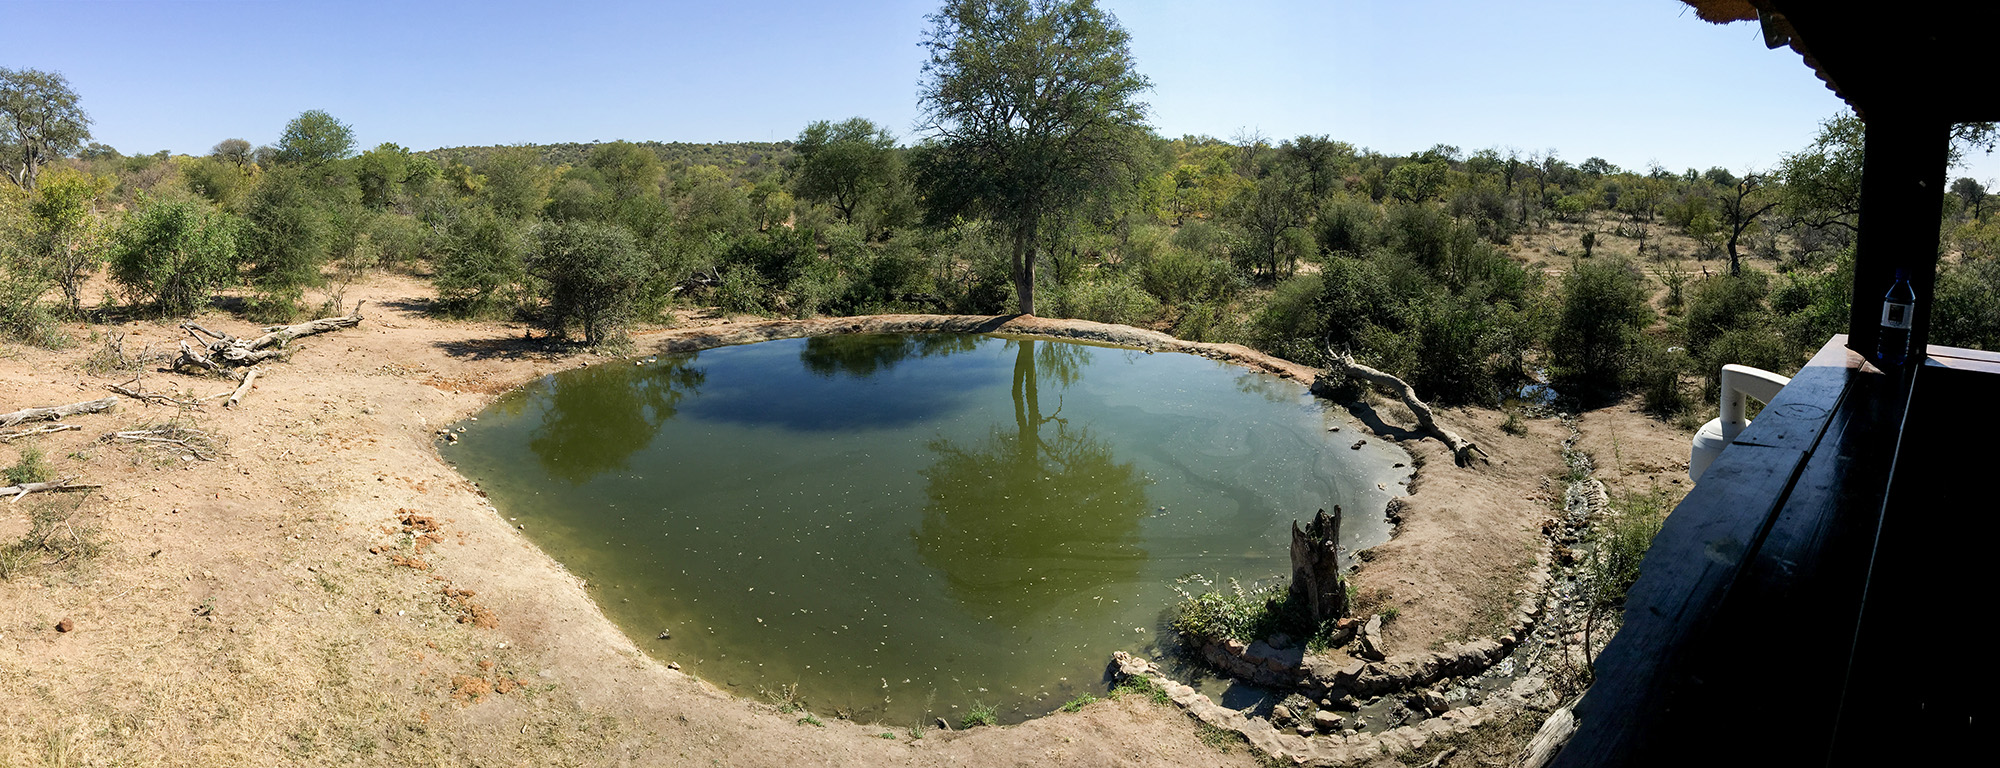
Capture the view with a panorama. Taken at the luxurious Naledi Bushcamp lodge in Balule Nature Reserve. Shot on iPhone 6+.A panoramic view from a Naledi Lodges hide. Shot on iPhone 6
Timelapses are a great way to show a busy environment – clouds, sunset/sunrises
Film close and wide shots, telling details, different angles
Film in motion (pan up/down, left/right) to move the story along
Film more video than you need, and cut (split) when editing.
Keep scenes to 2-5 seconds depending on how fast you want to cut to the next scene.
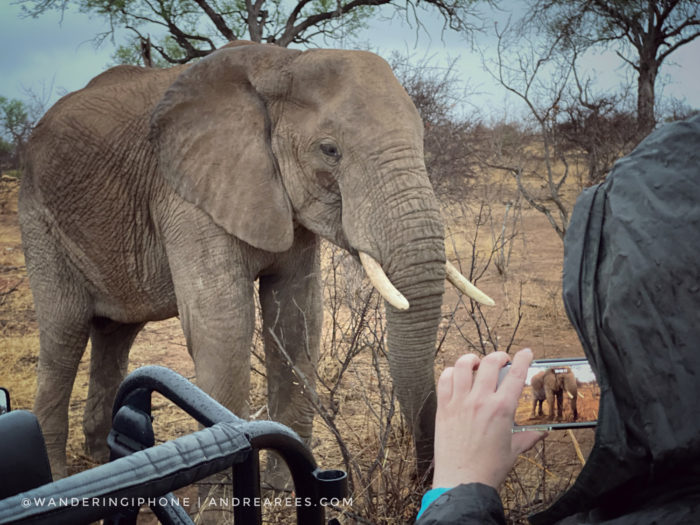
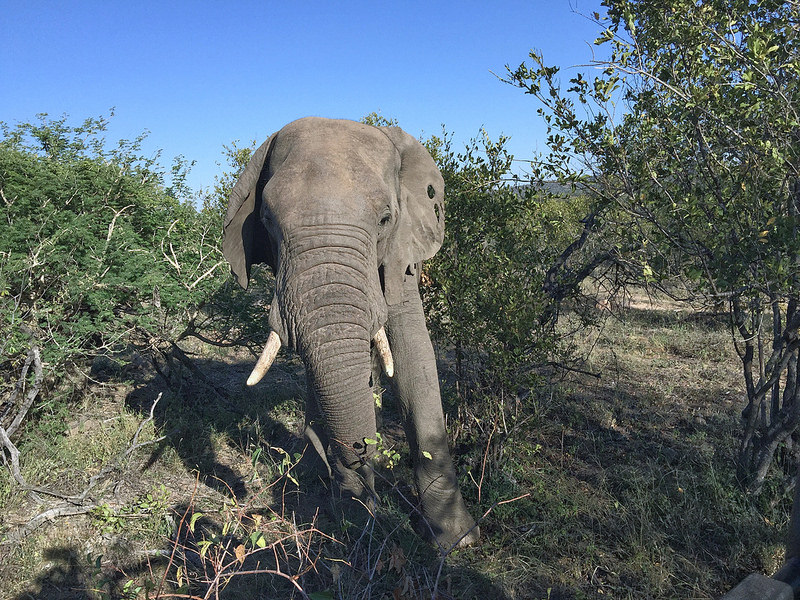
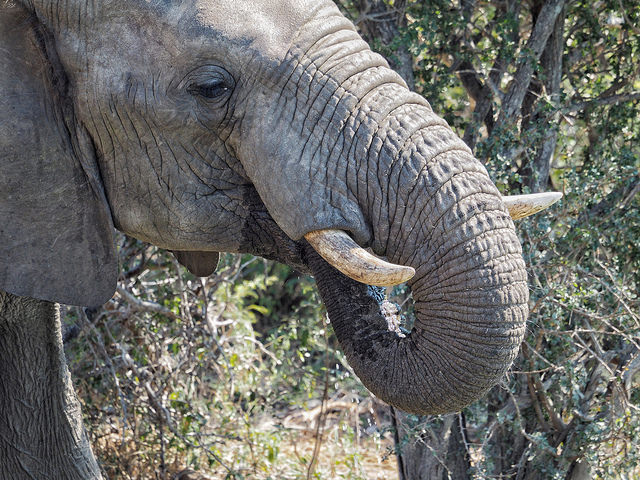
AN ENCOUNTER WITH A WILD AFRICAN ELEPHANT PHOTOGRAPHED ON IPHONE
Sometimes the animals come to you, and you have to capture the moment with your iPhone. This elephant was too close to photograph it with my Olympus OM-D E-M1 mirrorless camera and M. Zuiko 40-150mm 2.8 pro lens (the full-frame equivalent of 80-300mm).
For the full elephant encounter story and video, visit here.
Disclosure: This article may contain affiliate links for Moment products. It means that if you click on a link to purchase a product I recommend I earn a small commission. It is no additional cost to you. For more information, read my full disclosure and privacy page. If you have any questions about the Moment lenses or cases, please do not hesitate to contact me.
SOME OF MY FAVOURITE ACCESSORIES
Did you know that you can get a telephoto lens for iPhone or Android phones?
In 2012, I had a telephoto lens for my iPhone 4s, and it looked ridiculous, but aesthetics do not matter if it does the job, right? I took it on safari with me and I did capture a few images with it. Unfortunately, the photos weren’t of good quality. The lens didn’t fit well so there was a lot of vignetting. I didn’t recommend that lens to anyone and never used it again.
I had the macro and wide-angle Olloclip lenses when I had the iPhone 4s and iPhone 6. Their lenses are okay, but not as good as I hoped they would be. The 2 things that bothered me about the Olloclip system are 1. I had to remove my case and 2. if I upgraded my iPhone, I had to buy new lenses.
I had been keeping an eye on a few different smartphone lens companies for a few years, and in 2017, I decided to invest in Moment lenses. I didn’t invest in the Moment system until I heard that they offered cases that the lenses could be attached to (around the time I had an iPhone 6s). I never use my iPhone without a case on it.
MOMENT ADD-ON LENSES AND CASES
There is no loss of quality with Moment lenses and the wide lens (1x). The best part is that if you upgrade your smartphone, you only have to purchase a new compatible case and not a new set of lenses like you have to with Olloclip lenses. The lenses rotate into the case and fit perfectly. With Olloclip or other clip-on lenses, you have to line it up and hope it stays. Moment cases are available for iPhone, Samsung Galaxy and Note, Google Pixel and One Plus smartphones too.
Moment add-on lenses for iPhone
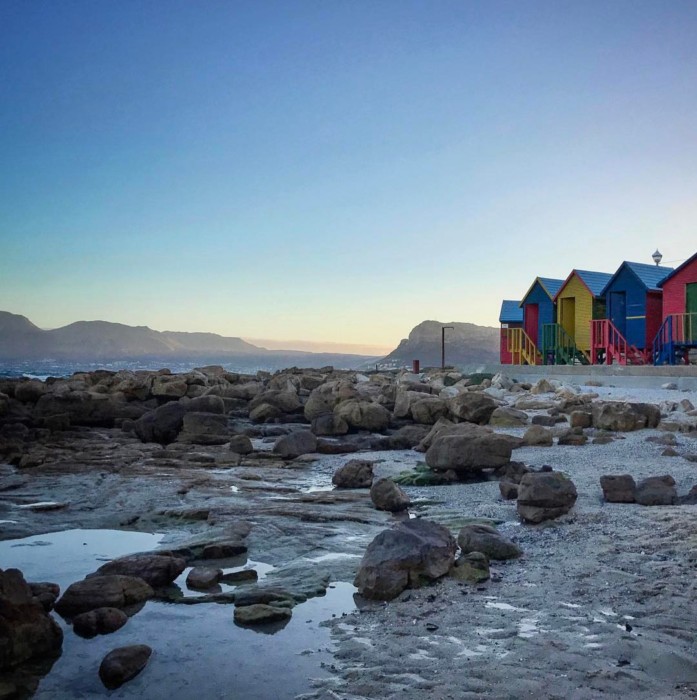
Shot on iPhone XSmax at 1x, 2x (dual lens) and 4x with a Moment telephoto lens.
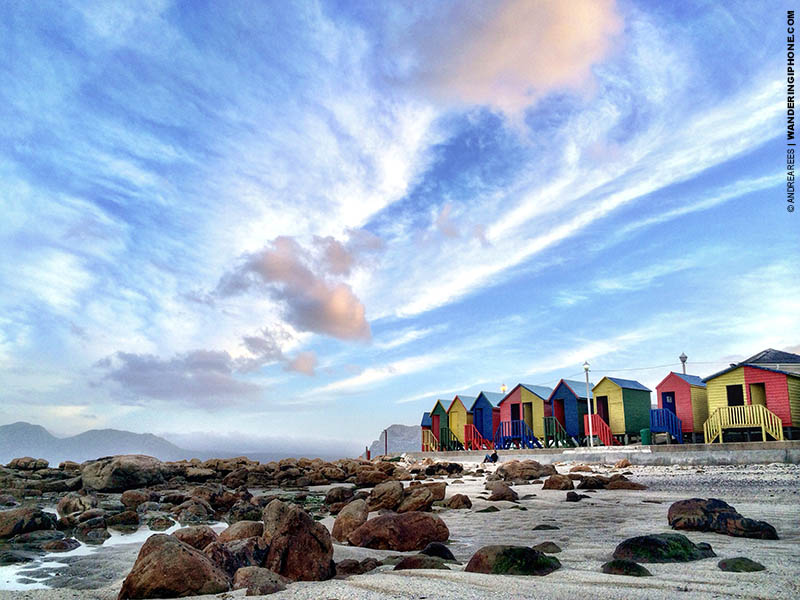
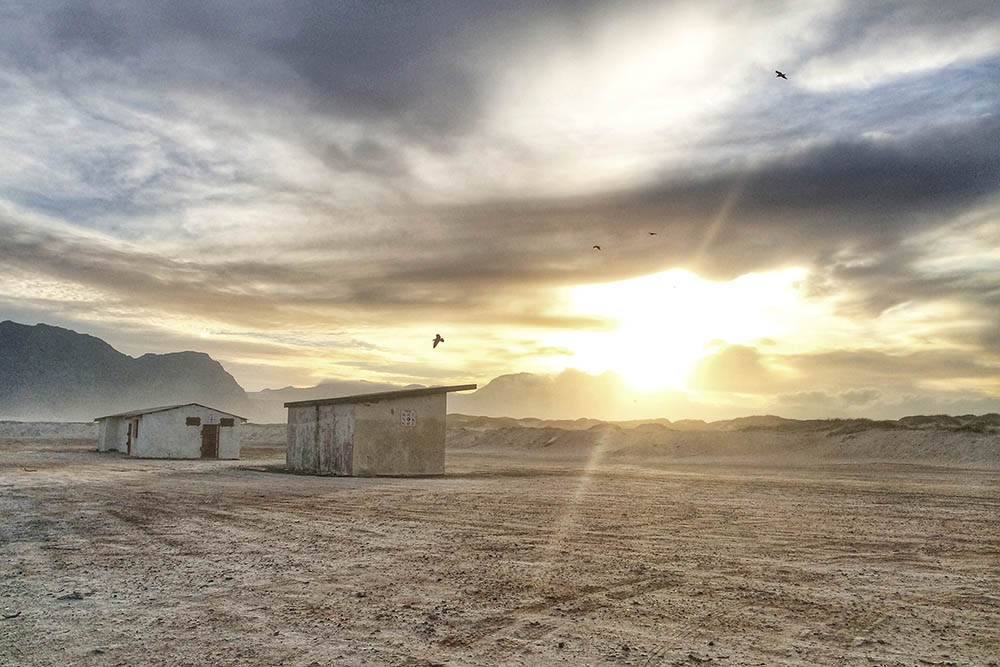
Dusk at St. James Beach in Cape Town, South Africa.
MOBILE PHOTOGRAPHY WORKSHOPS
I’ve been a professional photographer since 2003 and a mobile photography educator since 2013. I offer live virtual smartphone photography workshops on Zoom and in-person workshops in Toronto, Canada.
I offer a public and private group 60-minute virtual workshop through Airbnb Online Experiences or for a private series of workshops (2 or 3 workshops), check here.
If you’re in Toronto or visiting the area and are into nature, birding and wildlife photography, I offer a birding/nature walk + photography lesson through Airbnb experiences Toronto.
I hope these tips will help you create cherished photos of your safari. If you have any questions, please do not hesitate to contact me.
SUBSCRIBE to wanderingiPhone.com for staying in the loop – exclusive opportunities, photo tours, workshops, webinars, and subscriber discounts on mobile photography workshops, consulting and more.
In 2013, I kept hearing the term mirrorless and micro 4/3 but wasn’t sure exactly what it was. After some research and a visit to a camera store, I was sold on the Olympus mirrorless camera system and specifically the OM-D em5. I wanted a travel-friendly camera that uses interchangeable lenses that could eventually replace my heavy and cumbersome DSLR as well as compliment my iPhone photography.
My initial impressions were based on the way it felt in my hands, the solid build and how lightweight and compact it was in comparison to my Nikon camera body and lenses. One of the things I liked about the Olympus camera system was that they had a greater selection of lenses than any other mirrorless system as Panasonic lenses work on the Olympus camera bodies.
As you know, I advocate for the iPhone as a capable and fantastic camera and even made a case for photographing your safari with a smartphone. While I recommend taking photos with your iPhone, the camera in your pocket, sometimes you need more of a reach while on safari or photographing wildlife in the distance.
Hello Olympus.
SWITCHING TO OLYMPUS
In the Autumn of 2013 was the OM-D e-m5 camera body, the 12-42mm 3.5-5.6, 45mm 1.8 and the 40-150mm f4.0-5.6 lenses. Then came the OM-D em-1, a contender for making a switch from DSLR to a mirrorless system for my photography business.
I purchased it and some prime lenses, a 17mm 1.8, 45mm 1.8 and 75mm 1.8 lenses. The em-5 became my backup camera and the 75mm 1.8 quickly became my favourite portrait lens out of the studio and the 45mm 1.8 lens became my favourite portrait lens in the studio.
I was impressed with what I was achieving with the Olympus system, even with ‘straight out of the camera’ images. It had been some time since I touched my Nikon camera, so I made the switch from DSLR to a mirrorless micro 4/3 system and haven’t looked back since. I travel everywhere with my Olympus camera and use it in the studio with my studio flash units and pocket wizard flash triggers; it works perfectly.
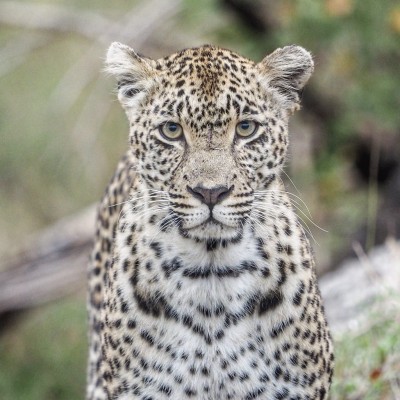
In 2014, the M. Zuiko 40-150 mm 2.8 pro lens made its debut and I could hardly wait. I received it just in time for a November 2014 trip to South Africa for a project I was working on there and also planning some time for a safari. One of my favourite captures with the lens is of a leopard in the Sabi Sands private game reserve.
THE OLYMPUS MIRRORLESS CAMERA SYSTEM ON SAFARI
The photo below is of a much-loved leopard known as Karula, and she was on the move. She was also travelling with a companion, a male leopard known as Tingana. They were mating so any chance of a shot, you had to be quick. Here’s the shot I captured of her as she looked my way for a second, literally.
When on safari in a private game reserve, you get fairly close to the animals. The M. Zuiko 40-150mm 2.8 pro lens is a fantastic lens for the situation. It is fast, incredibly sharp and gives you an equivalent focal length of 80-300mm on a full-frame camera. Add the mc-14 teleconverter and it’s a fantastic combination. Keep in mind you lose 1 full stop with the teleconverter.
When on a self-drive or guided game drive in the Kruger National Park, the animals may not be as close and you must stay on the paved or dirt roads. In a private game reserve such as Sabi Sand, your guide can drive off-road if you’re tracking an animal. I’ve often needed a further reach in Kruger.
I read about the Olympus M.Zuiko Digital 75-300 mm f/4.8-6.7 ED II, a super-telephoto lens that is equivalent to a focal length of a 150-600mm lens on a full-frame camera. It is much smaller and lighter than the comparable focal length reach with a Nikon or Canon. Fortunately, I was able to get the lens on loan from Olympus, and I took it with me to South Africa for some wildlife photography testing.
ON SAFARI WITH THE OLYMPUS M. ZUIKO 75-300MM LENS
Here are some images using the lens while on safari in South Africa.
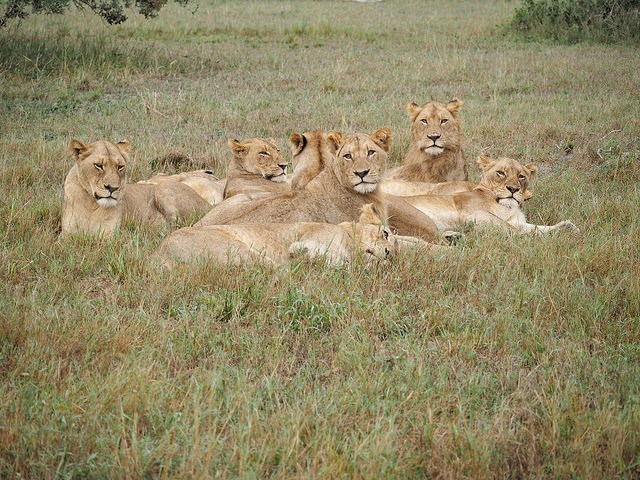
The Tsalala Breakaway pride of 13 lions at 109mm. The lone male at the back, photographed in the Sabi Sands game reserve.
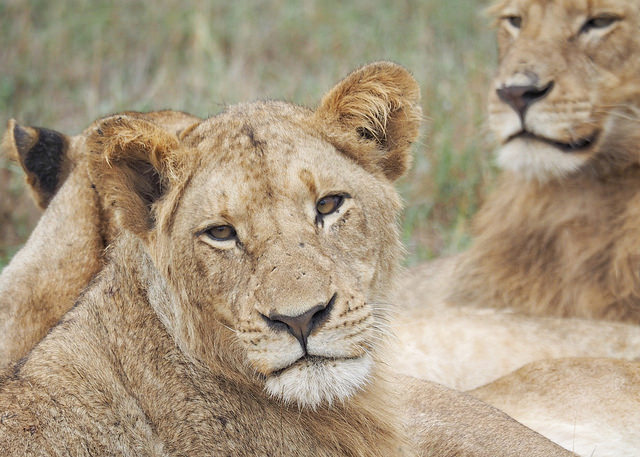
A close up of a lioness with the male sub-adult lion in the background, at 300mm and, cropped and photographed in the Sabi Sands game reserve.
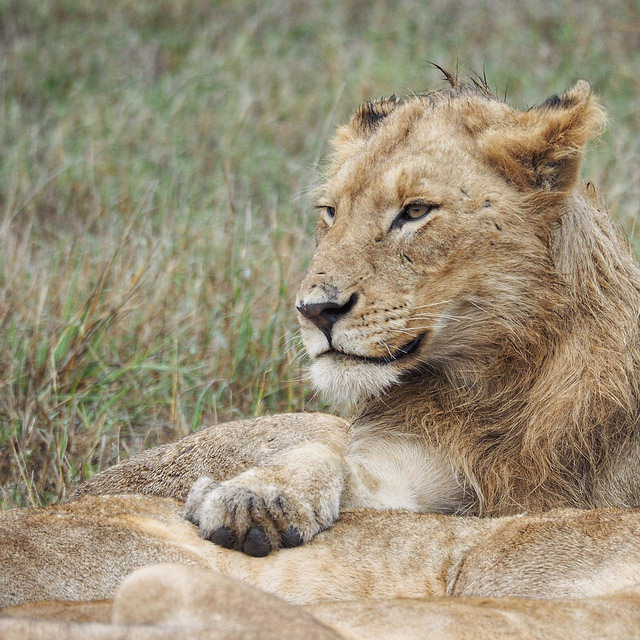
The male sub-adult lion at 300mm and cropped. Photographed in the Sabi Sands game reserve.
I was impressed especially considering these were handheld shots and I was in a safari game viewer with seven other passengers, not the stillest of conditions.
An African bull elephant at 208mm. It is taken in the Balule nature reserve.
A close up of an African bull elephant at 300mm and cropped. Photographed in the Balule nature reserve.
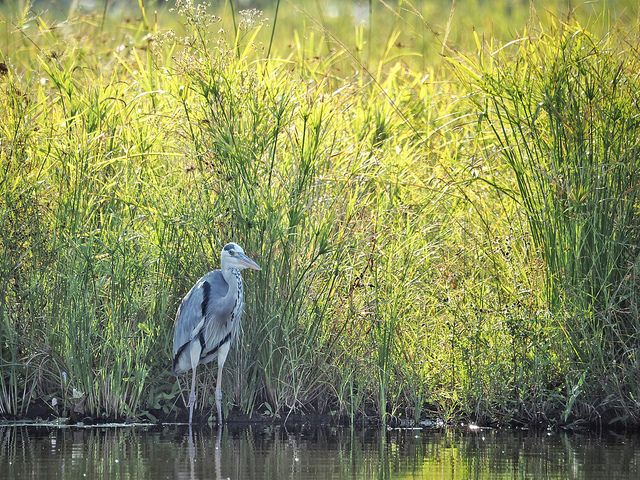
A heron at 300mm, photographed in Kruger National Park.
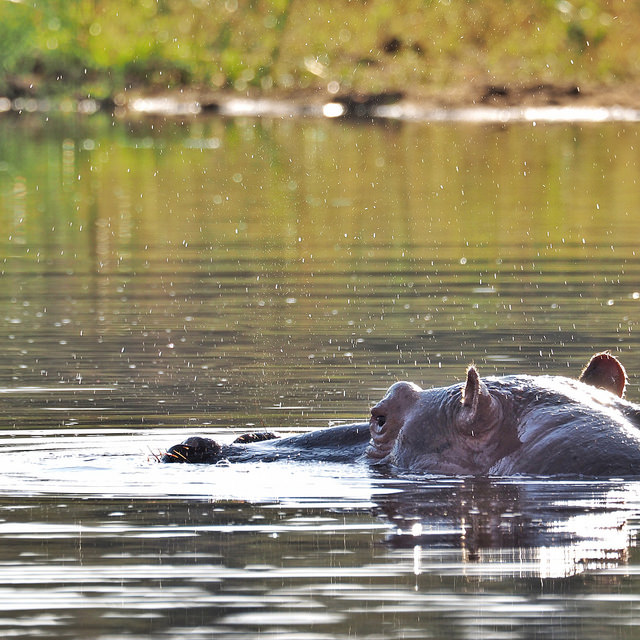
A hippo surfaces, 300mm and cropped, photographed in Kruger National Park.
A yellow-billed hornbill at 300mm, photographed in Kruger National Park.
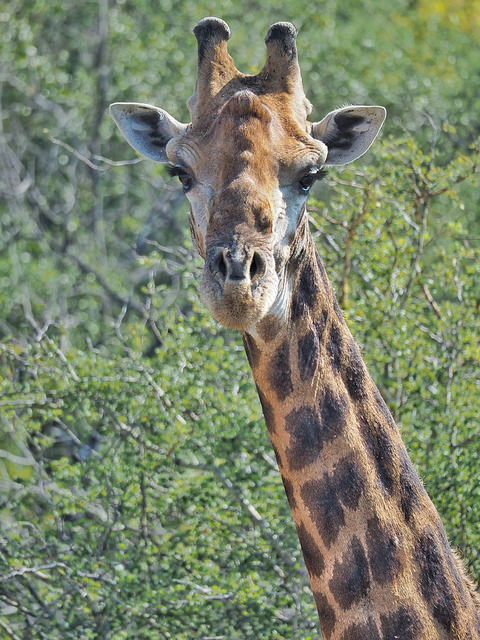
A giraffe at 300mm, photographed in the Balule Nature Reserve.
The quality you get for the price, the reach, the size, and weight make this lens one to add to the camera bag for anyone that is looking for a super-telephoto glass that travels well and doesn’t break the bank. It’s a great option for safari.
UPDATE AUGUST 2019
Olympus has since released an M. Zuiko 300mm F/4 IS pro lens and a 2x teleconverter that works with the M. Zuiko 40-150mm 2.8 pro lens and 300mm pro lens. I haven’t invested in the 300mm pro lens because I need the flexibility of a zoom lens as I do not want to travel with 2 camera bodies. I do however get to borrow the 300 mm F/4 pro lens from time to time for my Spring and Fall bird-watching activities.
In case you haven’t heard, Olympus announced a 150-400mm f/4.5 lens. I’m waiting to hear more about it, but I suspect it will be out of my budget. I’d like to test the Olympus M.Zuiko 12-200mm F3.5-6.3 lens. This could be in consideration for the one perfect travel lens, although I do love my 40-150mm f/2.8 lens.
Birding with the Olympus M.Zuiko 300mm F/4 IS pro lens.
In October I’ll be leading a 7-day Cape Town photo tour. While in South Africa, I’ll once again be visiting Kruger National Park and the Greater Kruger area for safari. Stay tuned for a report on the new 2x teleconverter that I recently purchased.
Note: All Olympus camera bodies and lenses I own have been purchased by myself and have not been sponsored by Olympus. The Olympus M.Zuiko Digital 75-300 mm f/4.8-6.7 ED II was temporarily on loan to me from Olympus. All opinions, as always, are my own. I will only ever share reviews of products I find worthy of telling my readers.
Note: Some posts on this site may contain affiliate links to products and sites I recommend. Should you click through and purchase or book something through the link, I may earn a small commission. It is of no extra cost to you. As always, if you have any questions, please do not hesitate to connect with me. For the full disclosure policy, visit here.
5 Tips to Take Your Travel Photography to the Next Level
“You don’t just take a photograph, you make it.”
I believe that it doesn’t matter what the tool is or how expensive your gear is. Yes a dSLR (& mirrorless/micro 4/3) coupled with some good lenses has advantages, but I believe that no matter the tool the key to good photography is knowing the basics of photography such as light and composition and knowing how to ‘see’. I have taken many fantastic images with my iPhone and have had them printed and published both online and in print.
This image below was chosen to be a part of a nature and landscape mobile photography exhibit in September 2014 that included photographers from around the world. The curator printed this image to about 20″ wide and it looked amazing on the wall.
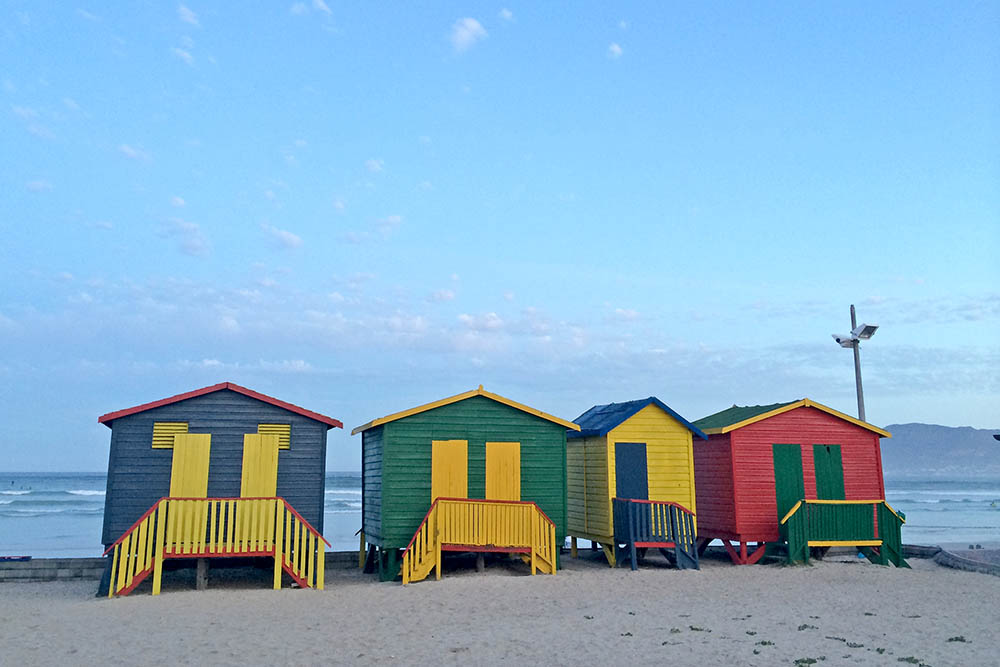
St. James Beach – Cape Town, South Africa.
There is truth to the old saying “practice makes perfect”, but to take your photography to the next level, ask yourself these 5 key questions before you take that photo.
1. What is the main focal point of this shot? Keep it simple and focus on one main subject.
2. What light is available? Learn to see the light and use the available light – from natural light such as ‘open shade’ and window light to candles, street lamps or the glow from an electronic device. Move your subject or yourself and see how the light falls differently. Often times if the light isn’t right, I don’t take the shot.
3. What angle is best? Try a different perspective than you’re used to. Get low, look up, tilt the camera, experiment and have fun.
4. Am I close enough? Fill the frame, but leave some space for cropping. Consider how people might view your photo. Images appear smaller on smartphones and Instagram uses a square format.
Don’t use the zoom on the smartphone camera to get closer, use your feet. The quality of the image is reduced when using the zoom feature on a smartphone.
5. Is there anything distracting in the background? Take a quick look around. Avoid cluttered backgrounds. A small change in movement or positioning your subject in a portrait can get rid of that tree or pole that is coming out of someone’s head or a busy background.
These tips can make a difference. To learn more about mobile photography including key elements such as composition, I highly recommend iPhone photography school and this article about a 365 photo project. I have no affiliation with them whatsoever, I just enjoy their easy to read and understand articles.
Your son is getting married and you want to gift him with an album full of his childhood photos so that he has it for his own family. Problem is, your computer crashed and the hard drive you had some of the photos on became corrupt. So what do you do?
Summer Memories
A few years ago I wrote a blog post for my professional portrait business. It is still relevant today so I’ll post the information that pertains to the iPhone. Originally posted on the Andrea Rees Photography Blog May 11, 2009.
August 2019 — updated with current relevant information
———-
While working on a blog post, a tv commercial came on that caught my attention. It’s a funny commercial that starts with a boy posing in a crib while his parents are taking a picture of him on their digital camera. The boy is about 11 years old and they are recreating his childhood in photos because his father dropped his laptop and lost the originals. While it was a comical look at the situation that I’m sure has happened to you or at least, one person you know, the commercial’s intent was to promote their online storage services.
As a photographer, backup is very important and I make every effort to backup and archive the images I create. My husband is in IT so I’m very lucky as he helps me come up with the best solution.
So the question is… how do you protect photos of your loved ones or of your travels?
External Hard Drives
While this is a great option if you’re travelling with a laptop, hard drives do crash. Let me repeat that. They do crash. I’ve had two external hard drives fail on me. Luckily, I had the images backed up in multiple ways so I didn’t lose anything. One hard drive crashed within 1 week of purchase. The other hard drive was about 1-2 years old.
When I travel I don’t rely on cloud storage solutions and use one of these backup scenarios:
I travel with several 128 GB SD cards as well and don’t delete images off my iPhone or SD cards until they have been transferred and backed up. It really depends on the type of travel I am doing and if I need to travel light. I don’t rely on cloud storage on my travels simply for cost as well as the internet can be unreliable.
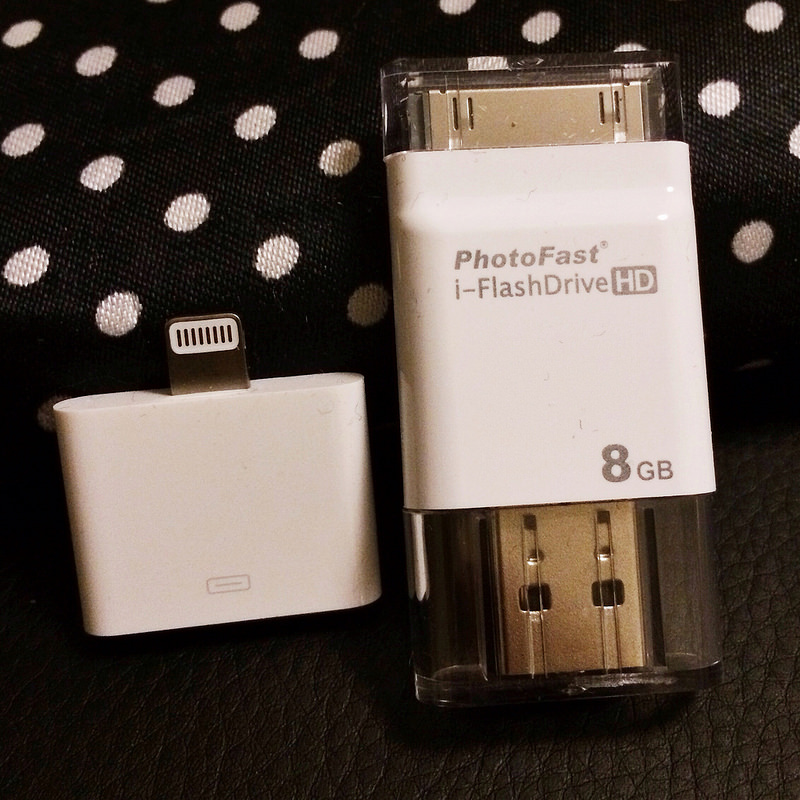
USB drive or iFlashDrive
These little things are great for mobility, but they are meant for temporary storage so please don’t rely on them alone, they can crash too. As I said above, I travel with 2 storage solutions.
An iFlash Drive. If you travel with an iPhone and an iPad or laptop this is the tech accessory for you. I often transfer my iPhone photos to my iPad mini to edit and for storage, especially if I’m travelling without a laptop, reliable internet or data.
This device will allow me to transfer photos to my iPad mini, but back again to my iPhone after editing. It works with videos and documents too. It really has been a great time saver and allows me to travel lighter when I need to. The one pictured below is no longer available in my photography stores or on Amazon, so I did some research and found something similar with good reviews.
iFlash Drive, 30-pin, I now have a lightning iFlashDrive
Online storage and/or Backup
I believe this is the best solution for most people. I use a Flickr Pro account for my original and edited images and videos, it gives me unlimited storage for about $45 USD/year. The free Flickr option gives you 1000gb of storage. I use Dropbox or Box.net for files and documents.
I also use Crashplan to automatically backup the files on my home server.
Mirrored drive and RAID servers
This is what we have in place at home. I don’t want to get technical on you especially since I don’t fully know the details, but simply it’s a way to replicate your data. For example, say you have your photos and data stored on one drive, mirrored drives and raid allow you to have an exact copy of that on another drive should the first drive fail. You will need someone with the knowledge to set this up for you. It might be overkill for most people, but if you take A LOT of photos or if you are a small business it might be something you should consider.
Hope this helps or at the very least gives you something to think about.